

We now bring to you the second article in the Selenium IDE tutorial series, where you will use Selenium IDE to record your first test script. In this article, we will use only the recording feature of Selenium IDE to create a new script. With Selenium IDE, together with recording your steps, you can manually add test steps as well. Manual addition of test steps would not be covered as part of this article (it will be covered further down in the tutorial series).
Topics covered in this article – Selenium IDE First Test Script
In this article, you will learn about the following concepts –
- Record your first test script
- Save the test script
- Re-run the script to make sure that it works fine

At the end of this article, we will also provide few scenarios which you can use for practice purpose.
Before you begin…
Before you start with creating your first test script, make sure that you have the latest version of Selenium IDE installed on Mozilla Firefox. If you have not installed Selenium IDE yet, follow the steps given in this article – Download and install Selenium IDE
Recording your script
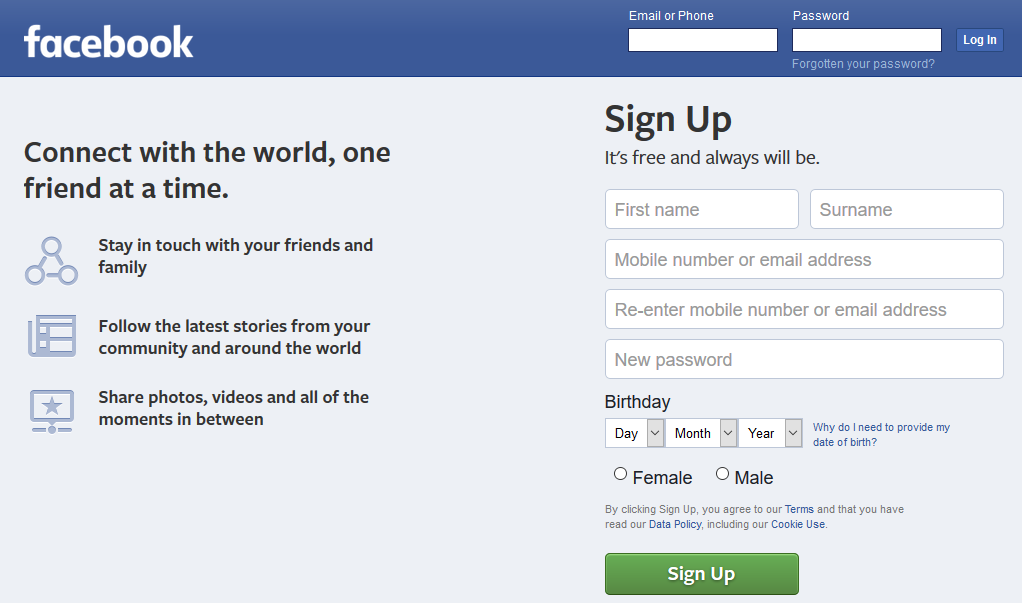
In this article, we will use the example signing up on Facebook as a test scenario. We will open Facebook login page and record the steps to create a new account. Follow the steps given below to do this –
1. Open Facebook link (https://www.facebook.com/) in Mozilla Firefox. Make sure that you are not already logged in, so that the Signup Screen is displayed as shown below.

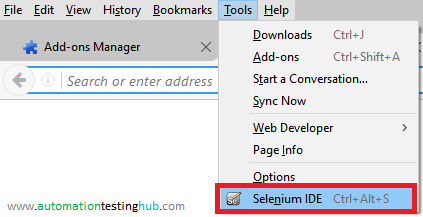
2. Next, we open Selenium IDE addon. To open Selenium IDE, go to Tools > Selenium IDE in Firefox, or simple press Ctrl+Alt+S keys.

3. After you open Selenium IDE, take a look at the below image which shows some of the important controls that we will use in this article. All these controls are highlighted in red rectangular box.
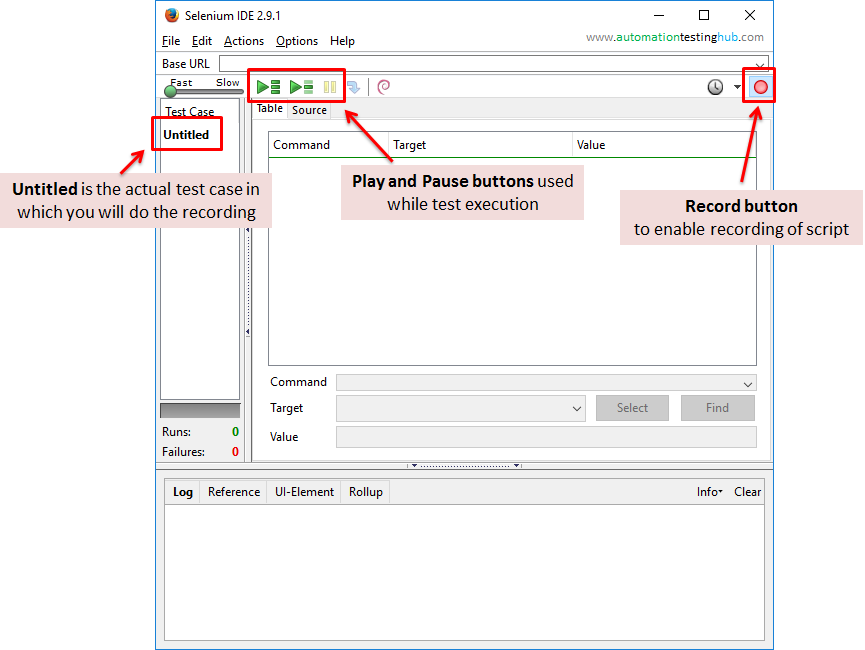

- Untitled – Untitled is the name of the test script in which you will do the recording. The name is shown as Untitled as its the default name Selenium IDE gives to a test script which is not saved. Once you save this script, Untitled will get replaced with the script name that you provide
- Play and Pause buttons – After you have finished recording your script, you can use these buttons to run the script. The first icon is used to run entire test suite (ie more than one test case). The second icon is used to execute a single test case, and the third icon is used to pause the execution. Hover the mouse over these icons to see the text which specifies the functions of each of these icons
- Record button – This is the actual button which you use for recording the script. This button should be kept pressed when you want to start recording. When the recording is turned ON, you will see that red button has a light blue rectangle around it, as its shown in the above image. When the recording it turned OFF, then the blue rectangle will not be there. Please note that the Recording button is ON by default, when you open Selenium IDE
There are other important controls in Selenium IDE, which we will not cover at this point. These will be covered when we actually use these controls (in later articles). This way you will learn about only those controls which you are going to use and this would help remember these controls easily.
4. Before you start recording make sure that the recording button is ON (there is a blue rectangle, outside the red button). After that you just need to perform actions on the browser. Selenium IDE would record all the actions that you perform and then add these actions as steps. In order for you to see the process, we have reduced the browser window size so that both Selenium IDE and browser window are displayed side by side. This way you will be able to see the process of how Selenium IDE adds steps corresponding to the actions you perform in the browser.
This method is just for representation purpose, you don’t need to adjust the browser window size for recording. You can do this with the browser maximized. Selenium IDE would go in background, but it would still keep recording the steps.
5. As you can see in the below image, when we perform some action on the browser the corresponding step is recorded and stored in Selenium IDE (Right click on the image and select View Image to see a bigger format of the image). For this particular scenario, we are just entering dummy values in all the fields and then click on Sign Up button.

For now, don’t worry about the errors that you are seeing due to wrong mobile number format. This is just a sample script to show that the Record feature in Selenium IDE works fine.
Saving your Selenium IDE test script
Follow the steps given below to save your test script –
1. Open File menu from Selenium IDE. You will see two options with which you can save the test script. These options are Save Test Case and Save Test Case As….


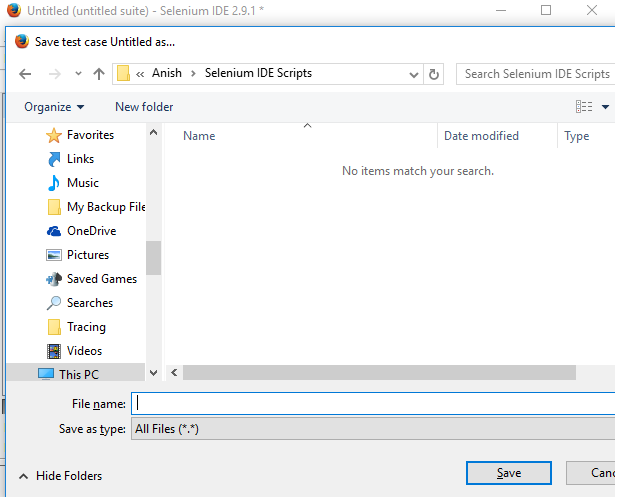
2. Select any of these options. You will see the Save window as shown below.

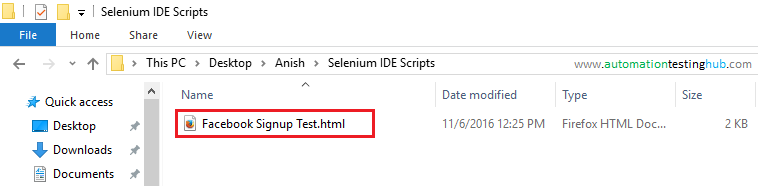
3. For this example, we have saved the script with the name – Facebook Signup Test. Check the folder where you have saved the script. The script would have been saved in .html format.

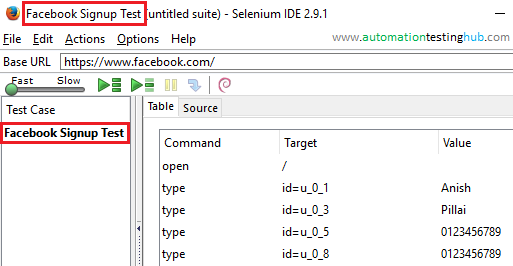
4. Also, check your test script in Selenium IDE. You would notice that the name of the test script has been updated in the IDE.

This completes the section of this article where we save the test script. Let us now jump onto the final part, i.e., re-run the test script to see if it works fine.
Rerun the saved Selenium Script to see if it works fine
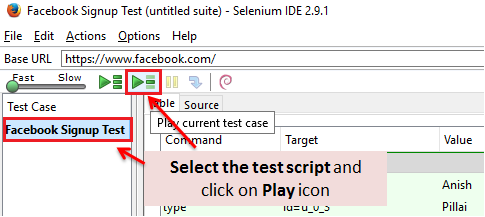
Running the test script is pretty straightforward. Just select the test script in Selenium IDE and click on Play Current Test Case icon. Make sure that Firefox browser is open when you run the script.
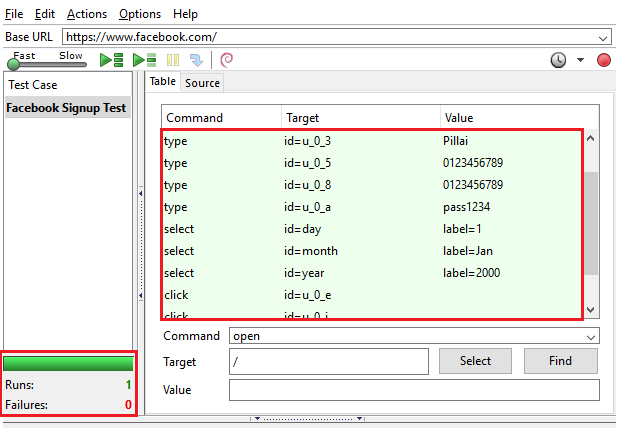
Once you click on Play button, you will see that Selenium IDE will itself load the Facebook URL in the browser, and then perform all the actions that you had recorded.

There are couple of more things that you would need to look at after you run your test script. First, observe that all the steps that have passed would be displayed in green color. And the Runs would also be updated in green color. Both the things indicate that your test script has passed.

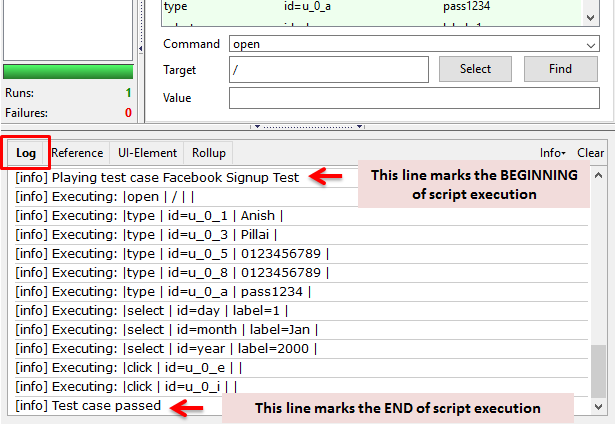
The second thing is to check the logs. This will show you what all steps were executed as part of your test script. To view the log, click on Log tab as shown below. It will show the entire log of the script execution.

This now finishes our section on the very basics of executing Selenium IDE test scripts and checking the test results. We will cover all these items in bit more details in upcoming articles on Selenium IDE tutorial series. Let us now check out the final part of the article, where you will find some scenarios which you can try on your own.
Scenarios for Practice
Before you start with the scenarios, make sure that you add all the test cases in the same Selenium IDE window where you have saved the above test case. With this approach you would be adding multiple test cases in the same test suite, and then you will be able to execute one or more test cases together.
Scenario 1 : Record the Signup page for Gmail – This scenario is similar to the one we have covered above. Here you will have to record the steps for Gmail Signup page –
- Create a new test case in Selenium IDE (Hint: Select option File > New Test Case to create a new test). You will now have two test cases in Selenium IDE – this one and one for Facebook Signup
- Open Gmail signup page – https://mail.google.com/mail/signup
- Enter dummy values for all the fields and click on Next Step button
- This completes the recording step. Save the test case
- Run only the Gmail signup test case
- Run both the test cases using the option – Play entire test suite
- While your test case is running, click on Pause button and see that your execution is paused. Then click on Resume to finish the execution
Scenario 2 : Search for an item in Google and open the first link from the Search results – In this test scenario, you will have to record the following steps –
- Create a new test case in Selenium IDE
- Open Google.com webpage
- Search for youtube
- Click on the first link that’s displayed in the Google search results
- Save and just run this test script alone
- Select this one and the Gmail signup test case together, and run both these test cases together (Hint: To select multiple test cases, select the first one and the click on Control key and the click on other tests to select them
- There is a slider called Fast-Slow before the play button. Move the slider towards Slow and then execute any test script. Do you observe any difference in script execution?
This completes our article on Selenium IDE First Test Script, where we recorded a scenario and then saved and executed it. Try out these scenarios on your own and let us know if you face any issues with any of them. You can share your issues with us using the comments section. Also, please share your feedback with us about what you feel about the content. We would love to hear from you how you like our articles, so that we can make these more useful for our readers.