
In our previous article on Appium Inspector Tutorial series, you saw the detailed steps on how to download and install Appium Inspector. In this article, we will proceed a step further and you will learn about how to specify Appium Server details, set Desired Capabilities and eventually start the Appium Inspector session successfully so that you are ready to inspect the mobile app.
Appium Inspector Tutorial – Steps to get started
Inspecting your mobile app and starting to identify elements is a multi-step process. You would need to do the following tasks to get rolling –
- Start Appium Server
- Open Appium Inspector and provide Desired Capabilities of your mobile device and app
- Start New Session (i.e., Start Appium Inspector)
- Inspect elements on your mobile app
Since there are many steps involved here and to make this entire process easy to understand, we will cover these steps in two articles. In this article, we will look at the first three steps – which will enable you to start the Appium Inspector. The next article will focus on the different methods using which you can inspect elements in mobile app. Let us start with the first step in our Appium Inspector Tutorial series.
Start Appium Server
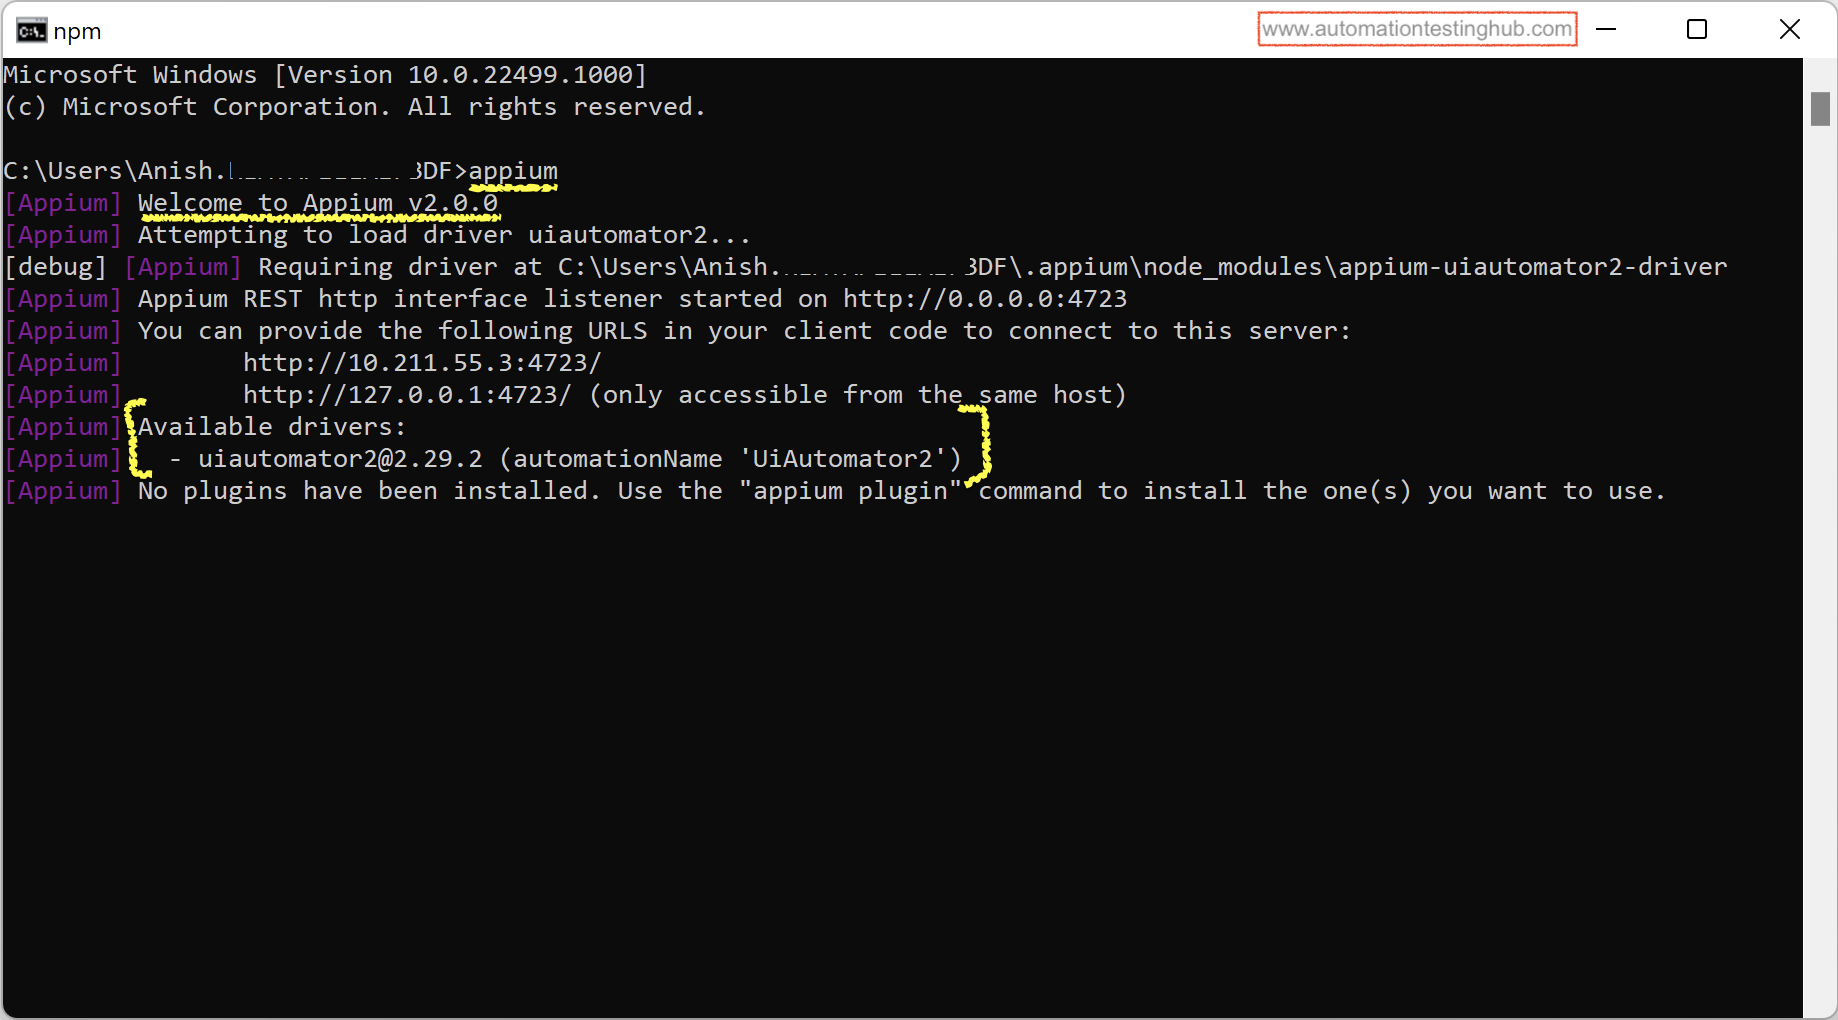
If you are working through our Appium Tutorial series, then you should already have Appium Server downloaded and installed. To start the server, open command prompt, then simply type appium and hit enter.

Open Appium Inspector and provide server details
1. Go to Windows -> Start, search for Appium Inspector and then open it

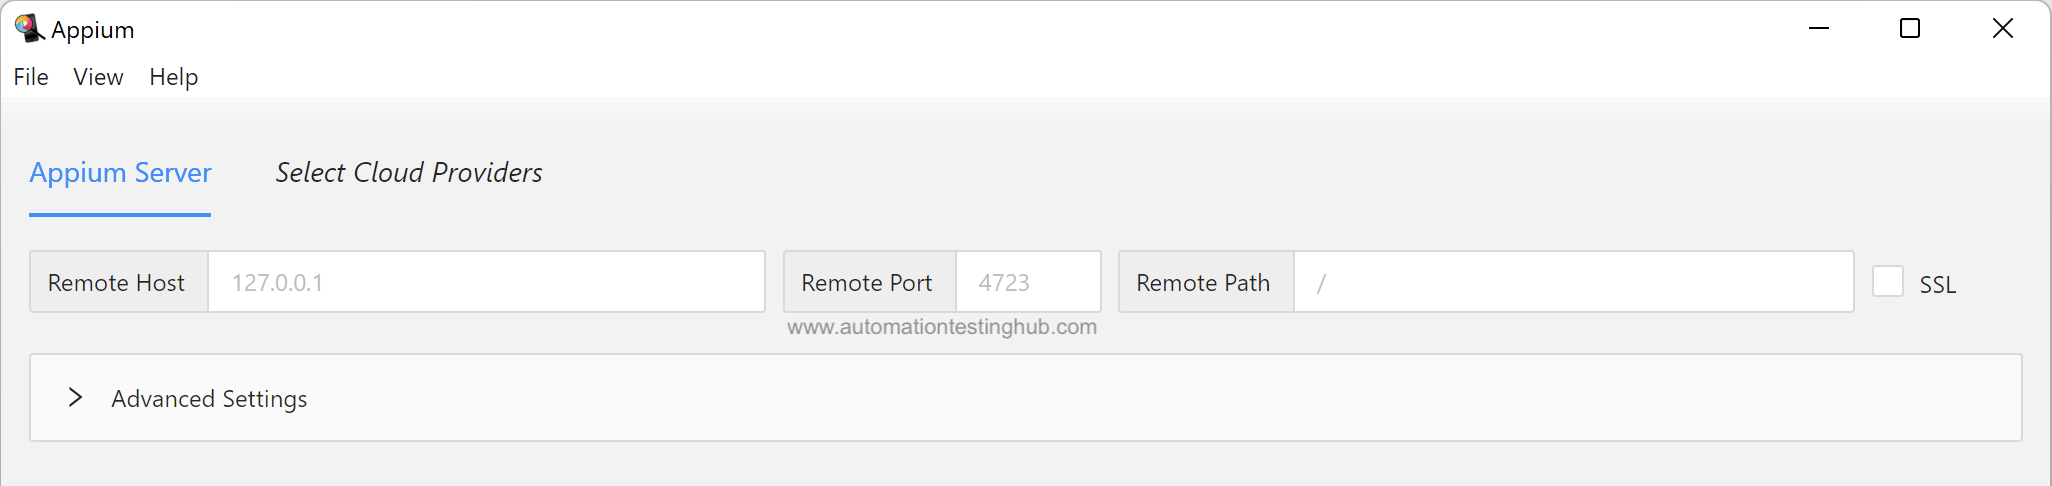
2. Appium Inspector start screen would be opened as shown in the below image

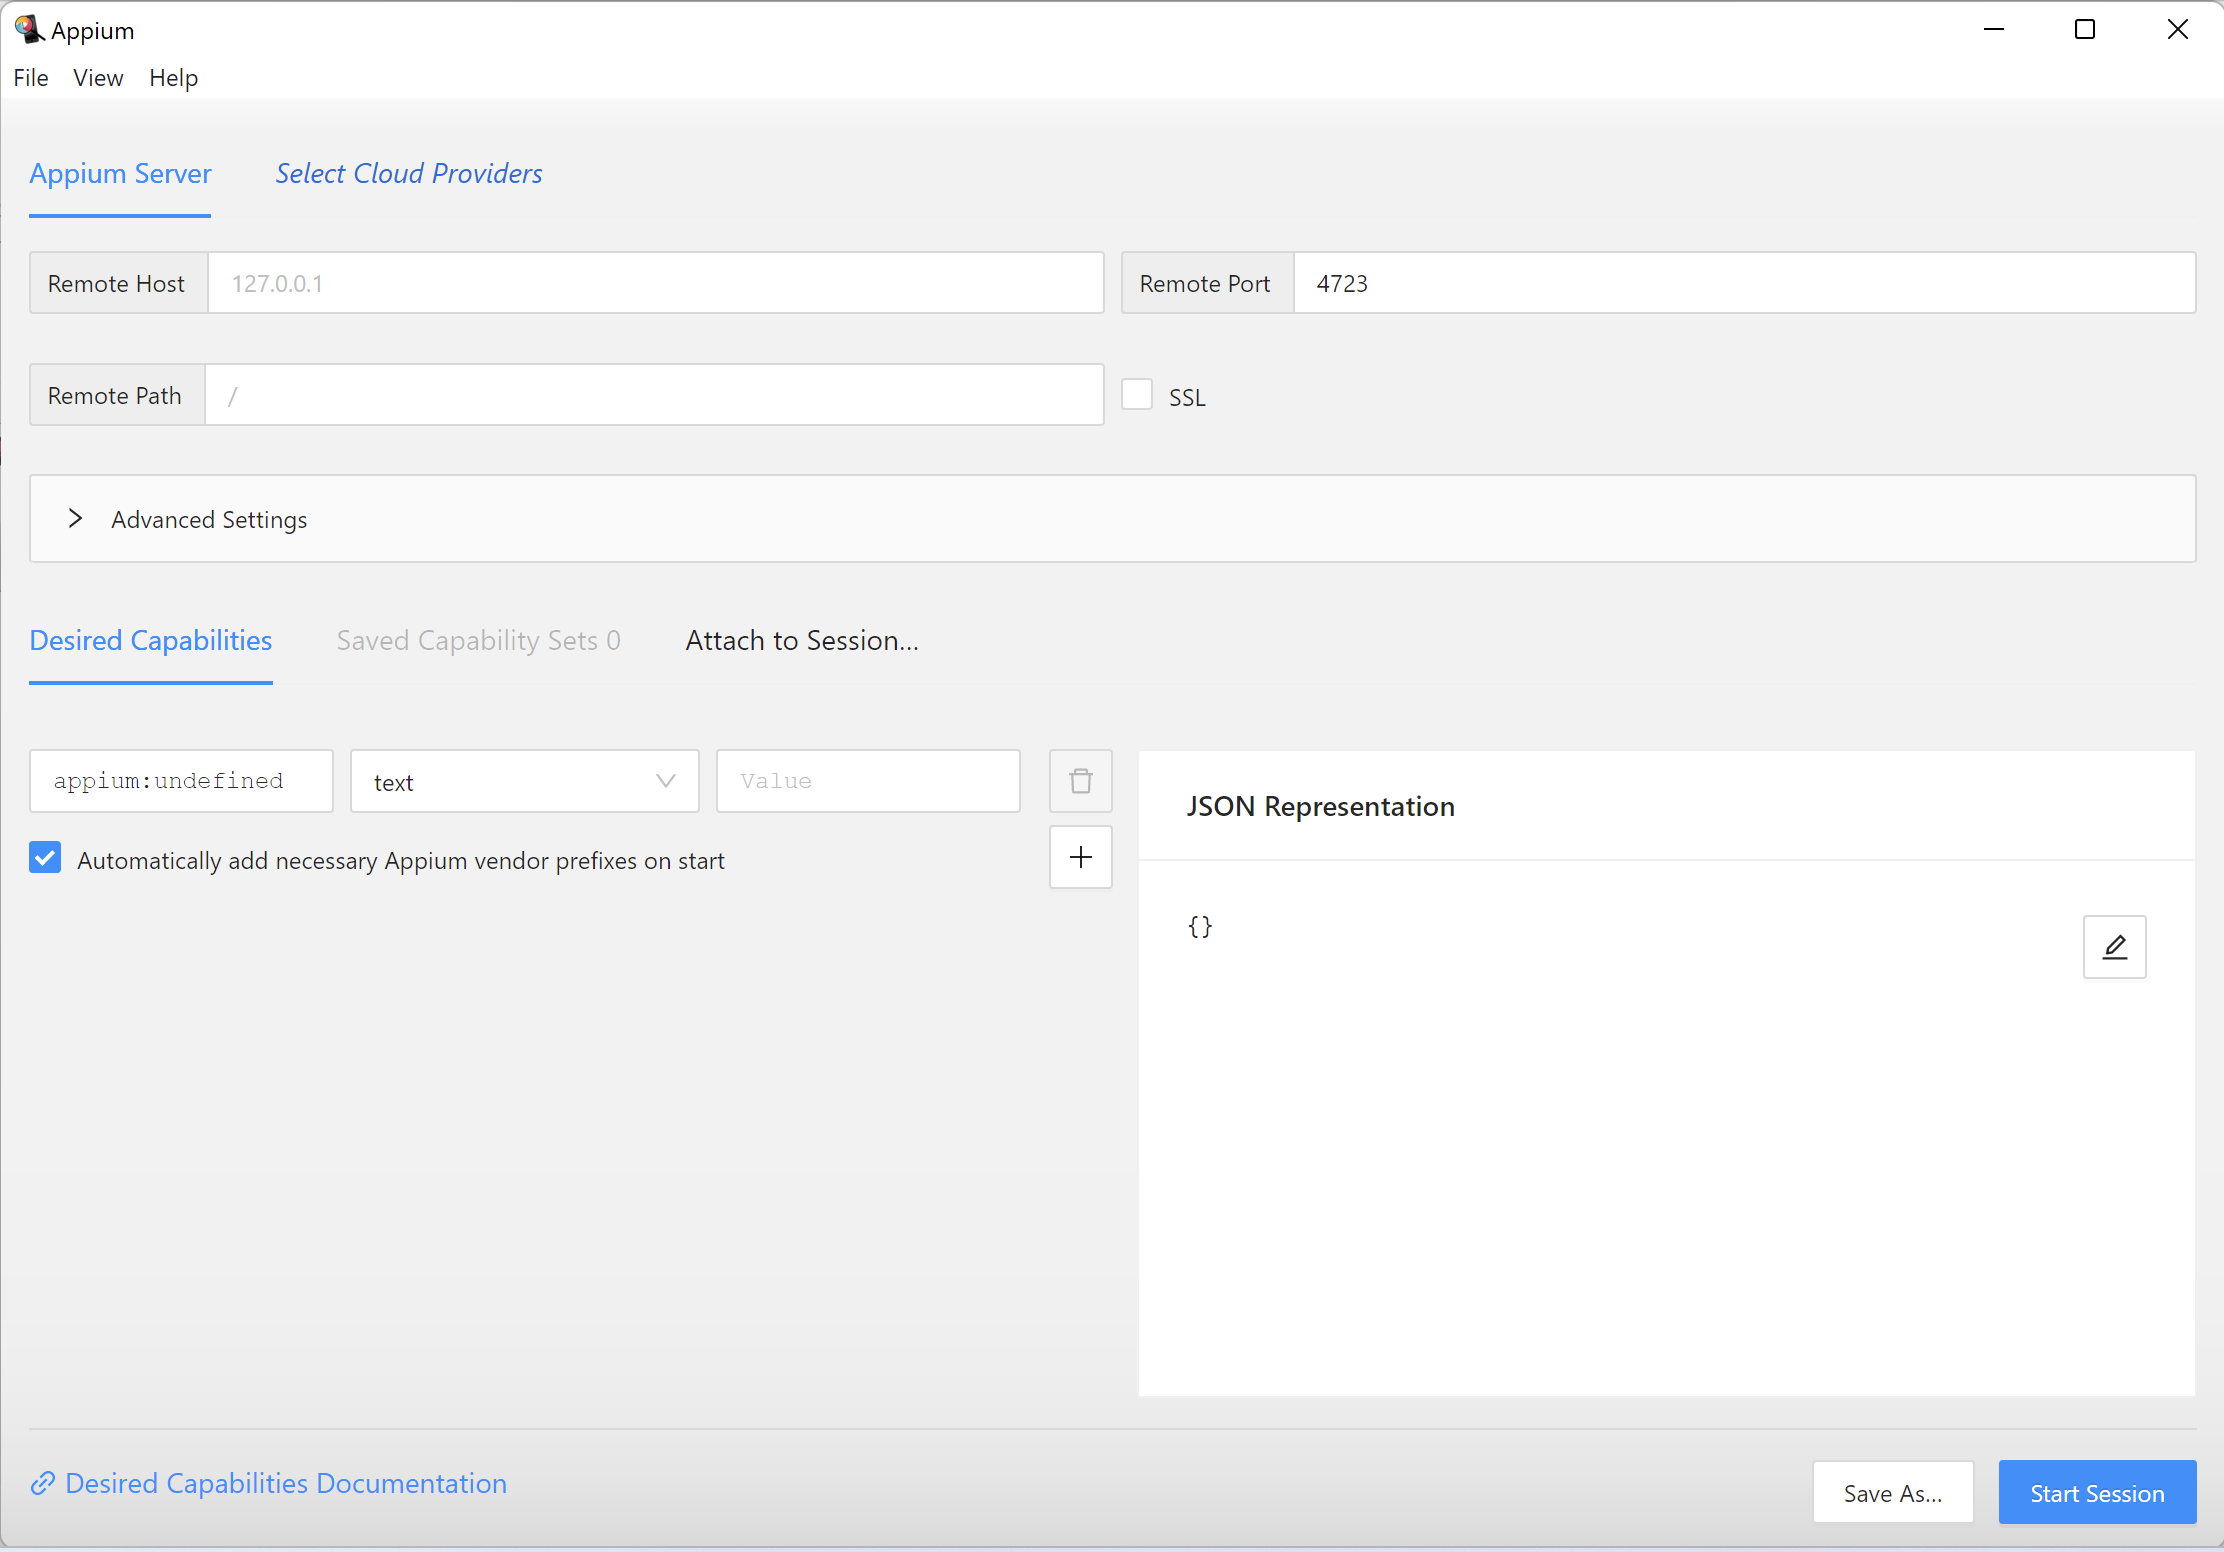
3. You would notice that Remote Host is already defaulted to 127.0.0.1, and Remote Port is also set to 4723 by default. Remote Path also has / as the default greyed out value.
Also, this is the same URL (http : // 127.0.0.1:4723 /) that is present in the console logs when you started the server. Hence, we will these fields as it is.

Provide Appium Inspector Desired Capabilities
Once you have added Appium Server details, the next step is to add the Desired Capabilities. Desired Capabilities are keys and values encoded in a JSON object and are sent by Appium Inspector to the server when you request a new automation session.
If you recollect our article on the First Appium Test Script, we had added UiAutomator2Options or Desired Capabilities in our test script. The same needs to be added to Appium Inspector as well. For reference, we have copied the Desired Capabilities code from the article here –
UiAutomator2Options options = new UiAutomator2Options();
options.setUdid("ENUL630010");

options.setCapability("appium:appPackage", "com.google.android.calculator");
options.setCapability("appium:appActivity", "com.android.calculator2.Calculator");
options.setCapability("platformName", "Android");
options.setCapability("appium:platformVersion", "12.0");
options.setCapability("appium:automationName", "uiautomator2");
You will have to add each of these capabilities in Appium Inspector. Follow the steps given below to do this –
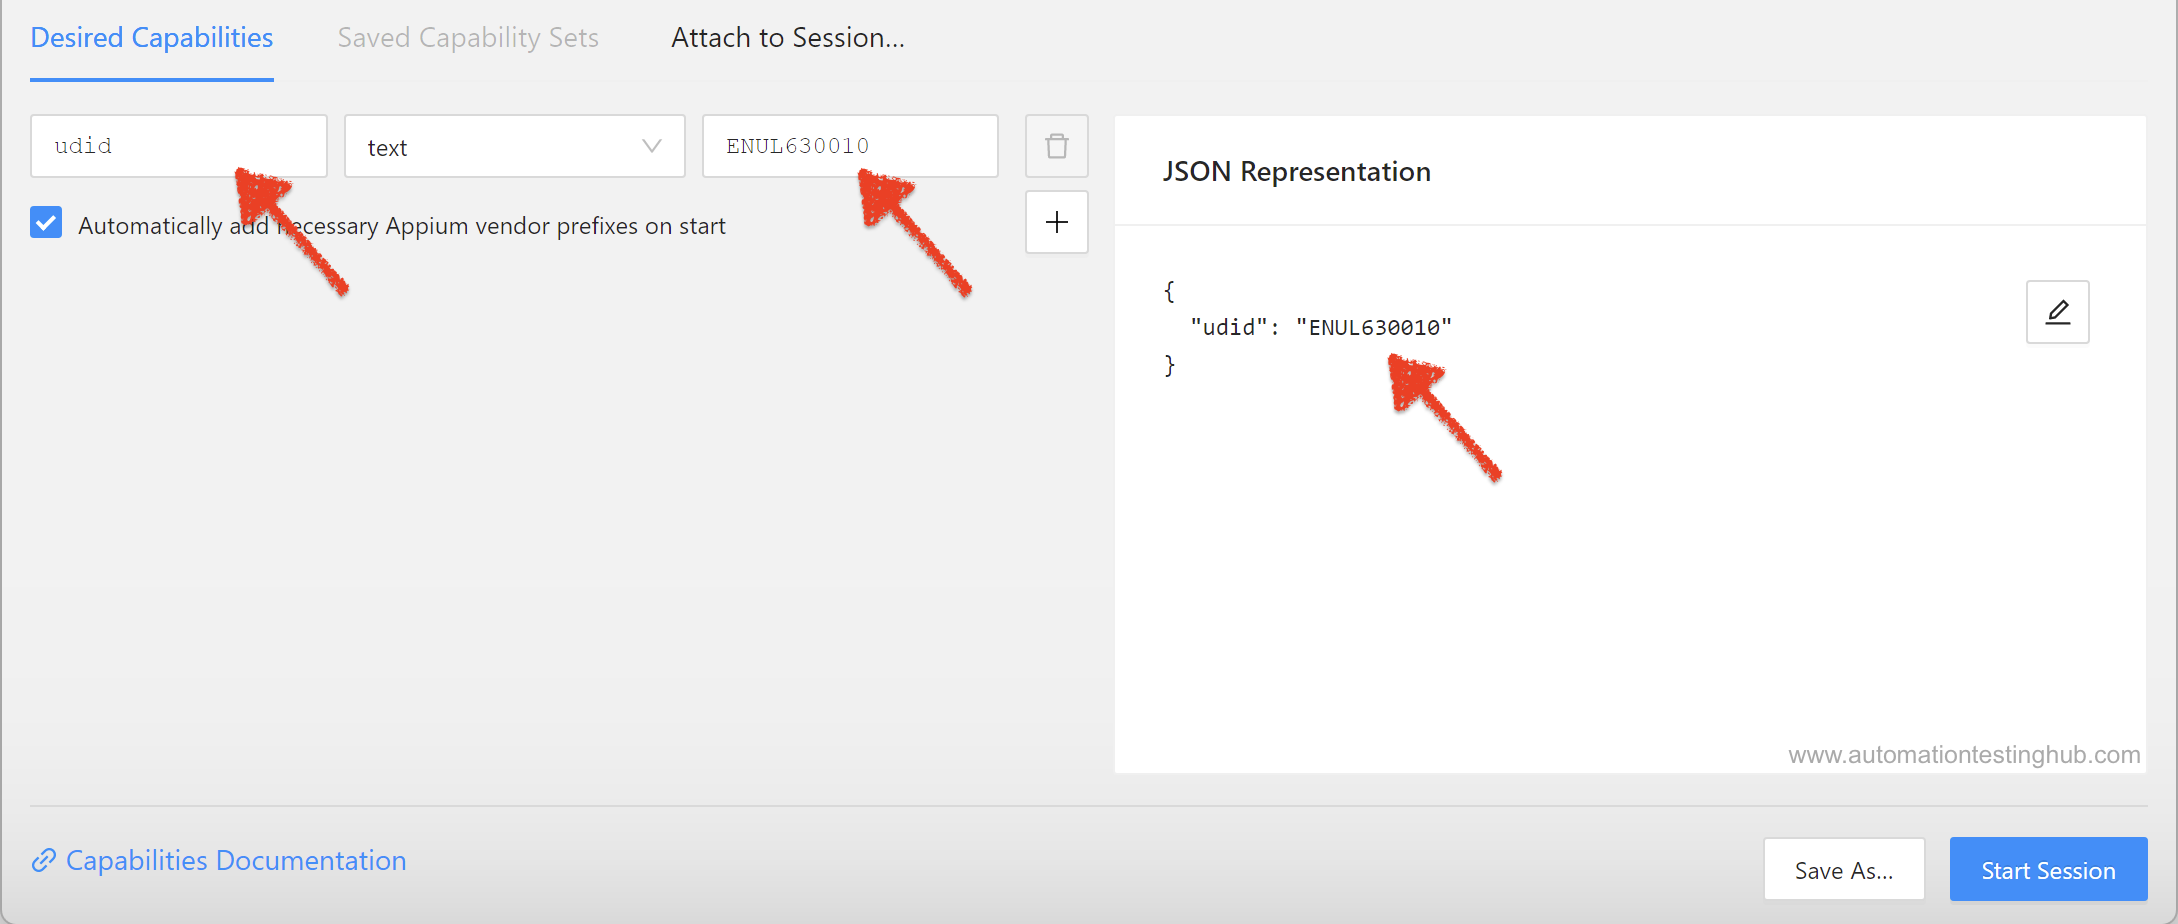
1. To add the first capability, type ‘udid’ in Name field and ‘ENUL630010’ in Value field. Your screen would now look like this (note that the JSON Representation block would automatically show the capability that you have added just now)

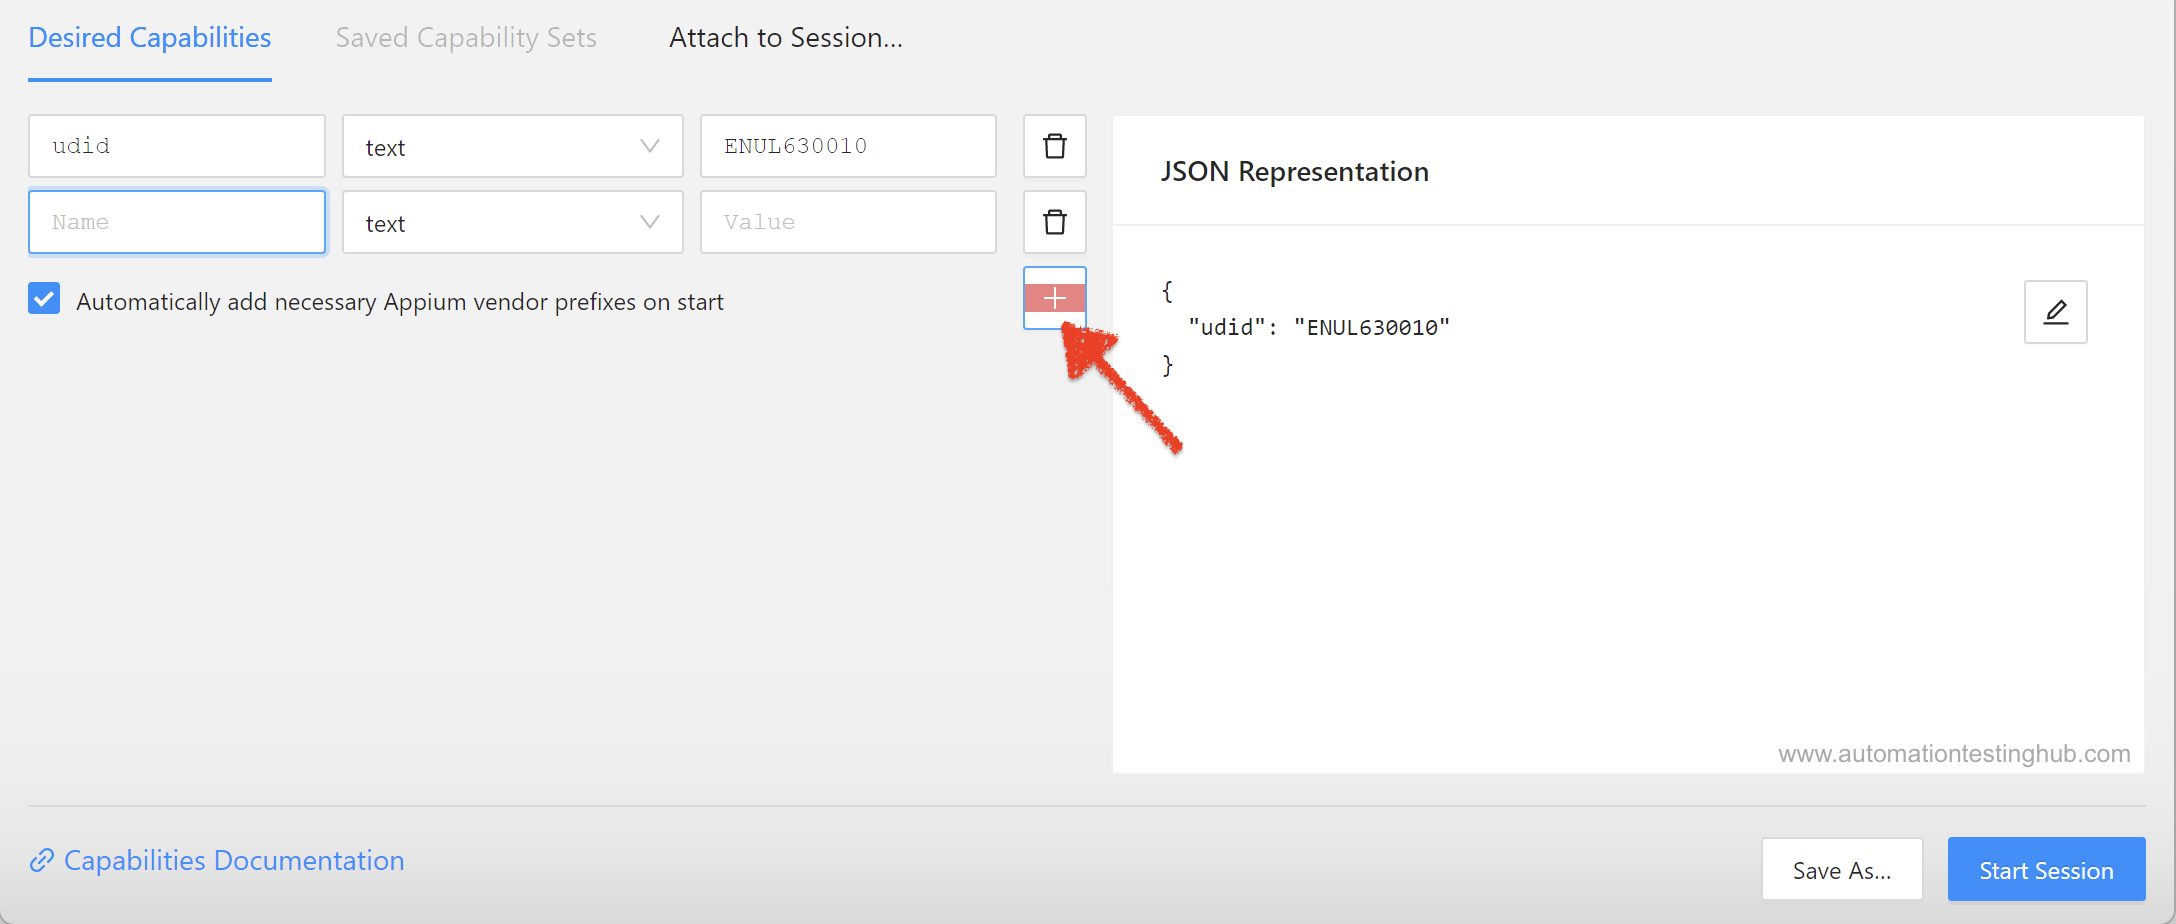
2. Now click on the ‘+’ icon, so that a new blank row gets displayed

3. Add the second capability (appium:appPackage) in this row
4. Keep on adding new rows till you add all the capabilities that you see in the above code block. Your screen should now look like this

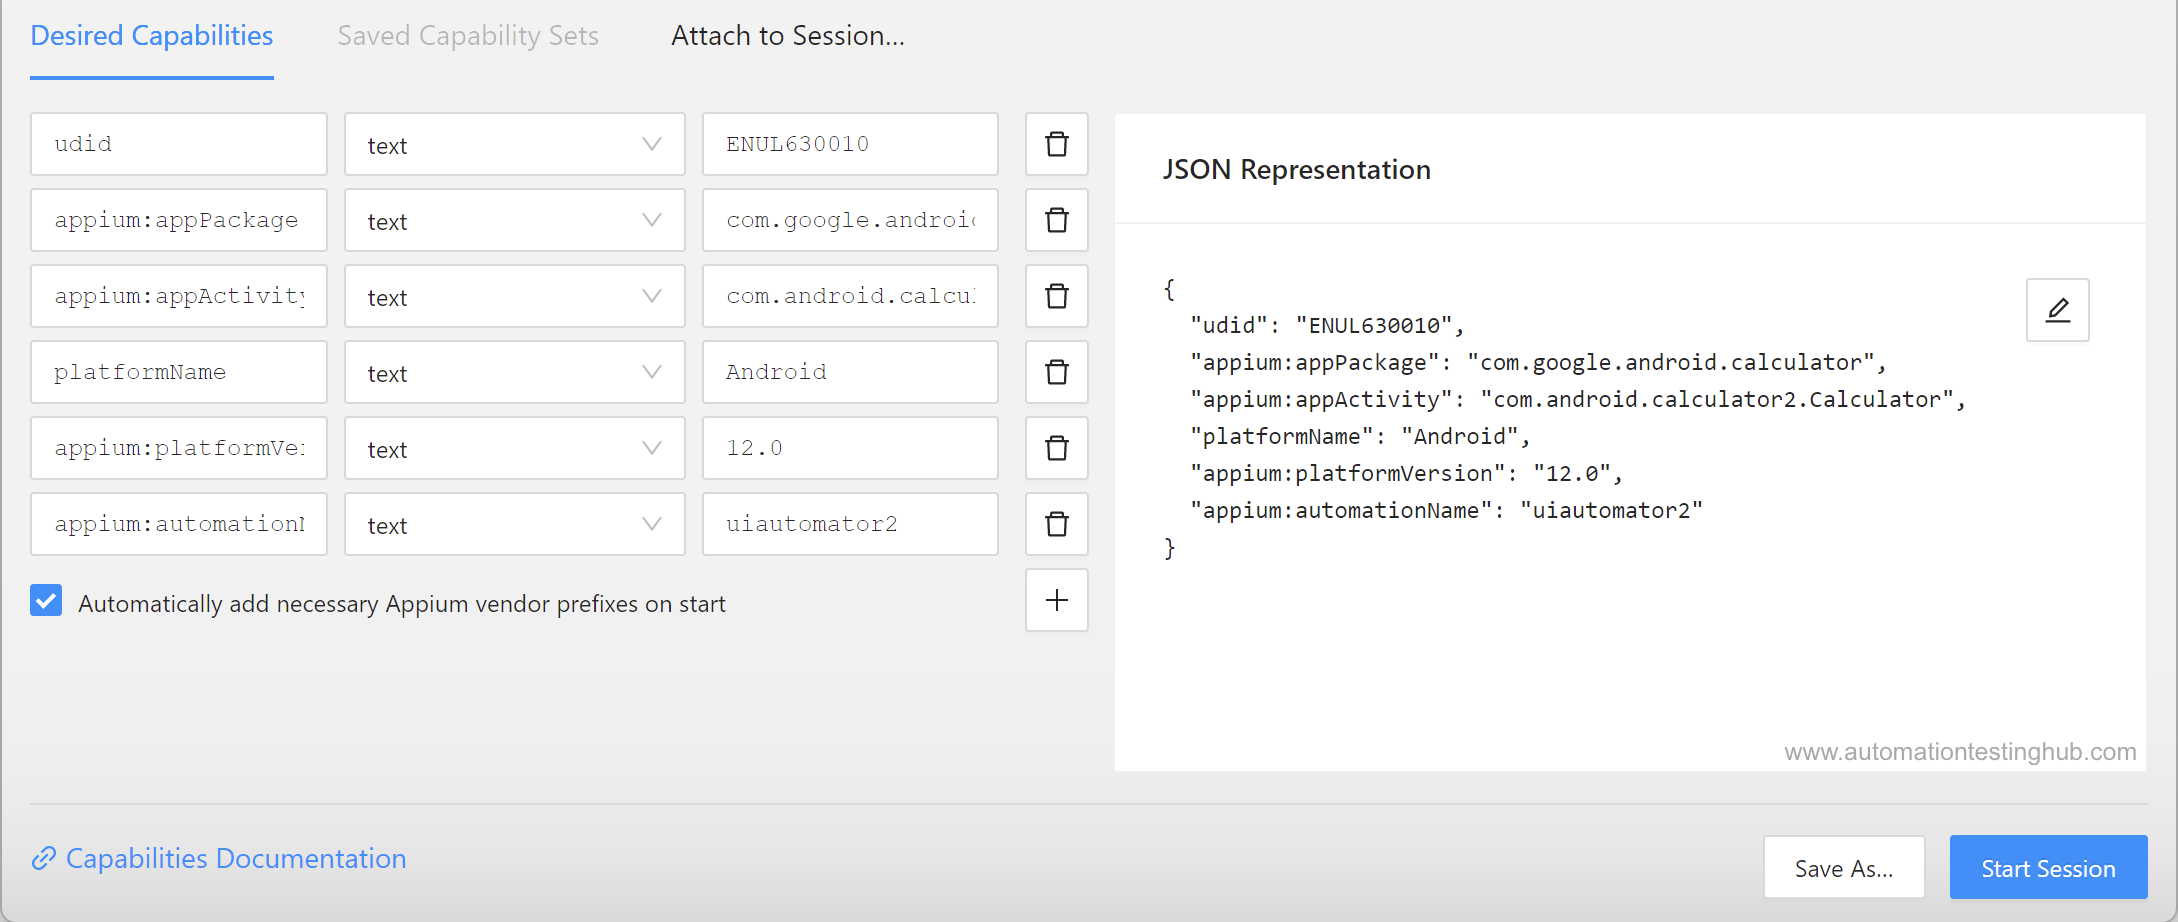
You have now successfully added all the Desired Capabilities. Let us now save this Capability Set and then start the Appium Desktop Inspector.
Save the Desired Capabilities Set
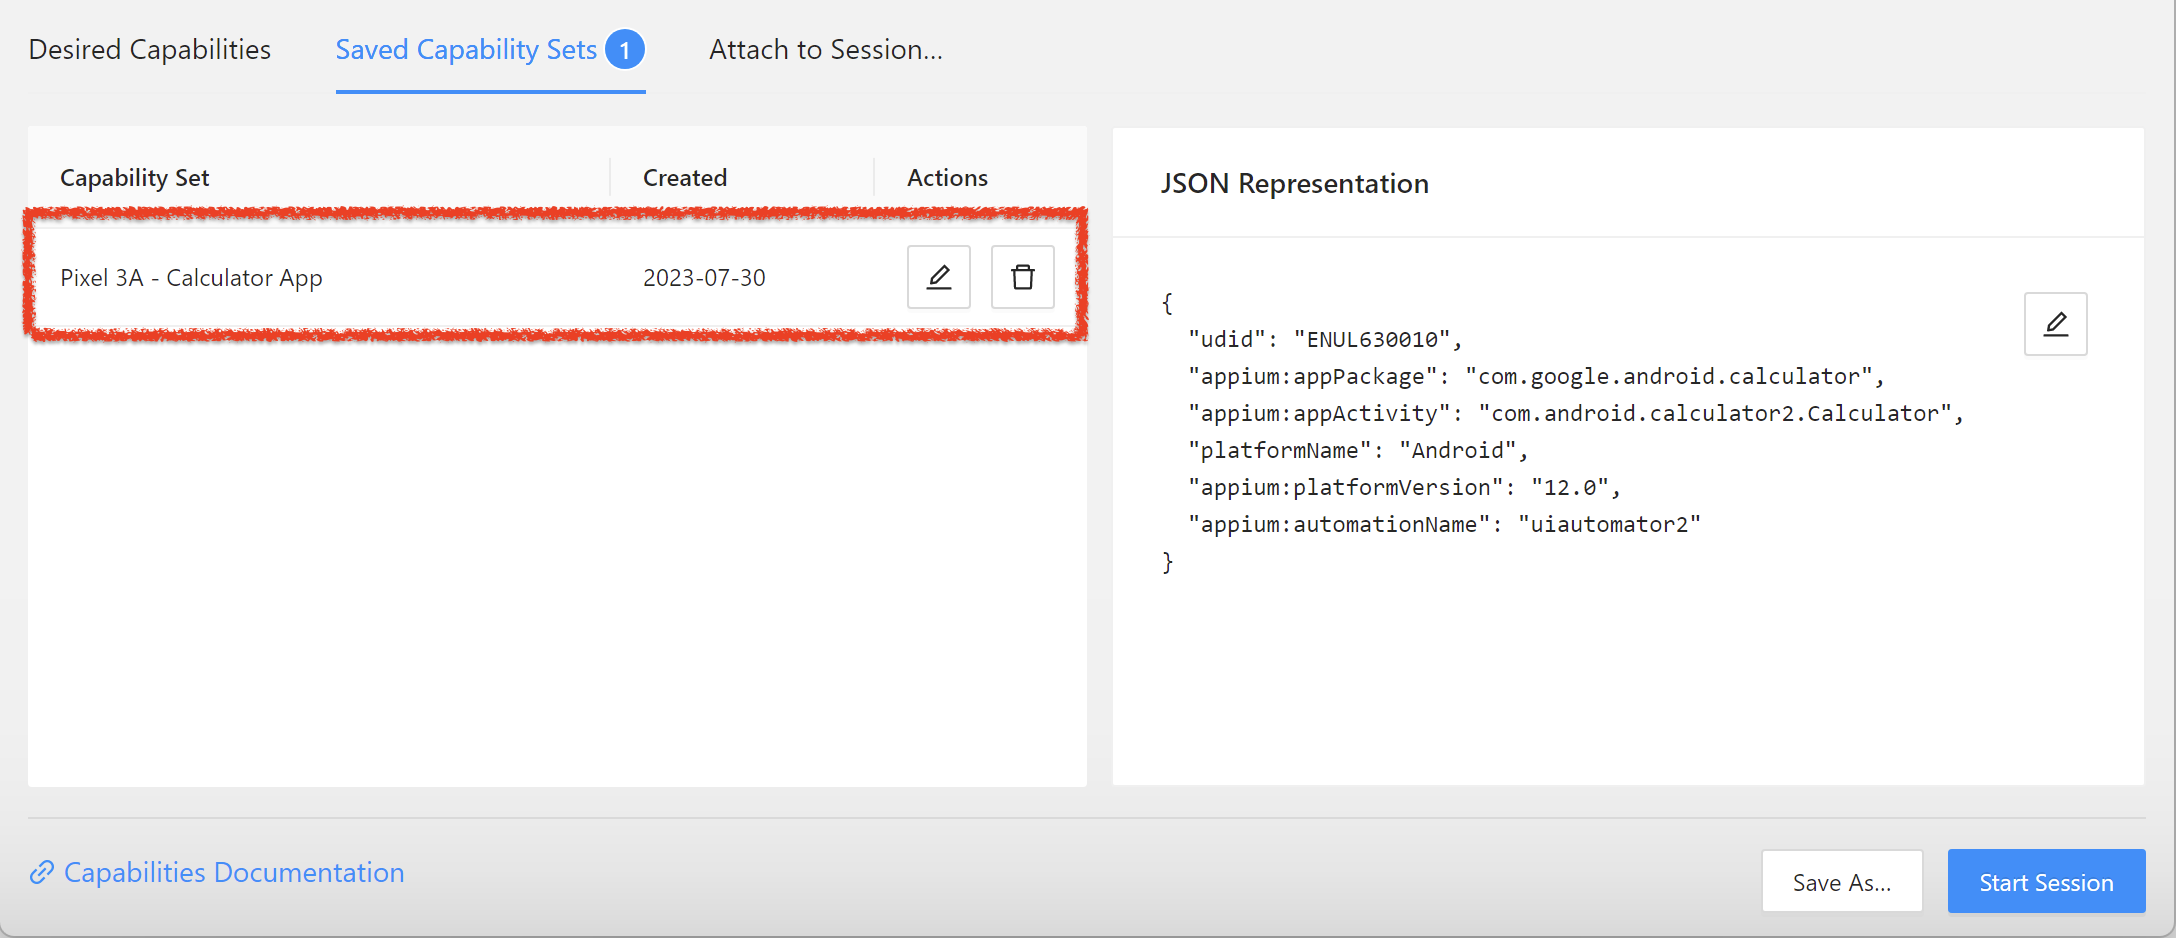
It’s a good approach to save the Desired Capabilities set especially when you are using multiple devices or testing multiple apps. This is due to the fact that once you save a Desired Capability set, then you can directly select it from the Saved Capabilities Set section and start the inspector. So if you use multiple devices or android versions, you can save these capabilities as say ‘Samsung Galaxy S7’, ‘Nexus 6P’, ‘Calculator App’ etc.
Let’s quickly see the steps that you have to follow to save the Desired Capabilities –
1. At the bottom of the screen, where you entered all the Desired Capabilities, click on ‘Save As…’ button
2. You would see a popup asking for the name of the Capability set

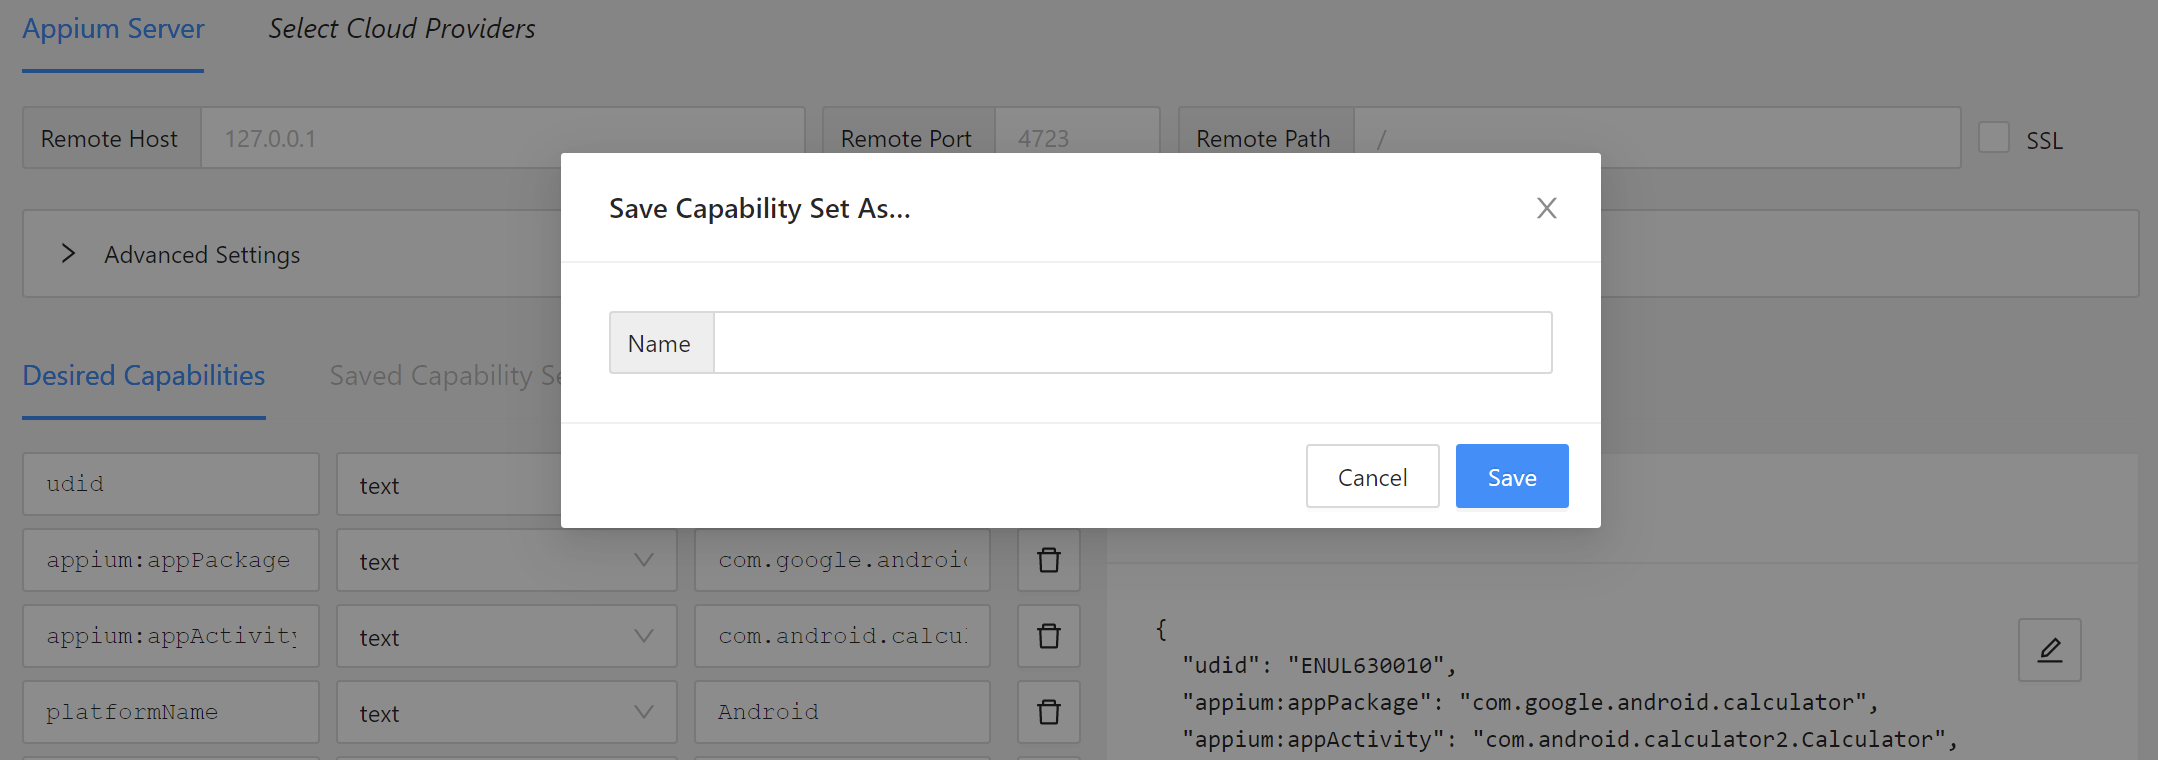
3. Enter any name you wish to use and click on Save button. The capability set would get saved
4. Click on Saved Capabilities Sets tab. You will see that the capability set you saved just now is displayed here

Start Appium Inspector
First of all make sure that your mobile device is connected to your machine. Also see that its unlocked. To start Appium Desktop Inspector, click on Start Session button.
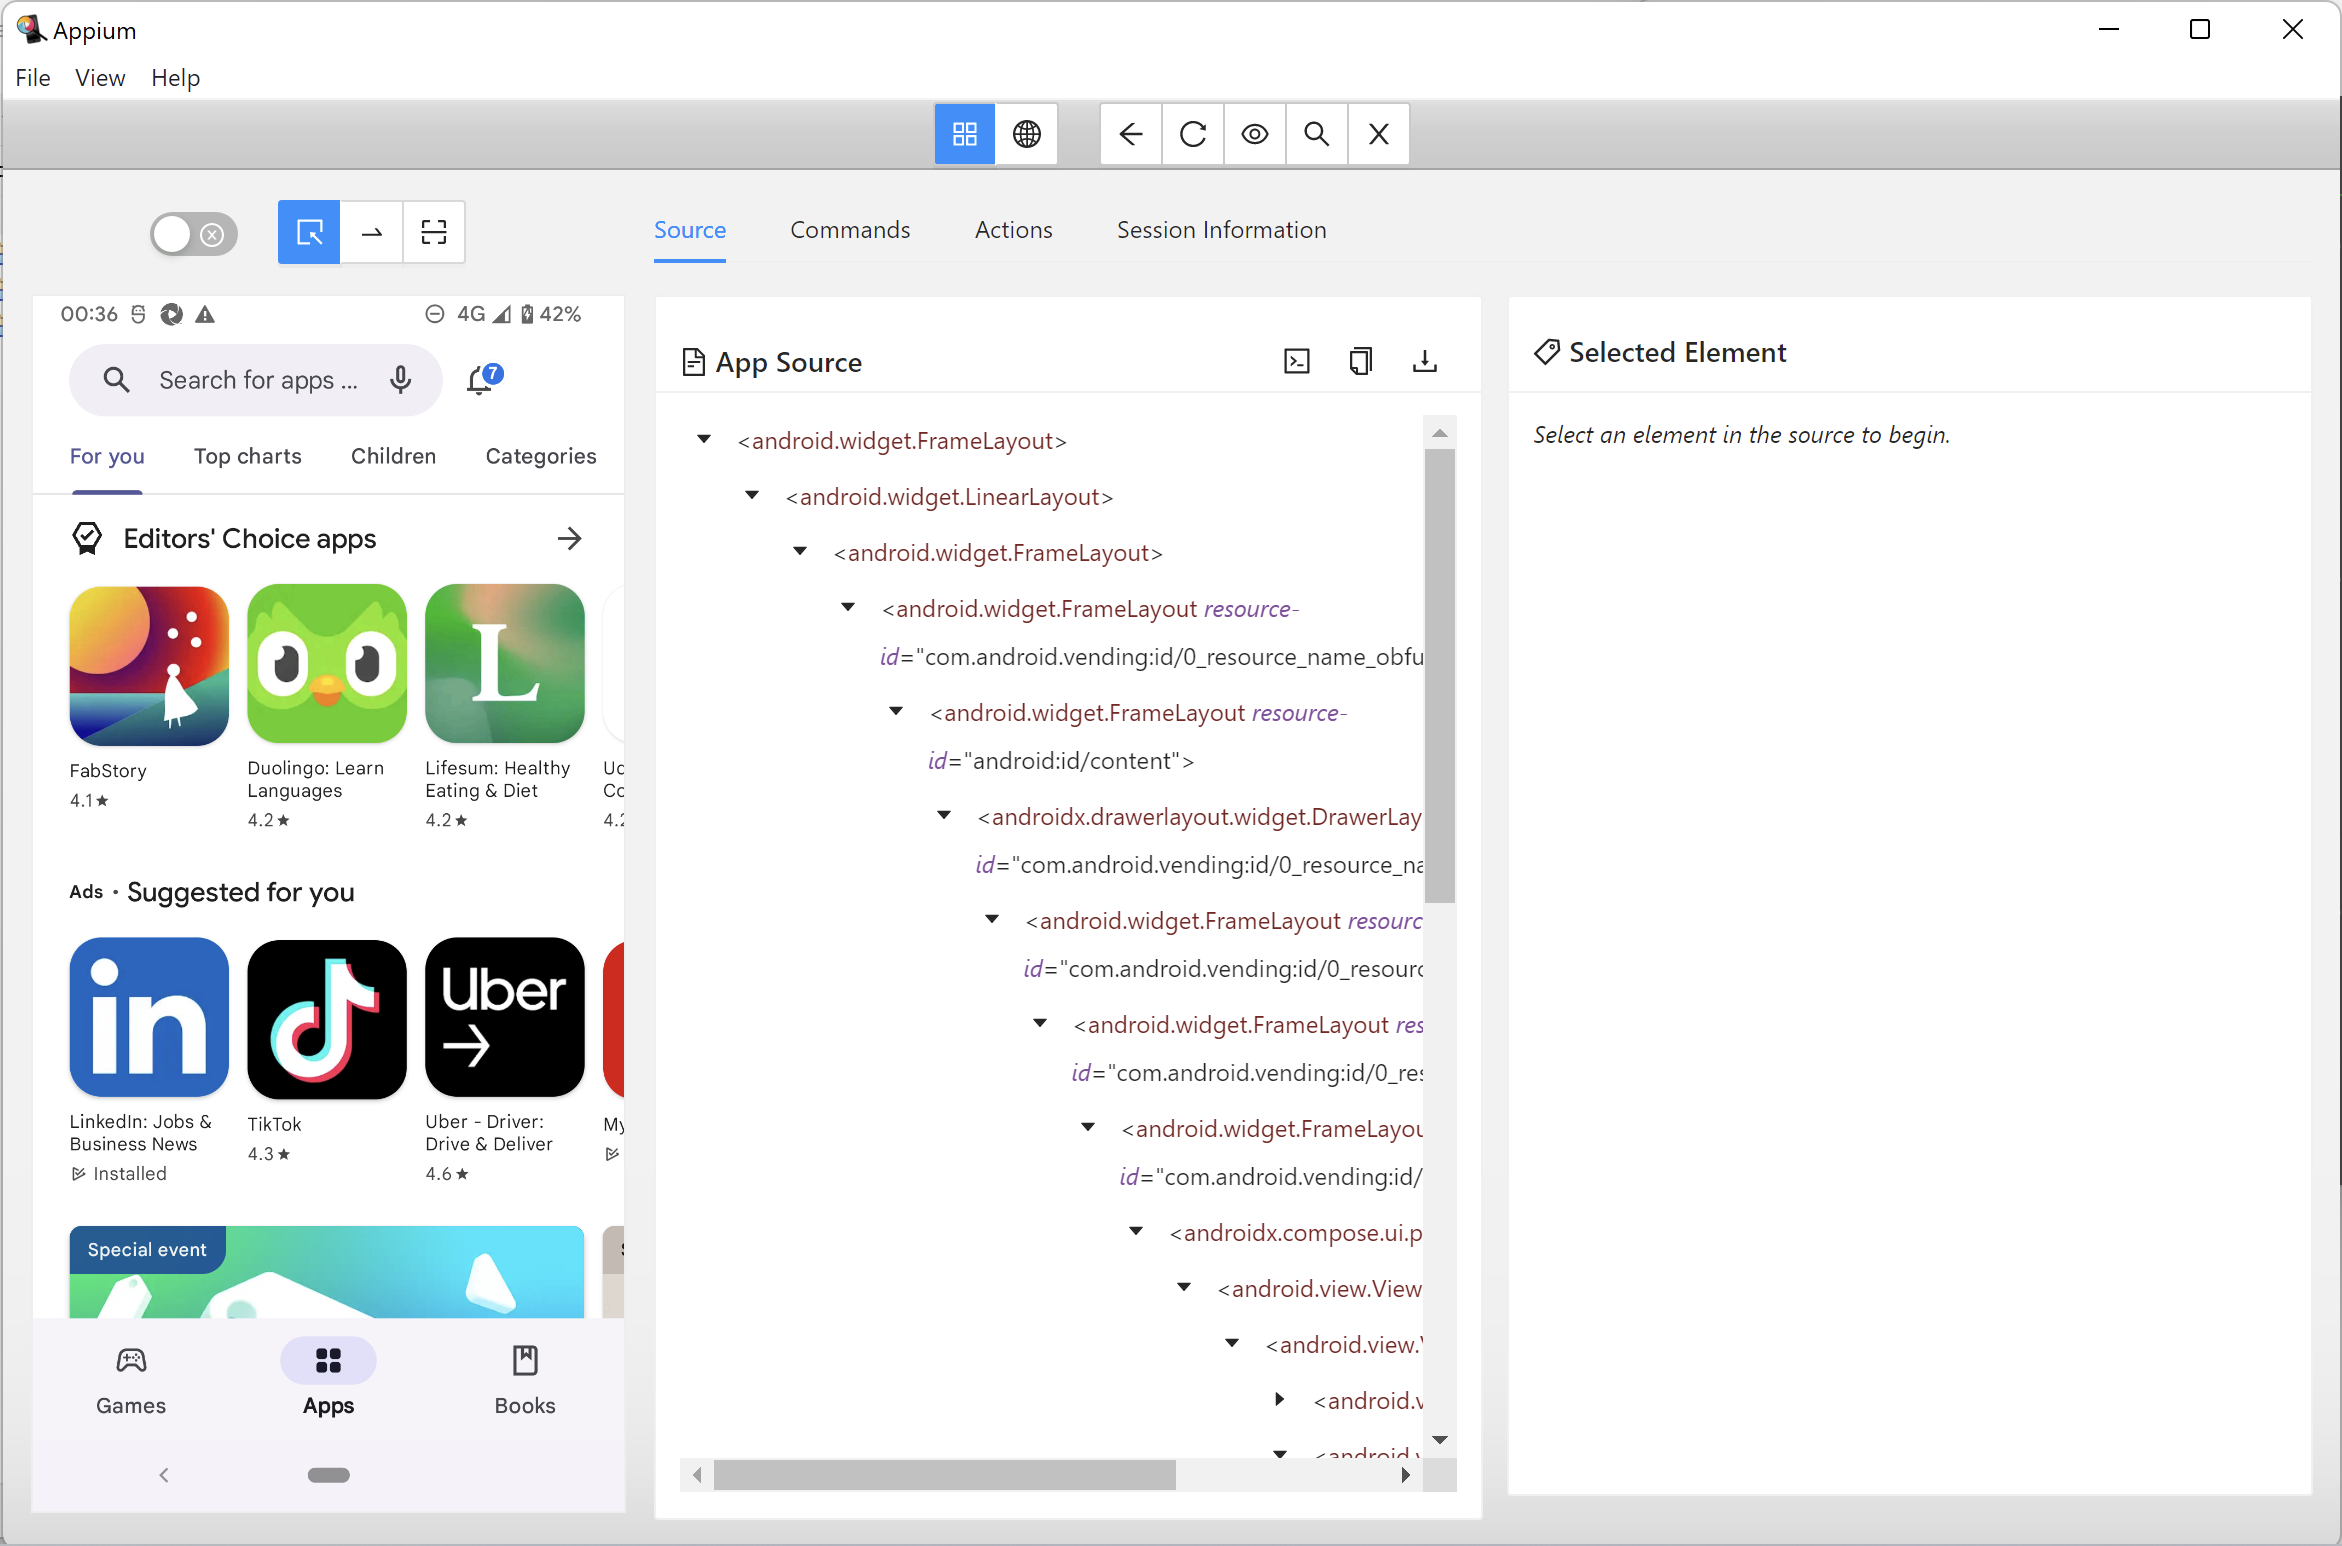
Once you click on the button, you would see that the screen would start getting refreshed. Then after few moments, Appium window would display the screenshot of Calculator app together with its Object Hierarchy Dump. The Appium window screen would like this –

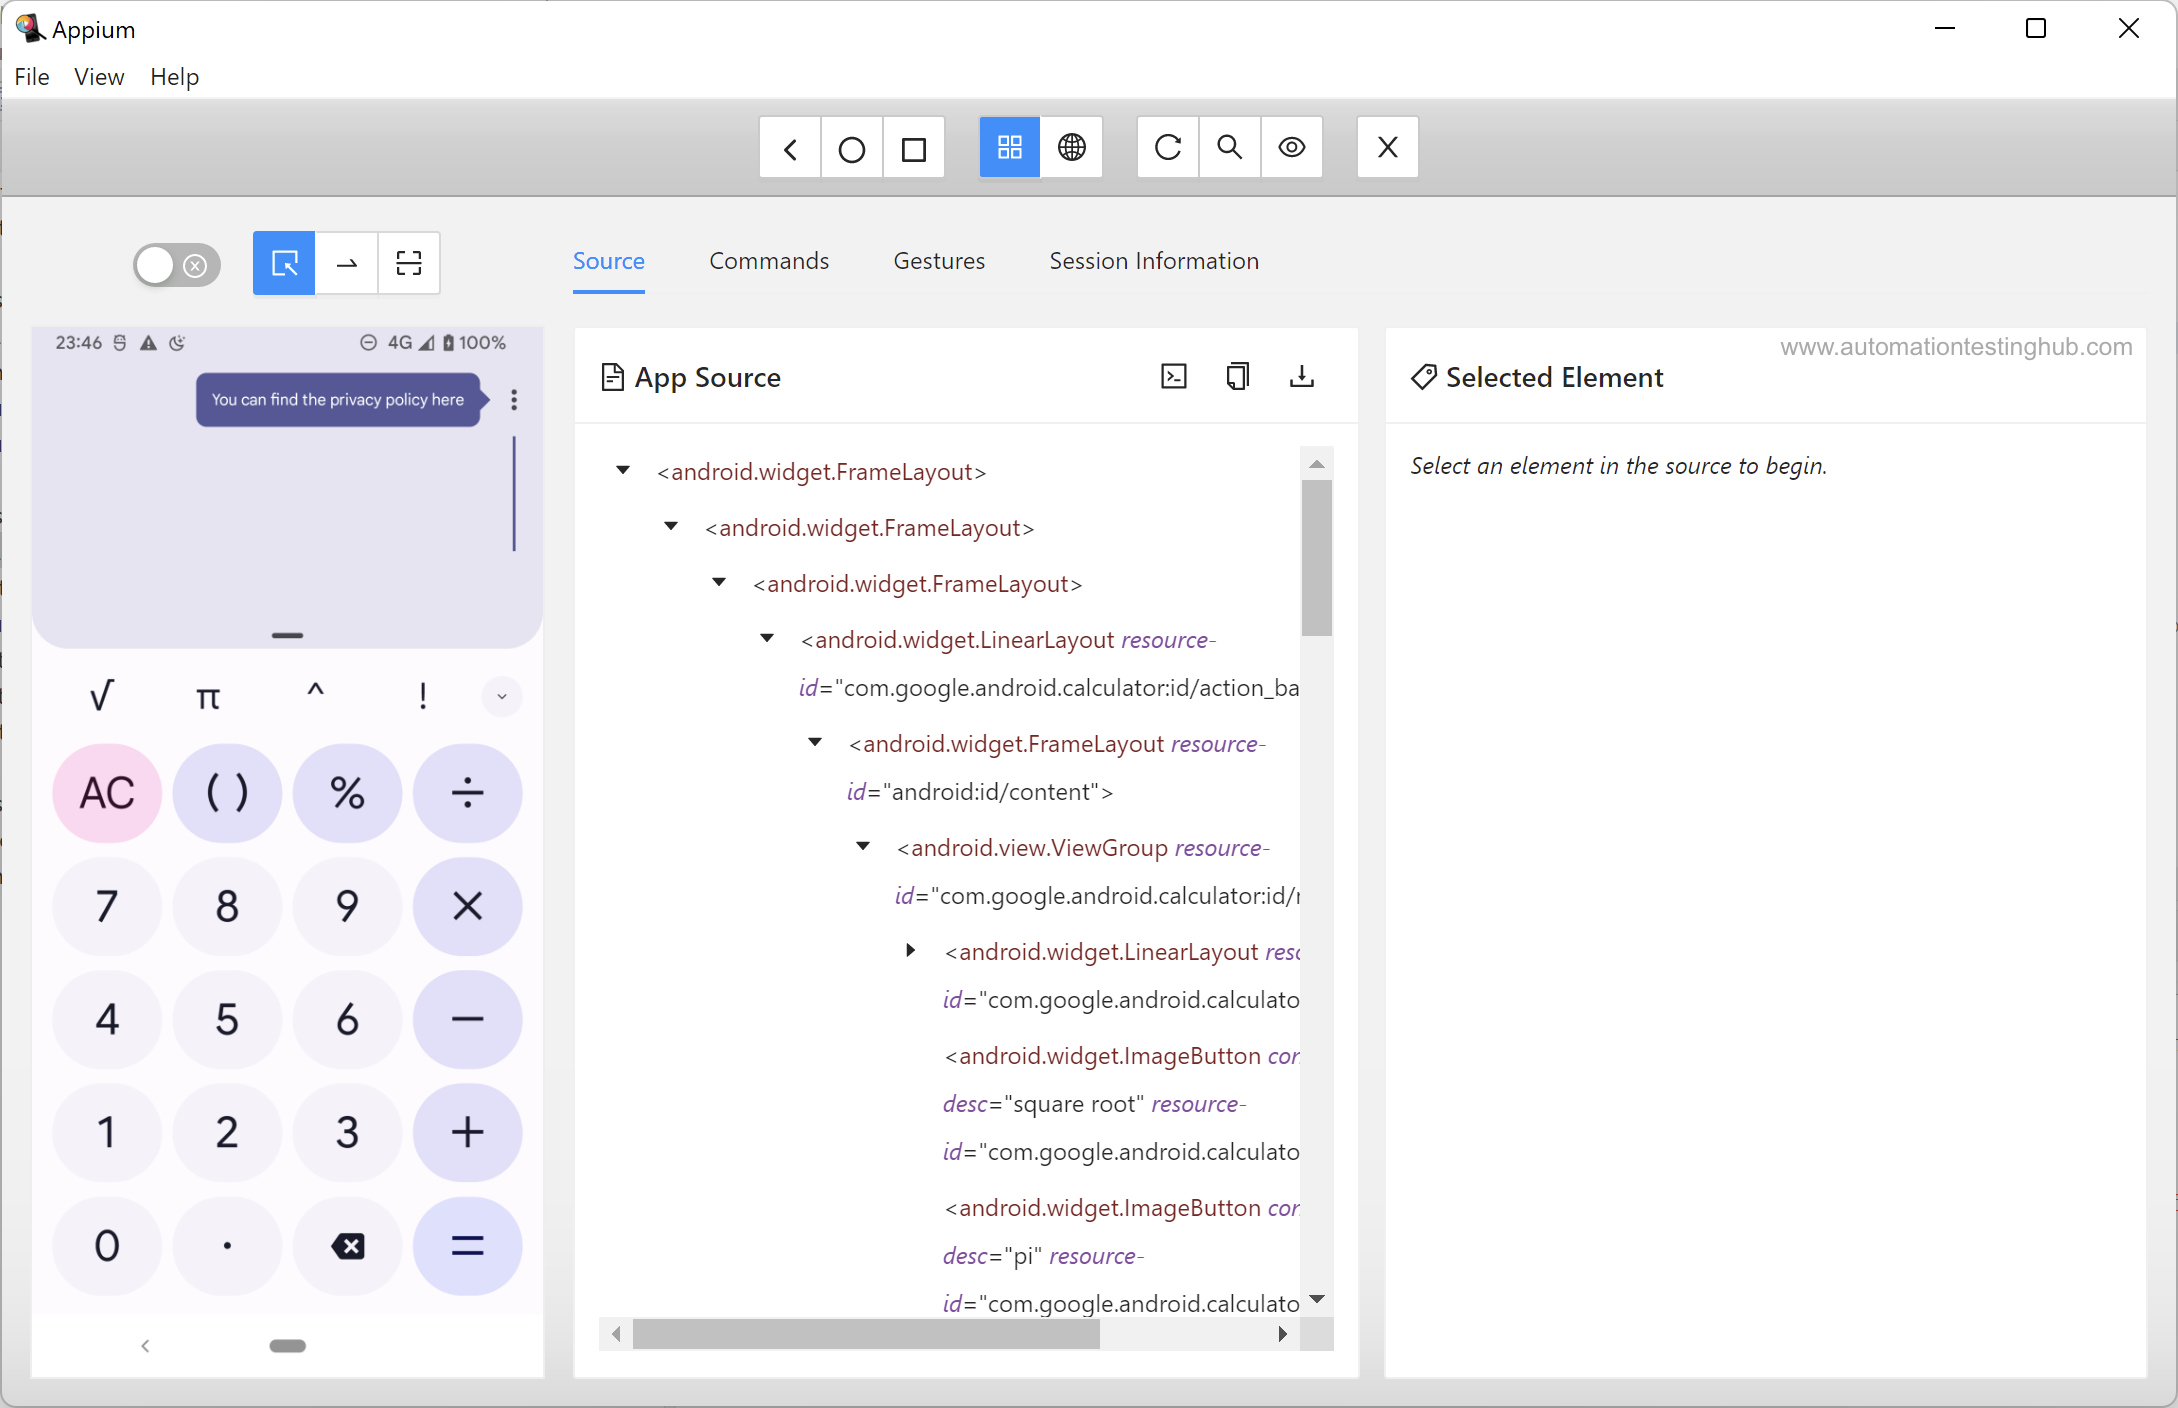
You can also notice that Calculator app has been opened on your mobile device as well.
You are now able to start a new session in Appium Inspector!! And this is where we will end this article. Our next article would cover the mobile inspection part, where you will learn about the different ways using which you can identify mobile elements from Appium Inspector.