
First of all – Congratulations!! that you have made it till here in our Appium Tutorial series. I have personally experienced how challenging and daunting it is to download and install all the tools, set up all the environment variables and do all this reading just to get Appium setup up and running.
Well, the good thing is that this is the article where you will start seeing results of the efforts you have put in till now. This is the article where we will provide you with the code, your first Appium test script, which you can use to launch your mobile app. Without waiting any further, let us directly jump over to see what you would learn in this article.
First Appium Test Script – Topics covered in this article
This article covers the below topics, which you can follow to run your test script
- Start Appium Server
- Get details of the mobile device
- Get details of the app which is to be launched
- Write Appium test script
- Run your test script and check that it launches the app
Let us now work with each of these topics one by one.
Start Appium Server
We are going to use the Appium 2 server, which you had downloaded in the beginning of this tutorial series. To start the Appium server, open command prompt, then simply type appium and hit enter.

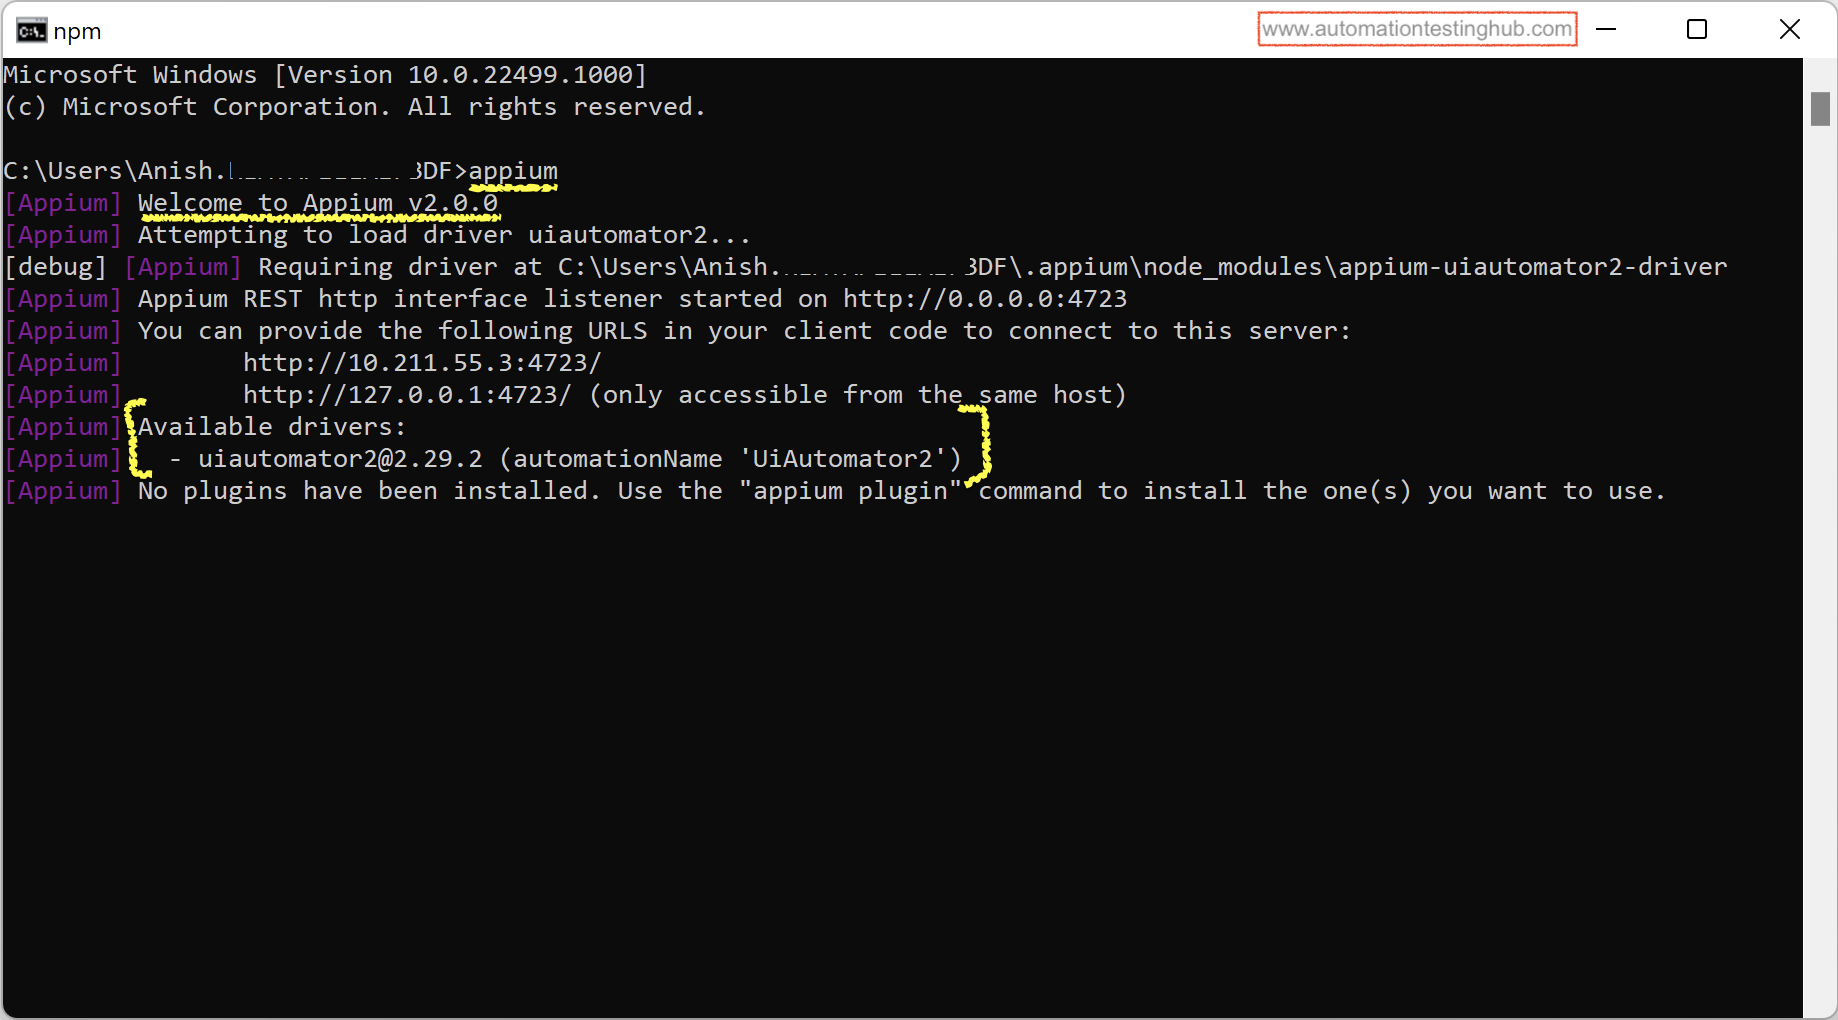
You would notice that there is some output on the console that starts with – Welcome to Appium v2.0.0. Also check that console shows uiautomator2 in the list of available drivers. This means that Appium server is up and running, and its ready for automation with an android device.
Get your Mobile Phone’s Device ID
Appium identifies your mobile phone using its Device Id (also called as its UDID). For example, consider a scenario where you have multiple mobile phones connected to your machine using USB cables. Now when you run your Appium test script, Appium would detect that you have multiple devices connected. So it would need the Device ID, using which it can connect to the correct device and run the scripts on that device. Let us see how you can find the Device ID (or UDID) of your mobile phone –
1. Connect your mobile device to your computer using USB cable. (If your mobile device shows a popup to allow debugging, then accept that popup)
2. Now open command prompt and run this command: adb devices
3. Once you run this command, you would see the details of the device as shown in the below image (if you see some other response such as “daemon not running. daemon started successfully”, then run the command again)


4. From the above screenshot, let us assume that the Device ID is – ENUL630010. Note down the device ID that you get for your phone, because you would need to provide that in your Appium test script.
5. Keep your mobile device connected to the USB cable. It needs to remain this way when you run your script.
Get your Mobile Phone’s Android version
You would also need to provide your mobile phone’s Android version number in the Appium script. To find this, open your mobile phone and go to Setting > About Phone. In About Phone screen, you can see the Android version as shown below –

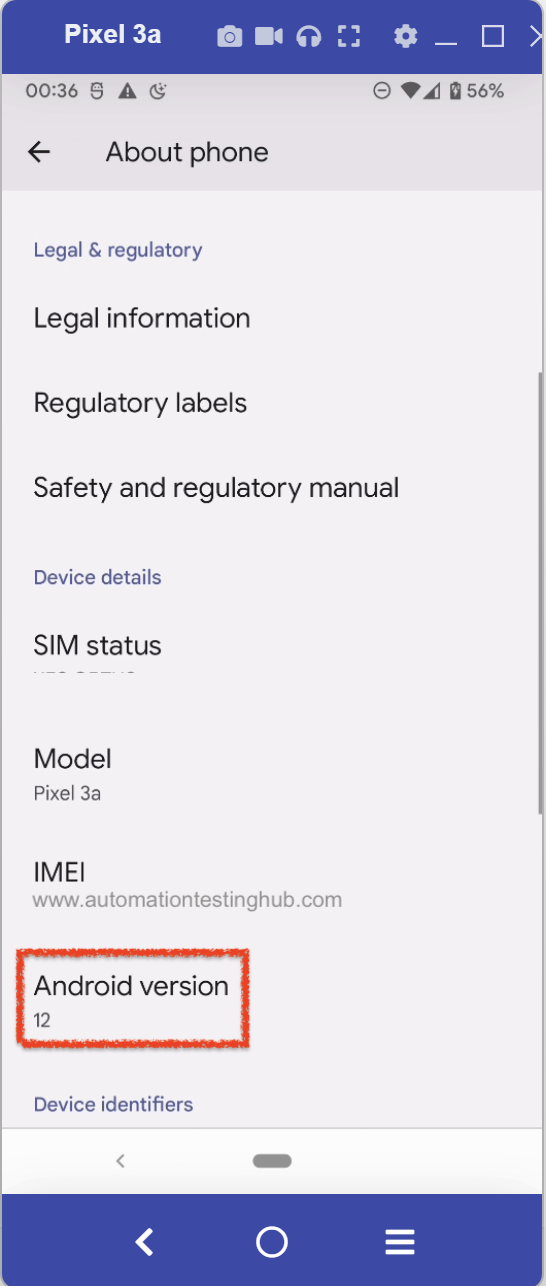
Please note that the exact process to check the Android version might differ from phone to phone. If you have difficulties finding it on your device, then please check for the steps on the internet.
Find out appPackage and appActivity names of the mobile app
In our previous article on finding appPackage and appActivity name, we covered in detail the process of identifying this information. Specifically for this article, we will be writing the script to launch the default calculator app. So, for the calculator app, we have
- appPackage name as – com.google.android.calculator
- and appActivity name as – com.android.calculator2.Calculator
Note: If you are using some other app, then please use this article to find its appPackage and appActivity name
Write Appium Test Script to launch the app
Now comes the important part where you write the Appium test script. Do this by following the steps given below –
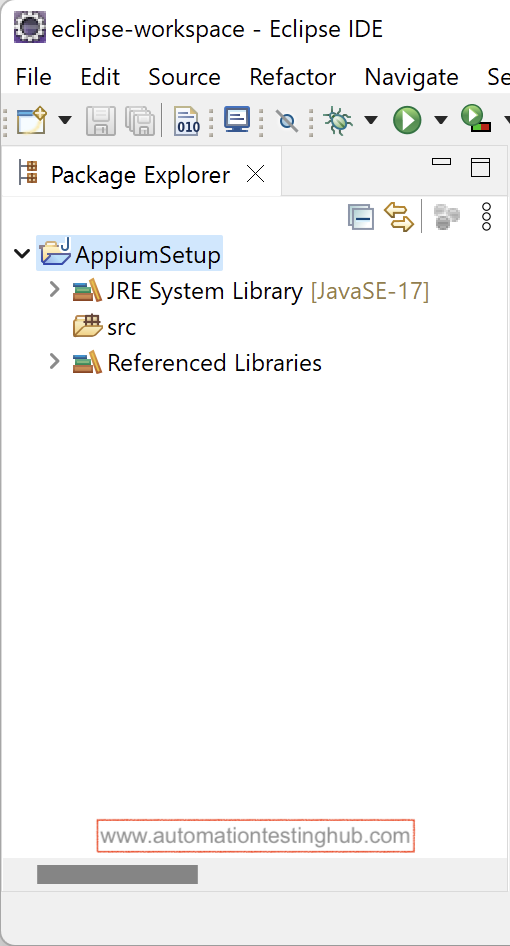
1. Open the Appium project that we had created in this article – Create new project in Eclipse. It should look something like this –

We will first create a new package in this project. Then we will then create a Java class inside the package, and finally we will write the Appium test script in the Java class. Let’s see how this is done.
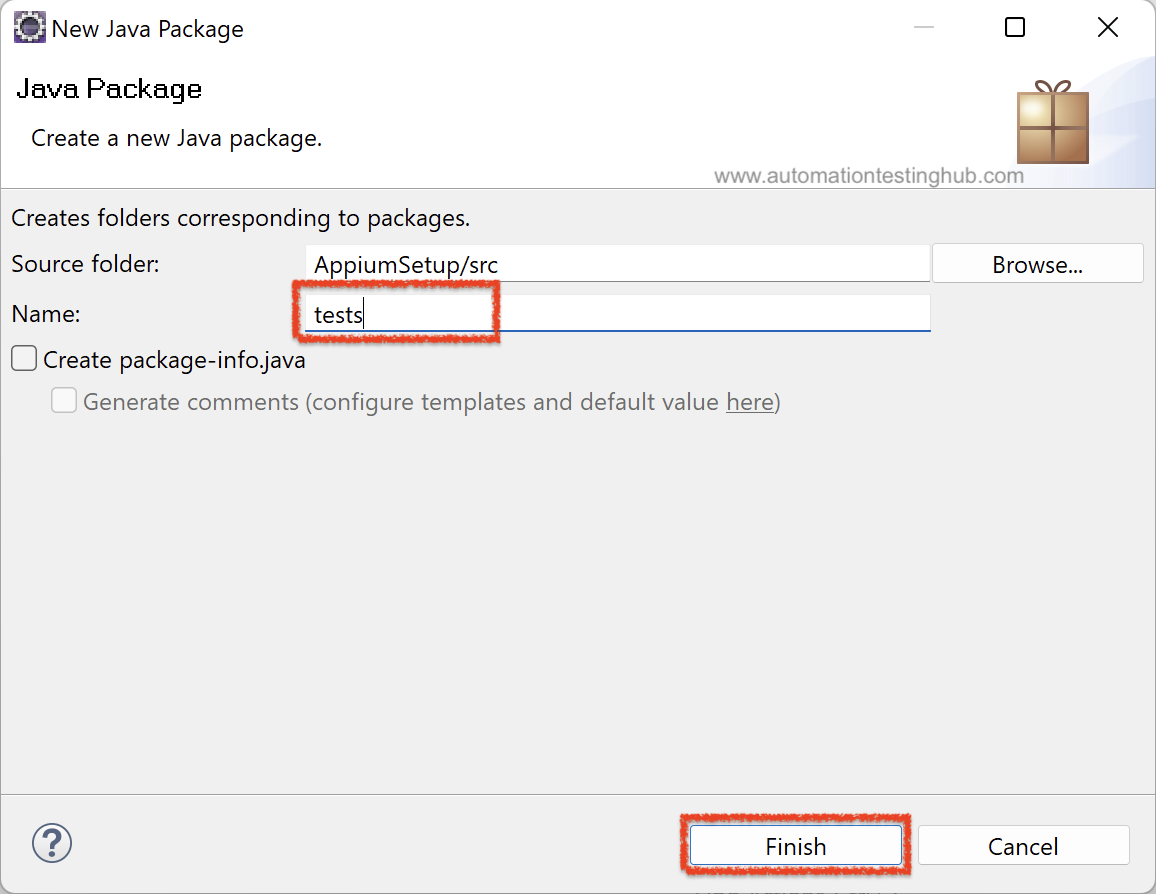
2. In the Appium project in Eclipse, right click on src folder. Then select New > Package


3. In the popup window, enter package name as tests and then click on Finish button

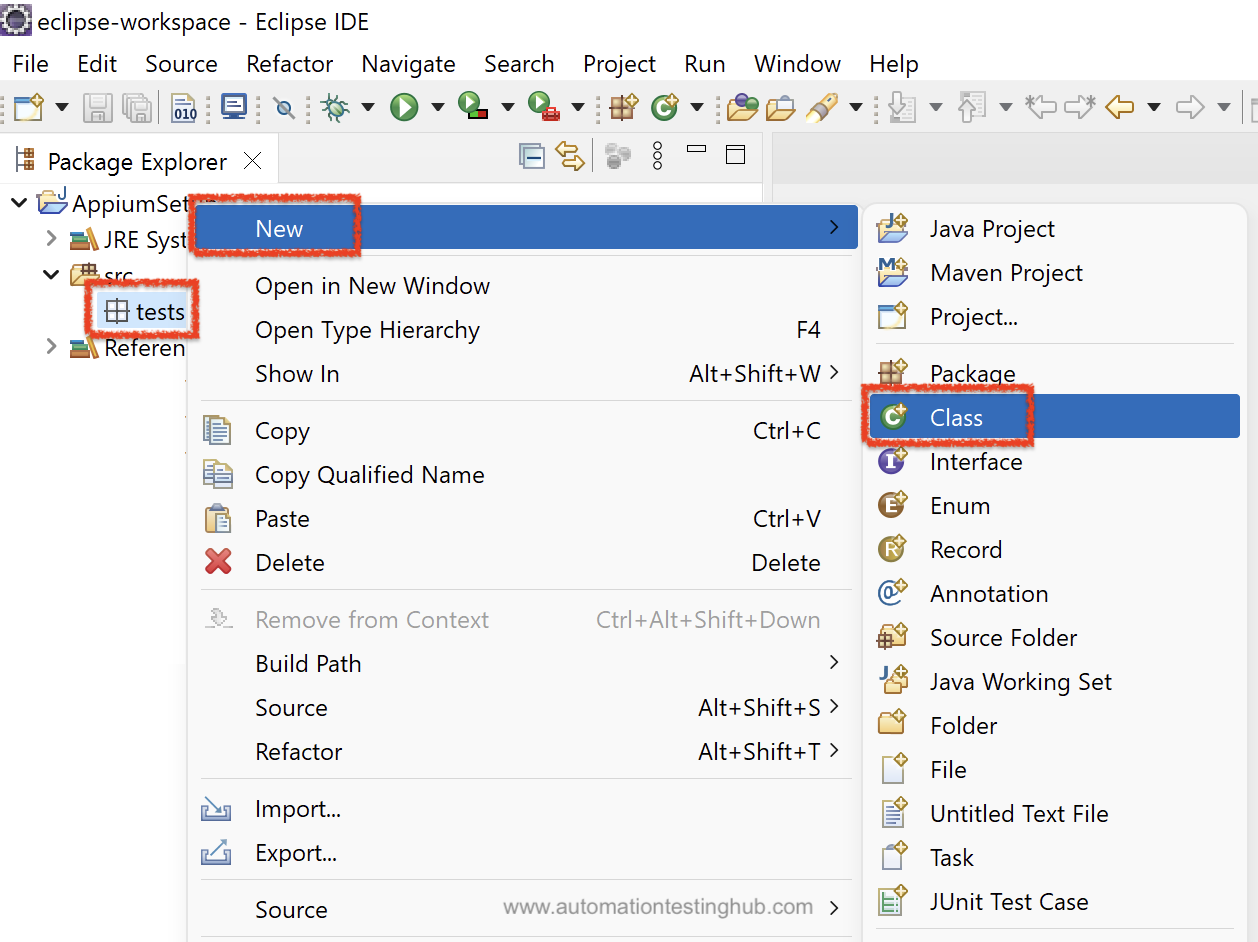
4. You can see that a new package called tests is created under src folder. Right click on this package and select New > Class option

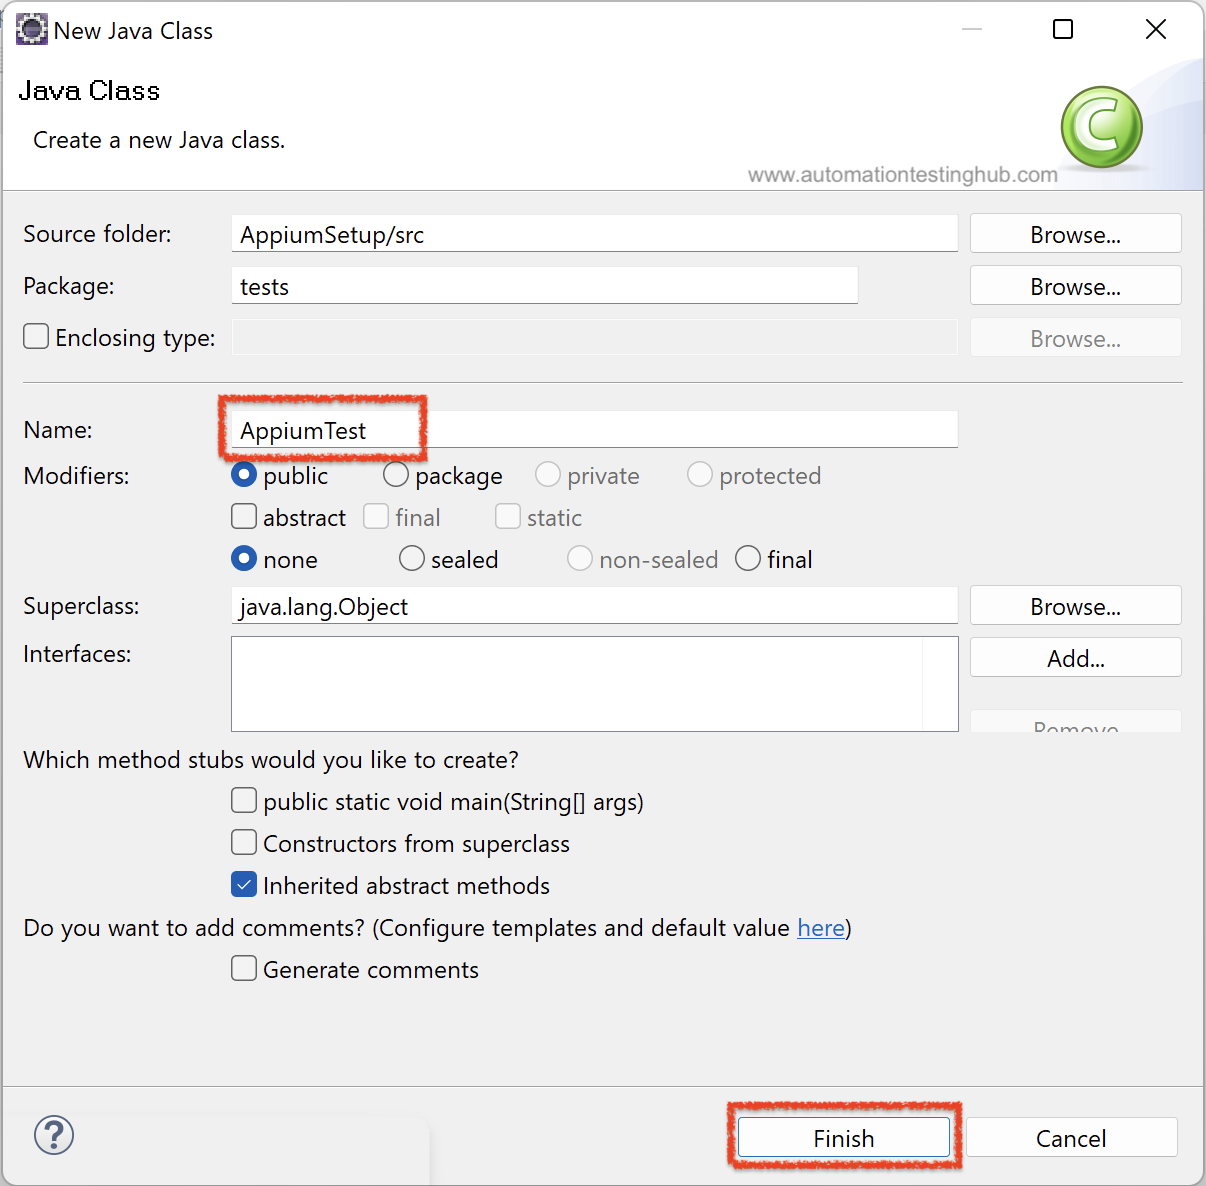
5. In the popup window, enter the class name as AppiumTest and then click on Finish button

6. The new class would be created as shown below. This is the place where you will add your code.

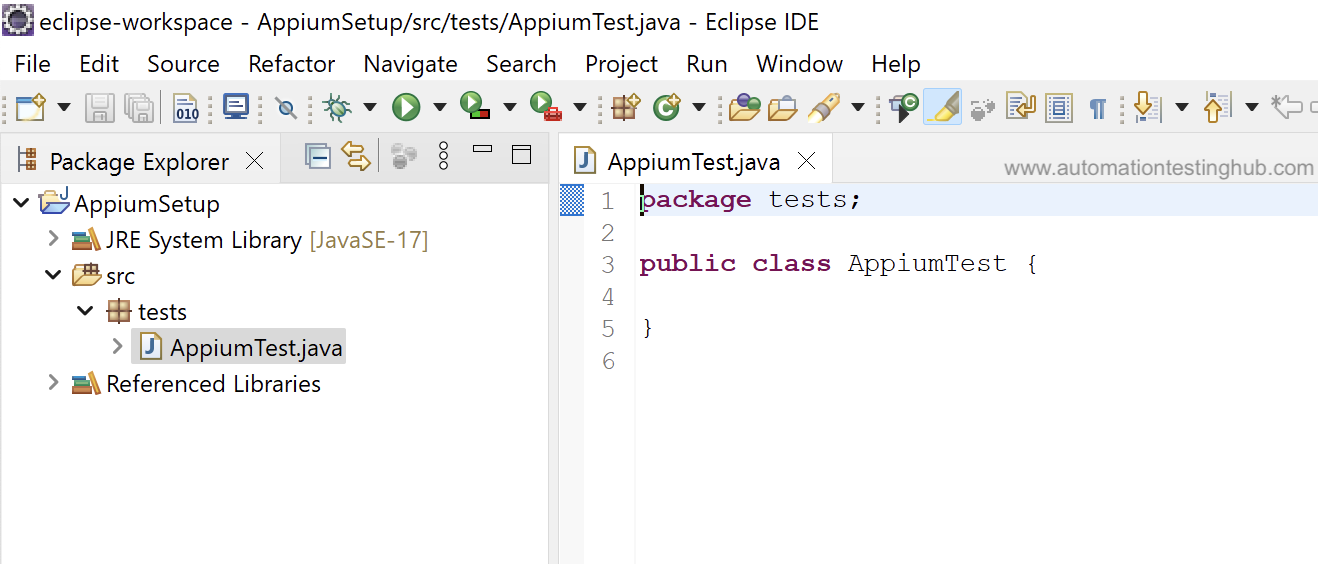
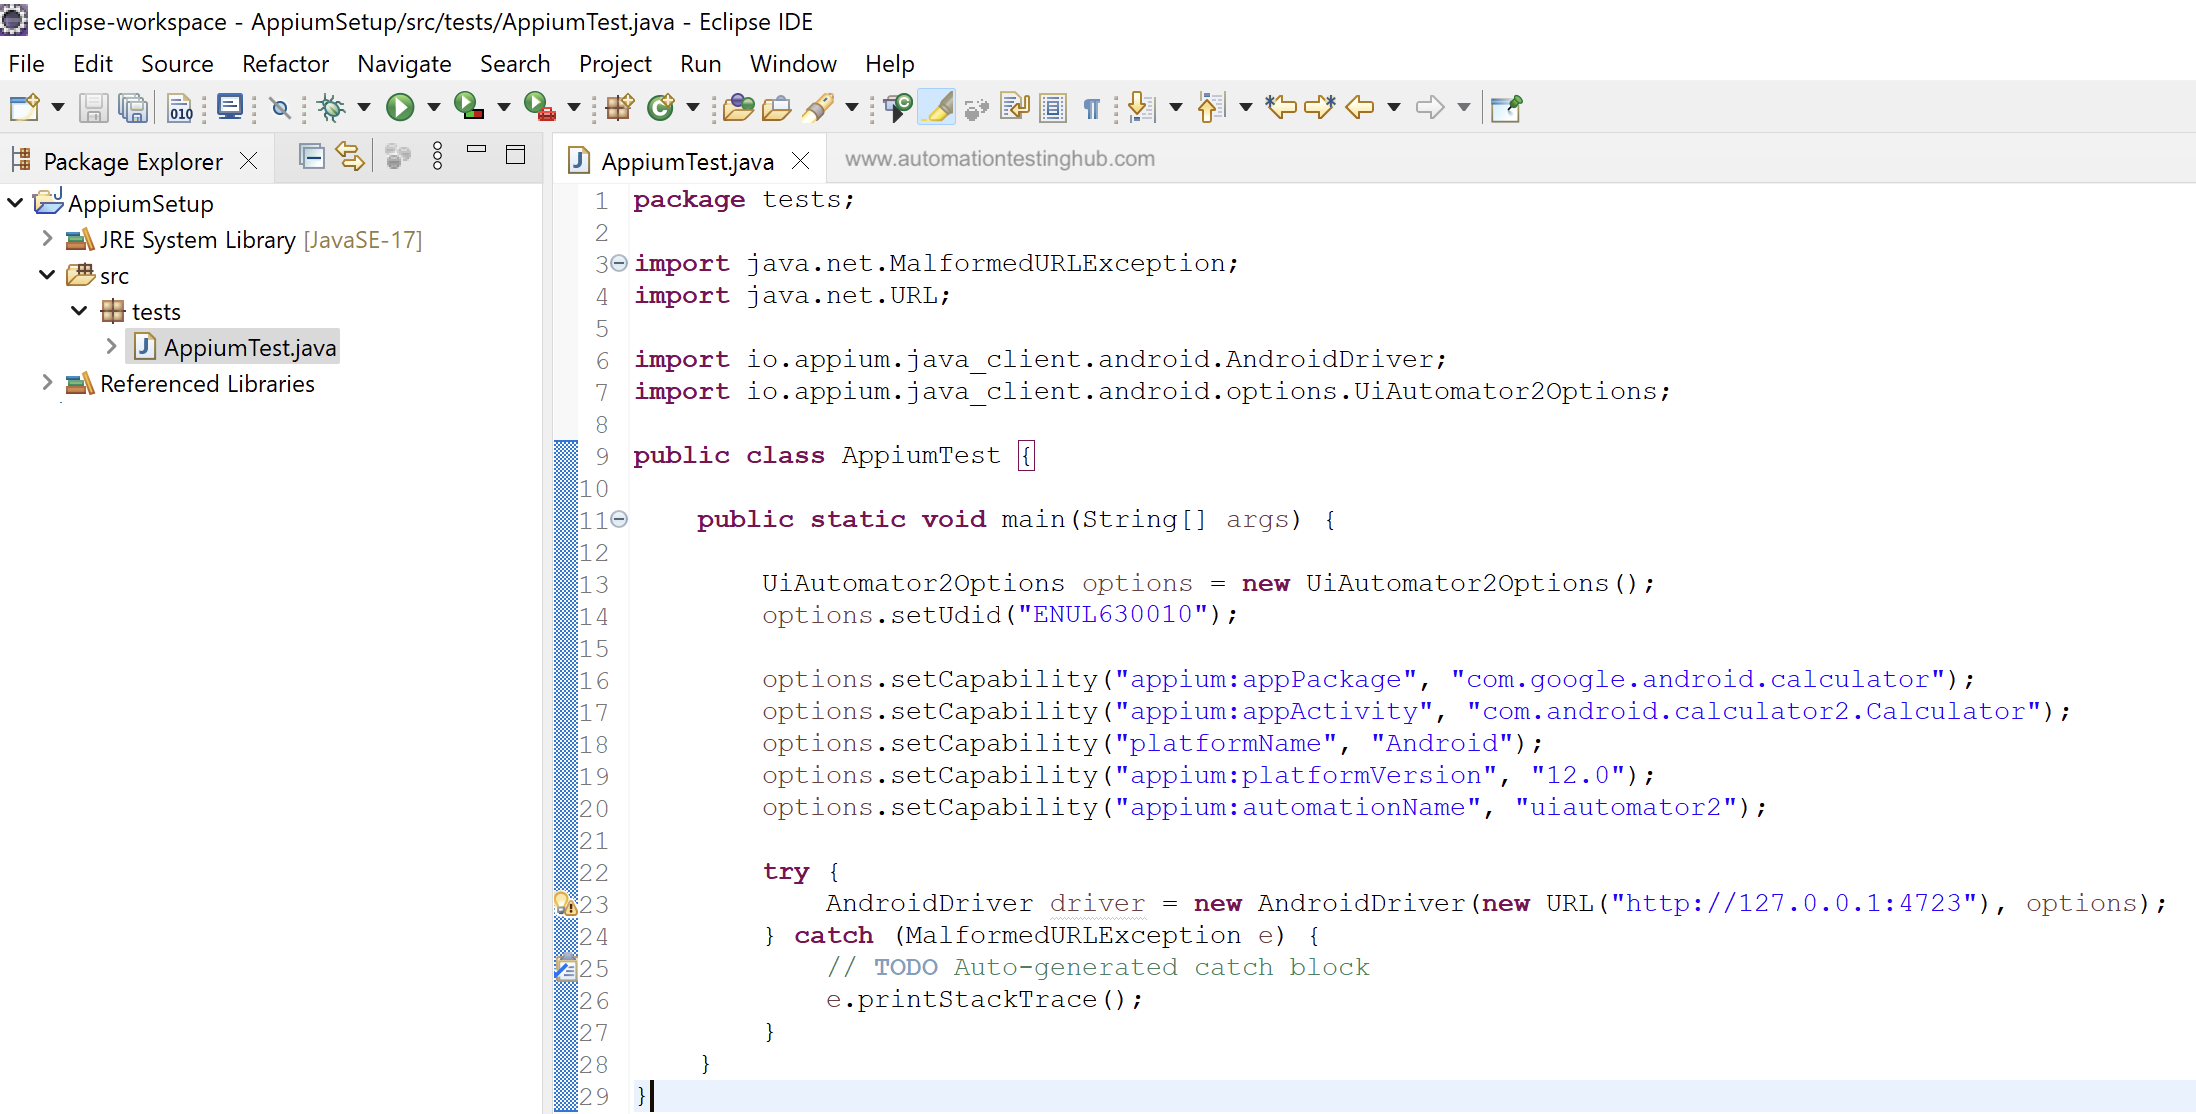
7. In this article, we will just provide you with the complete code that you would need to launch the calculator app. Don’t worry if you are not able to understand some of the details in the code. We will work on a separate article, where we will explain the code in detail.
8. For now, delete all the content in AppiumTest.java class and replace it with the code given below. Also, please make sure that you replace the device id (in line number 18) with the device id of your phone.
package tests;

import java.net.MalformedURLException;
import java.net.URL;

import io.appium.java_client.android.AndroidDriver;
import io.appium.java_client.android.options.UiAutomator2Options;

public class AppiumTest {

	public static void main(String[] args) {

		UiAutomator2Options options = new UiAutomator2Options();
	    options.setUdid("ENUL630010");

	    options.setCapability("appium:appPackage", "com.google.android.calculator");
	    options.setCapability("appium:appActivity", "com.android.calculator2.Calculator");
	    options.setCapability("platformName", "Android");
	    options.setCapability("appium:platformVersion", "12.0");
	    options.setCapability("appium:automationName", "uiautomator2");

	    try {
			AndroidDriver driver = new AndroidDriver(new URL("http://127.0.0.1:4723"), options);
		} catch (MalformedURLException e) {
			// TODO Auto-generated catch block
			e.printStackTrace();
		}
	}
}

9. Your code in Eclipse should look like this. Press Ctrl + S keys to save this Appium test script.
Note: When you check the code, you would observe that all the values (such as udid, appPackage, appActivity etc) are the ones that you had fetched in the previous sections of this article.
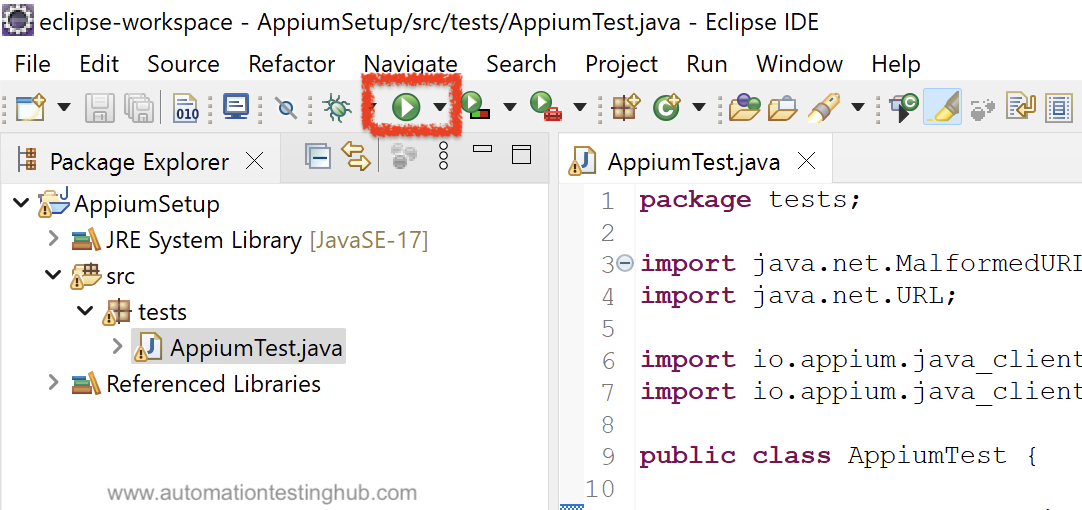
Run Appium Test Script
You have written your Appium test script. Its now time to run it. Please make sure that your mobile device is connected to your computer with USB and its unlocked. To run the script, click on the run icon from the toolbar.

Your script would start running and you would see that calculator app would get launched on your mobile device. This entire process might take 10-15 seconds because Appium has to connect to your mobile device first. A good approach would be to run your script and then monitor the Appium Desktop screen. You would notice that Appium Desktop screen should start showing some logs. This way you will know that your Appium test script is running.
Congratulations!!! With this, you have completed the first step of Appium mobile automation – which is to launch your mobile app with Appium code. If you have faced any issue while running the script, or if your app does not launch, then please let us know using the comments section.
What’s Next?
We understand that this is just the first step and a lot more is there to learn in Appium. But believe us, this was one of the hardest parts. If you get the setup right, and if you are able to launch your mobile app with Appium then it’s a great start. Learning scripting with Appium is not this hard, especially if you have some knowledge on Selenium.
We are in the process of adding more articles in our Appium tutorial series. You can follow us on our Facebook page to keep track of our latest articles.