Welcome to our Playwright testing tutorial!! In this tutorial series, we will walk you through the basics of automation testing with Playwright, where you will learn what playwright is, how you can install this tool, and how you can start writing basic automation scripts that run on your web browser.

What is Playwright?
Playwright is an open-source framework for end-to-end web testing developed by Microsoft. You can use Playwright to test all modern web apps such as Firefox, Chromium and Webkit. Google Chrome and Microsoft Edge browsers are based on Chromium, and Webkit is a browser engine used by Safari. This means that Playwright can be used to automate tests on all your modern web browsers – Firefox, Chrome, Safari and Edge
In addition to this, you can use Playwright on Windows, Linux and MacOS. You can also use Playwright for different languages such as TypeScript, JavaScript, .NET, Java and Python. There are lot of other features such as mobile web support, auto-wait, saving authentication state etc. We will cover some of these features in detail in our upcoming articles
Pre-requisites to installing Playwright
As mentioned in the previous section, Playwright supports multiple different languages. However, in this tutorial series, we will be using Playwright with JavaScript. Hence, you will need to setup the following tools before starting with Playwright.
1) Download and Install Node.js – Node.js/NPM will be used to download and install Playwright for JavaScript
2) Download and Install Visual Studio Code (VS Code) – We will be using VS Code as our code editor, to write the automation test scripts
Download and Install Playwright
Follow the steps given below to download and install Playwright (the steps mentioned below are common across different operating systems such as Windows or MacOS) –
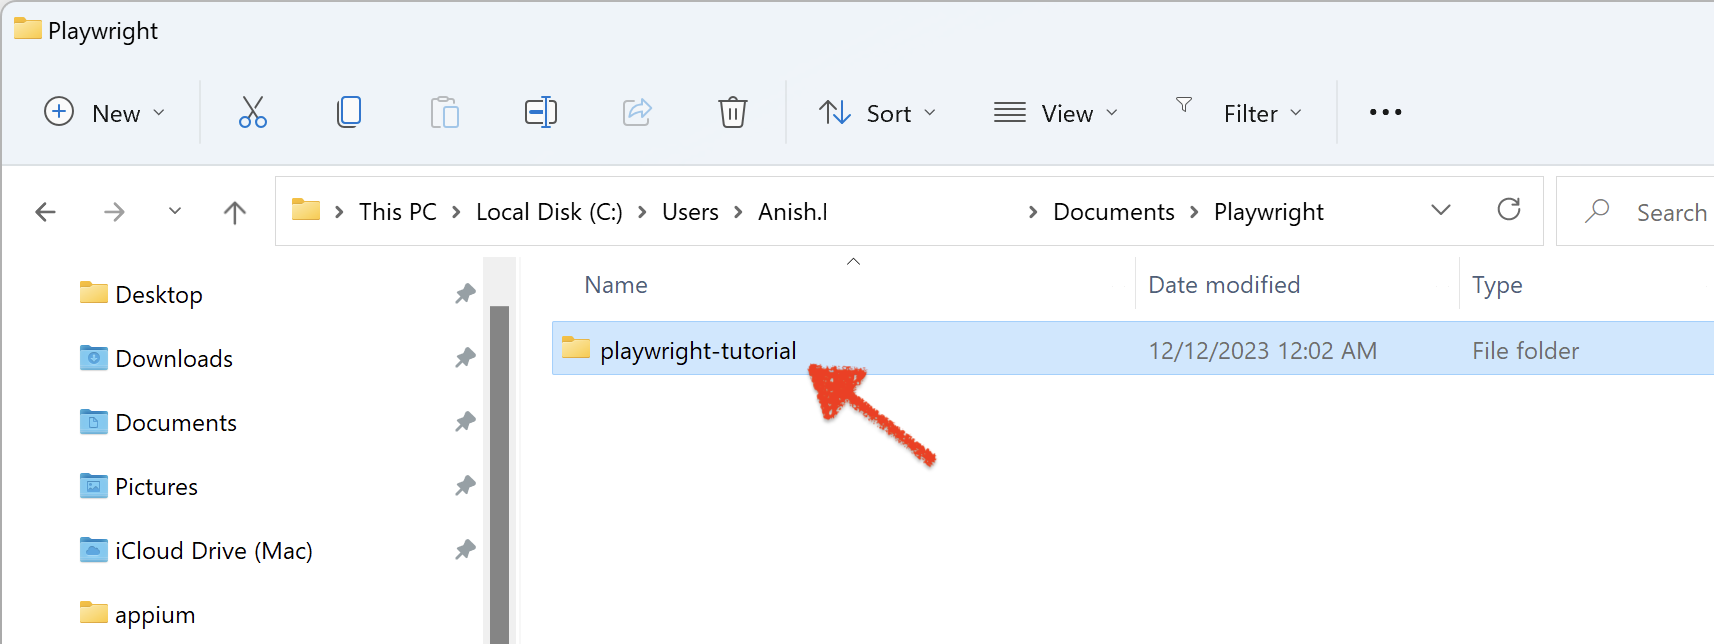
1) Create a new folder/directory on your machine for this Playwright testing project. We are creating a folder named playwright-tutorial, as shown in the below image

2) Open command prompt, or terminal and cd to this playwright-tutorial folder

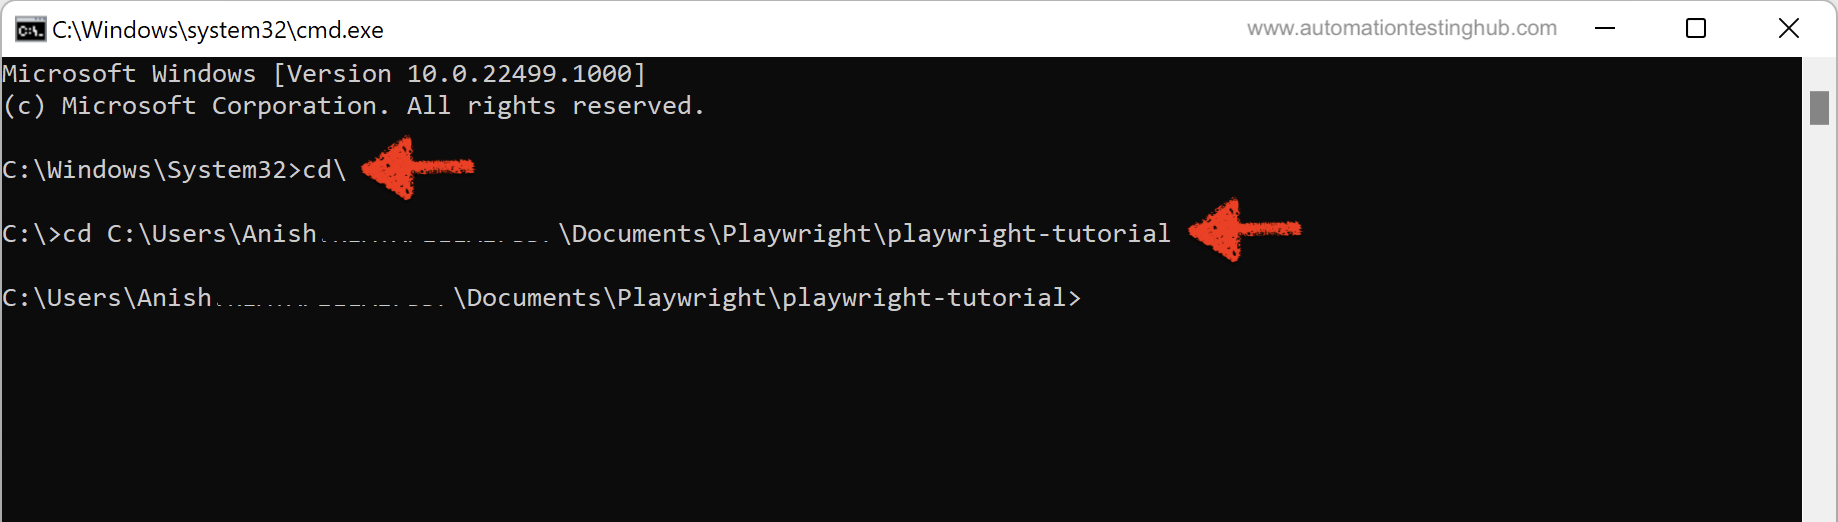
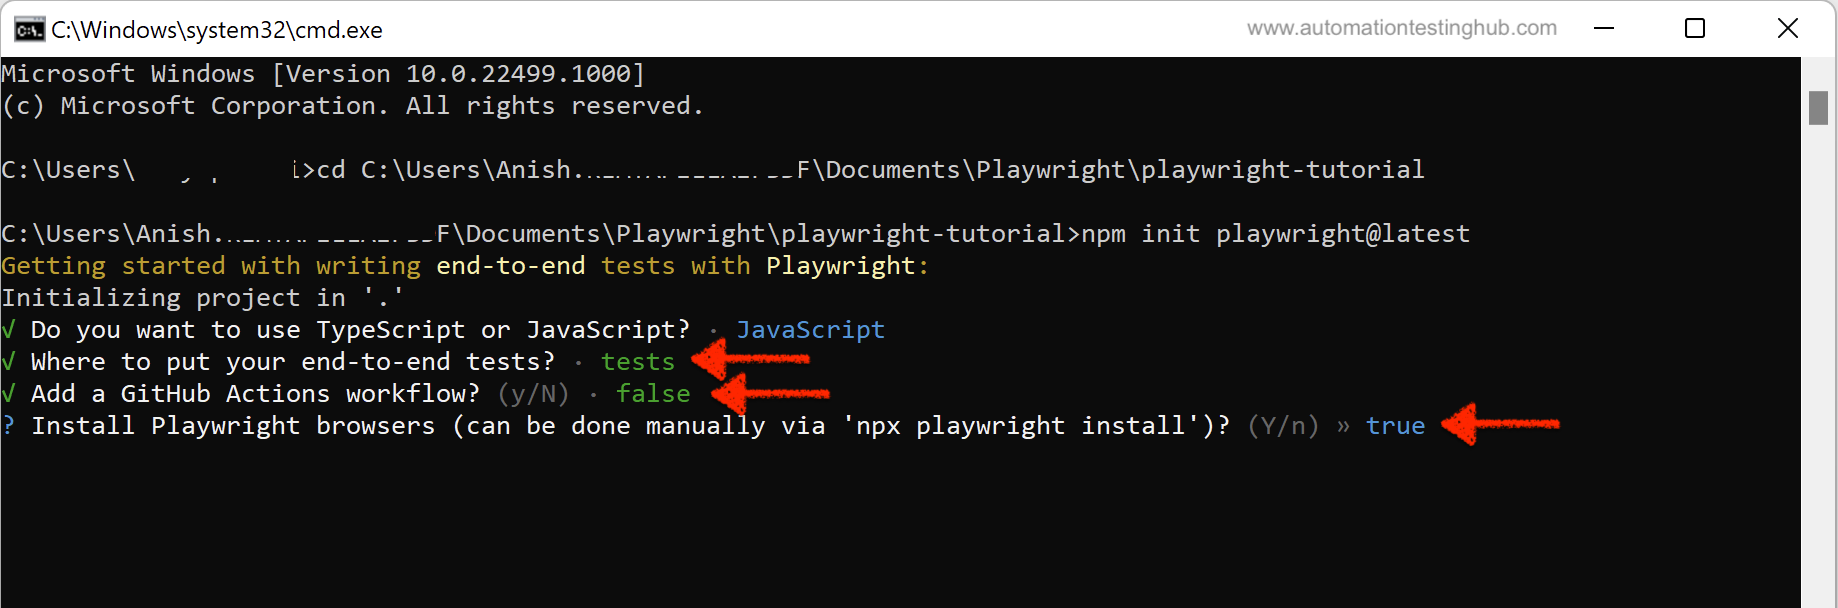
3) Next step is to install playwright including the browsers. For this, run the following command in cmd or terminal – npm init playwright@latest
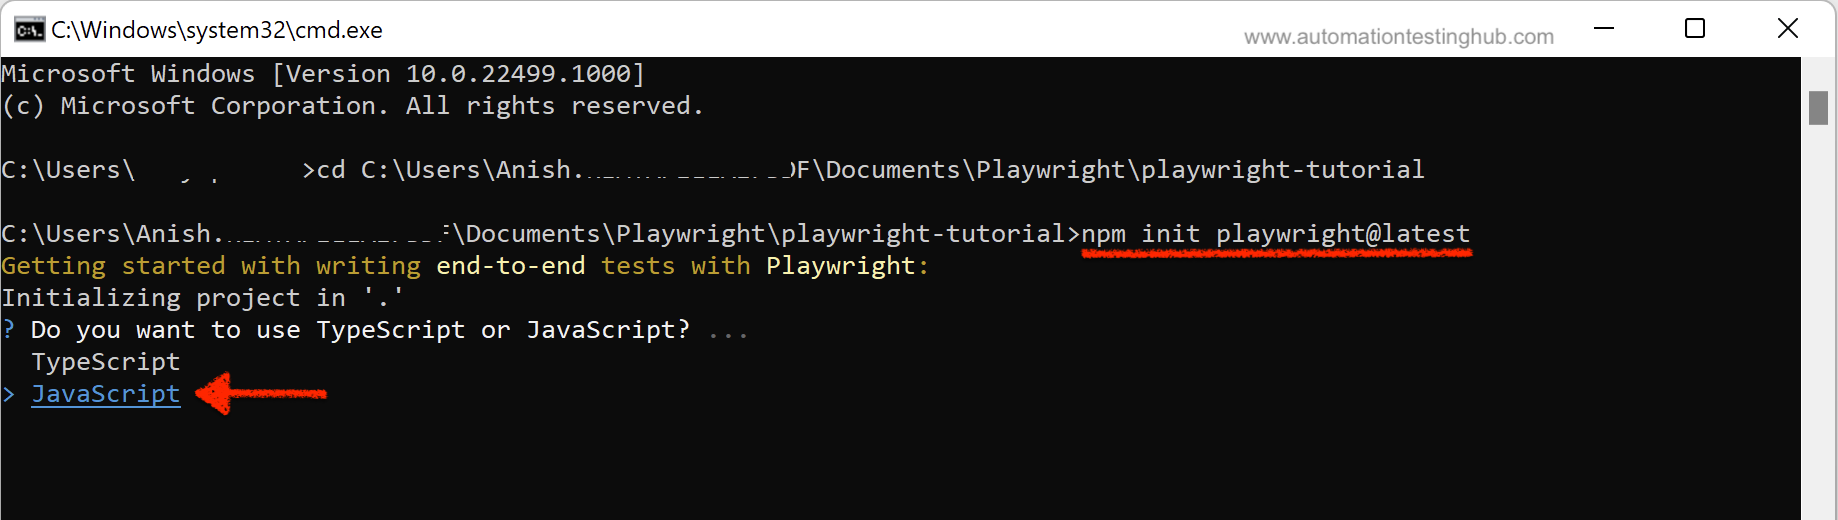
Once you run this command, the setup will prompt you to answer few questions –
3a) If the setup asks about installing playwright, then type y and hit enter.
3b) Next it would ask, if you want to use TypeScript or JavaScript. Use the down arrow key to select JavaScript and then hit Enter

3c) The next question is about the location of end-to-end tests. Type tests and then hit Enter
3d) After this, the setup will prompt for adding a Github actions workflow. False would be the default action, leave it as it is and hit Enter
3e) Next question is about Installing Playwright browsers. Default option is true, leave it as it is and then hit enter

This will start the installation process. In the command prompt, you would be able to see that npm is installing Playwright and the browsers as well (Chromium, Firefox and Webkit)

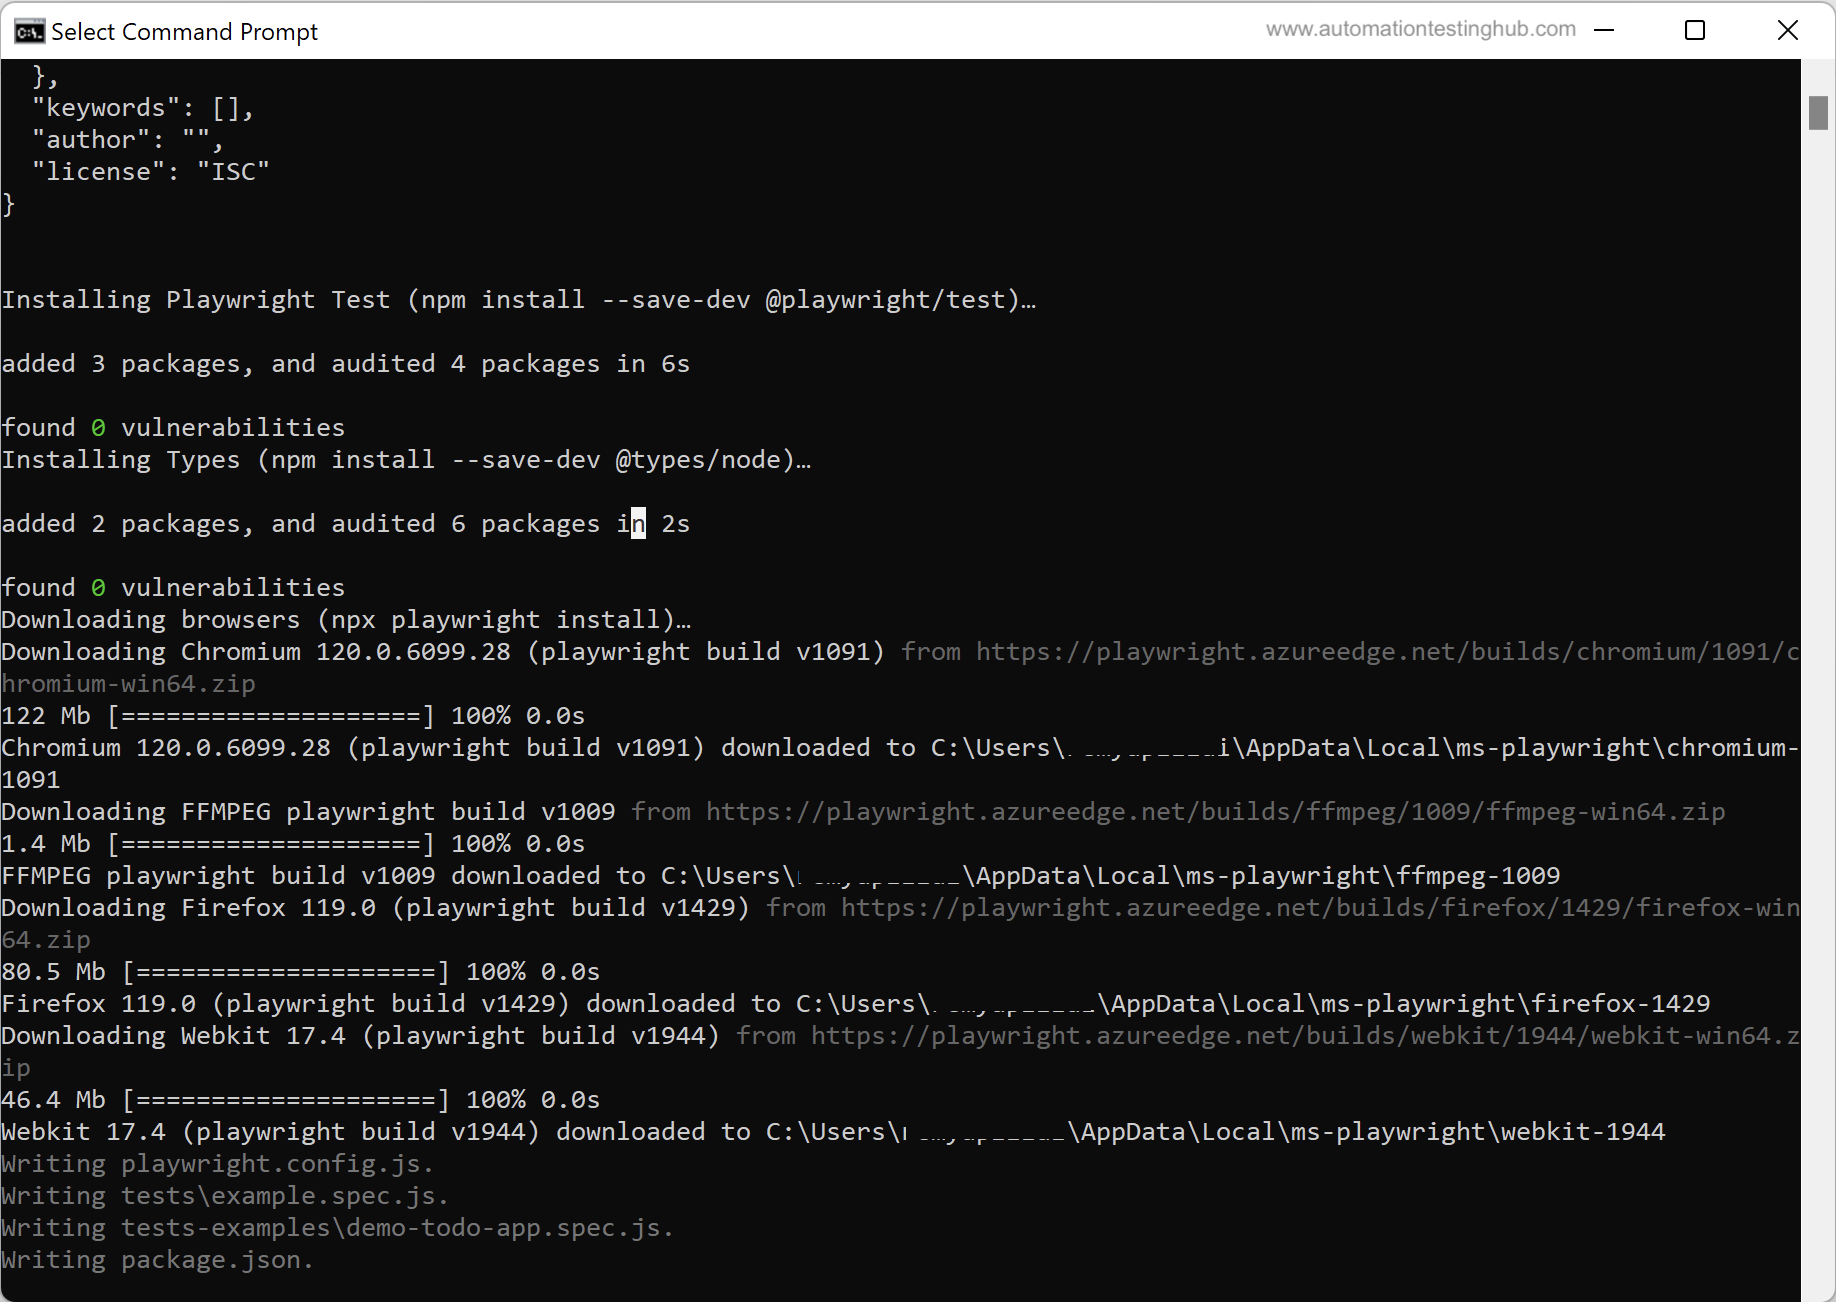
Once the installation is complete, you will see the final command prompt/terminal screen, which should look similar to the screenshot given below
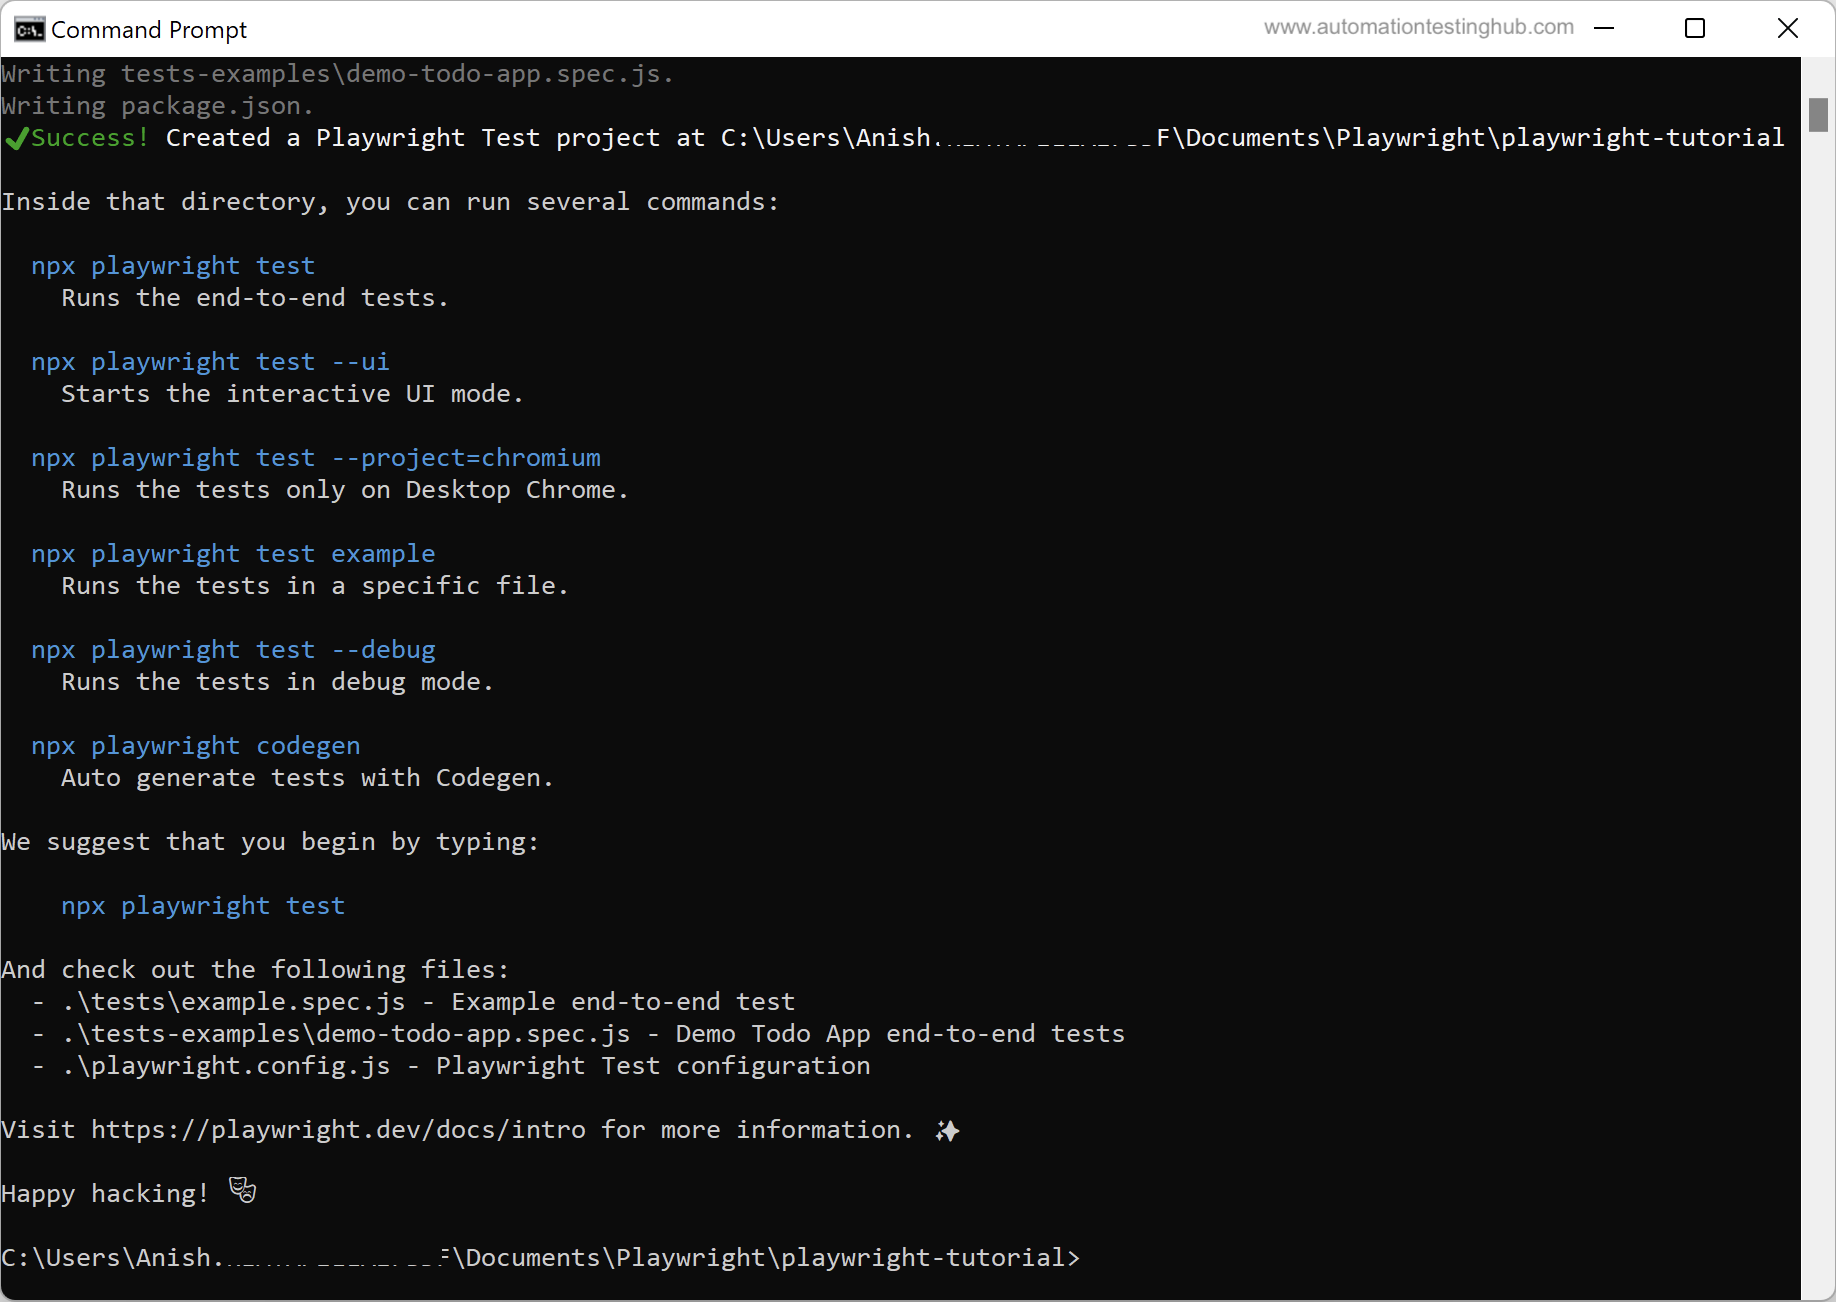
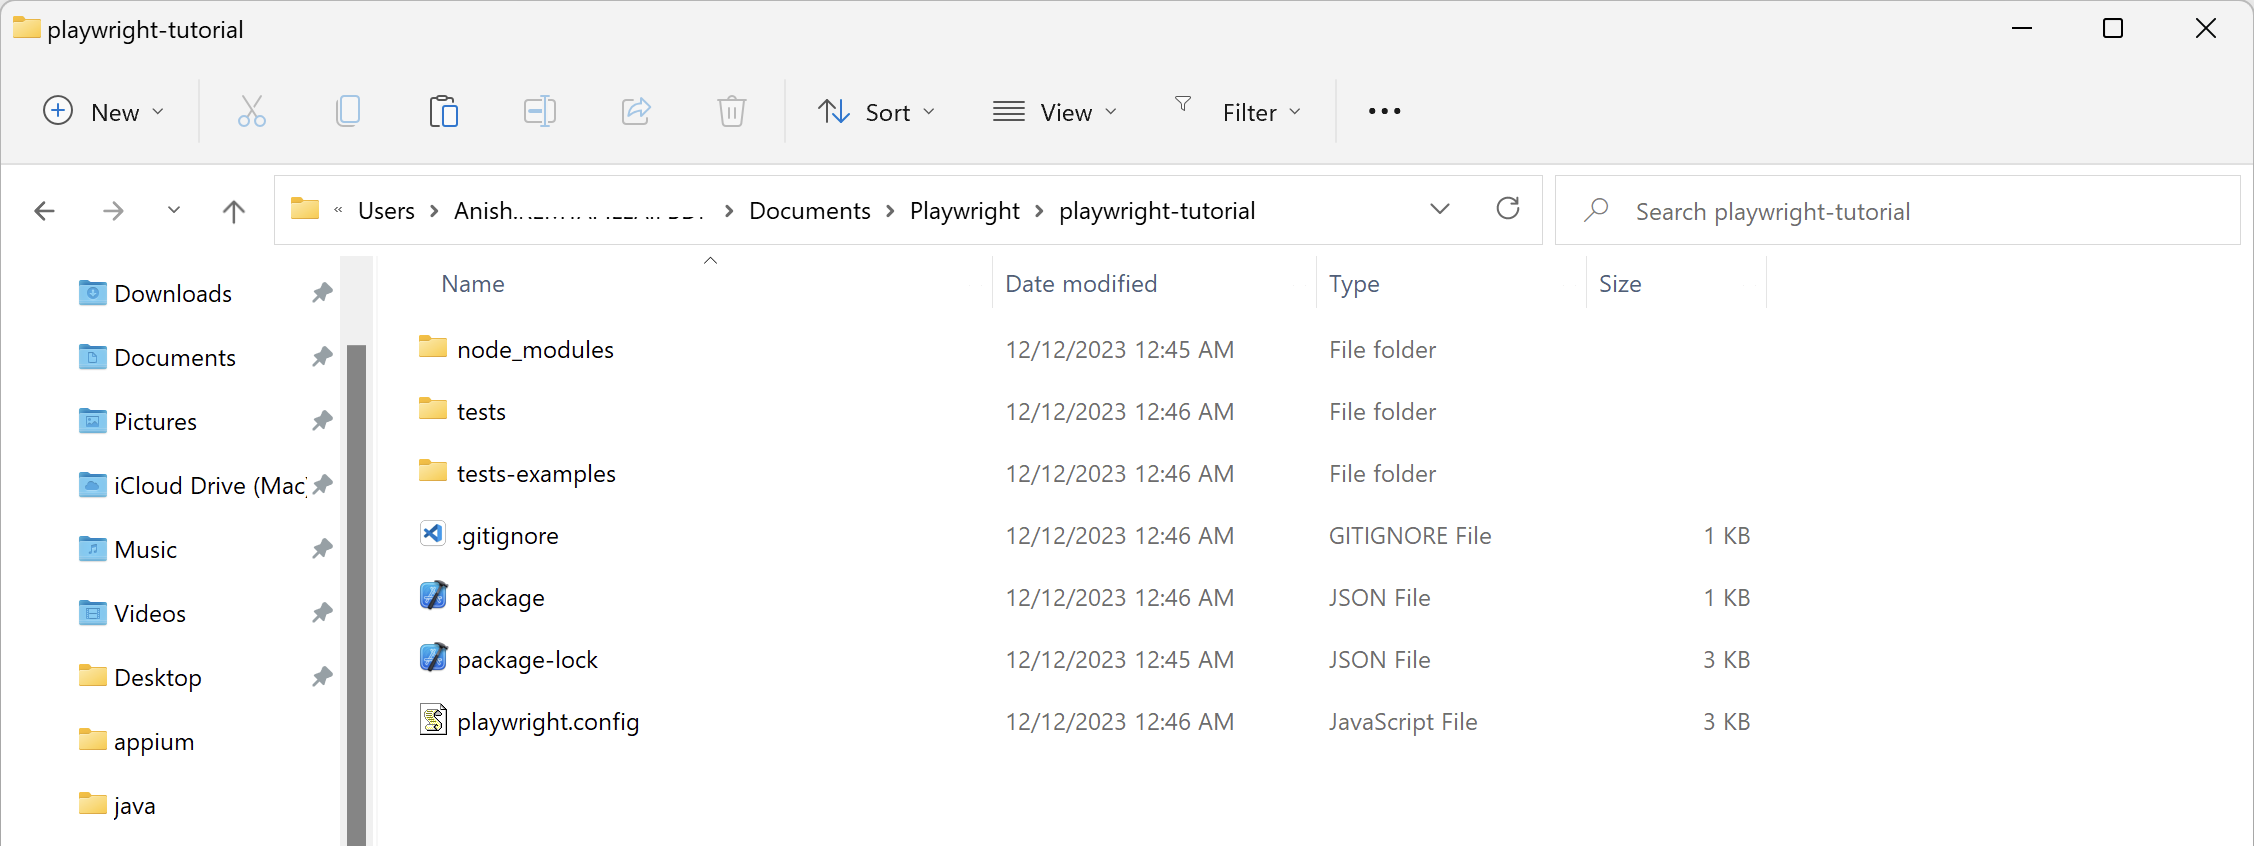
As the final step, open the playwright-tutorial folder once again. You will notice that the playwright setup/installation has been done inside this folder. This folder now contains multiple sub-folders such as node_modules, tests and some individual files like playwright.config

This completes our Playwright installation process. Let us now jump over to the next section where you will learn how to write your first test script with Playwright.
Write first Playwright test script
In this section, you will write your first automation test script with Playwright. The test scenario that you will automate is as follows –
- Open “Google” webpage on a browser
- Enter “automationtestinghub” in the search box
- Click on “Google Search” button
- Wait till the search results are displayed
Follow the steps given below to write the test script –
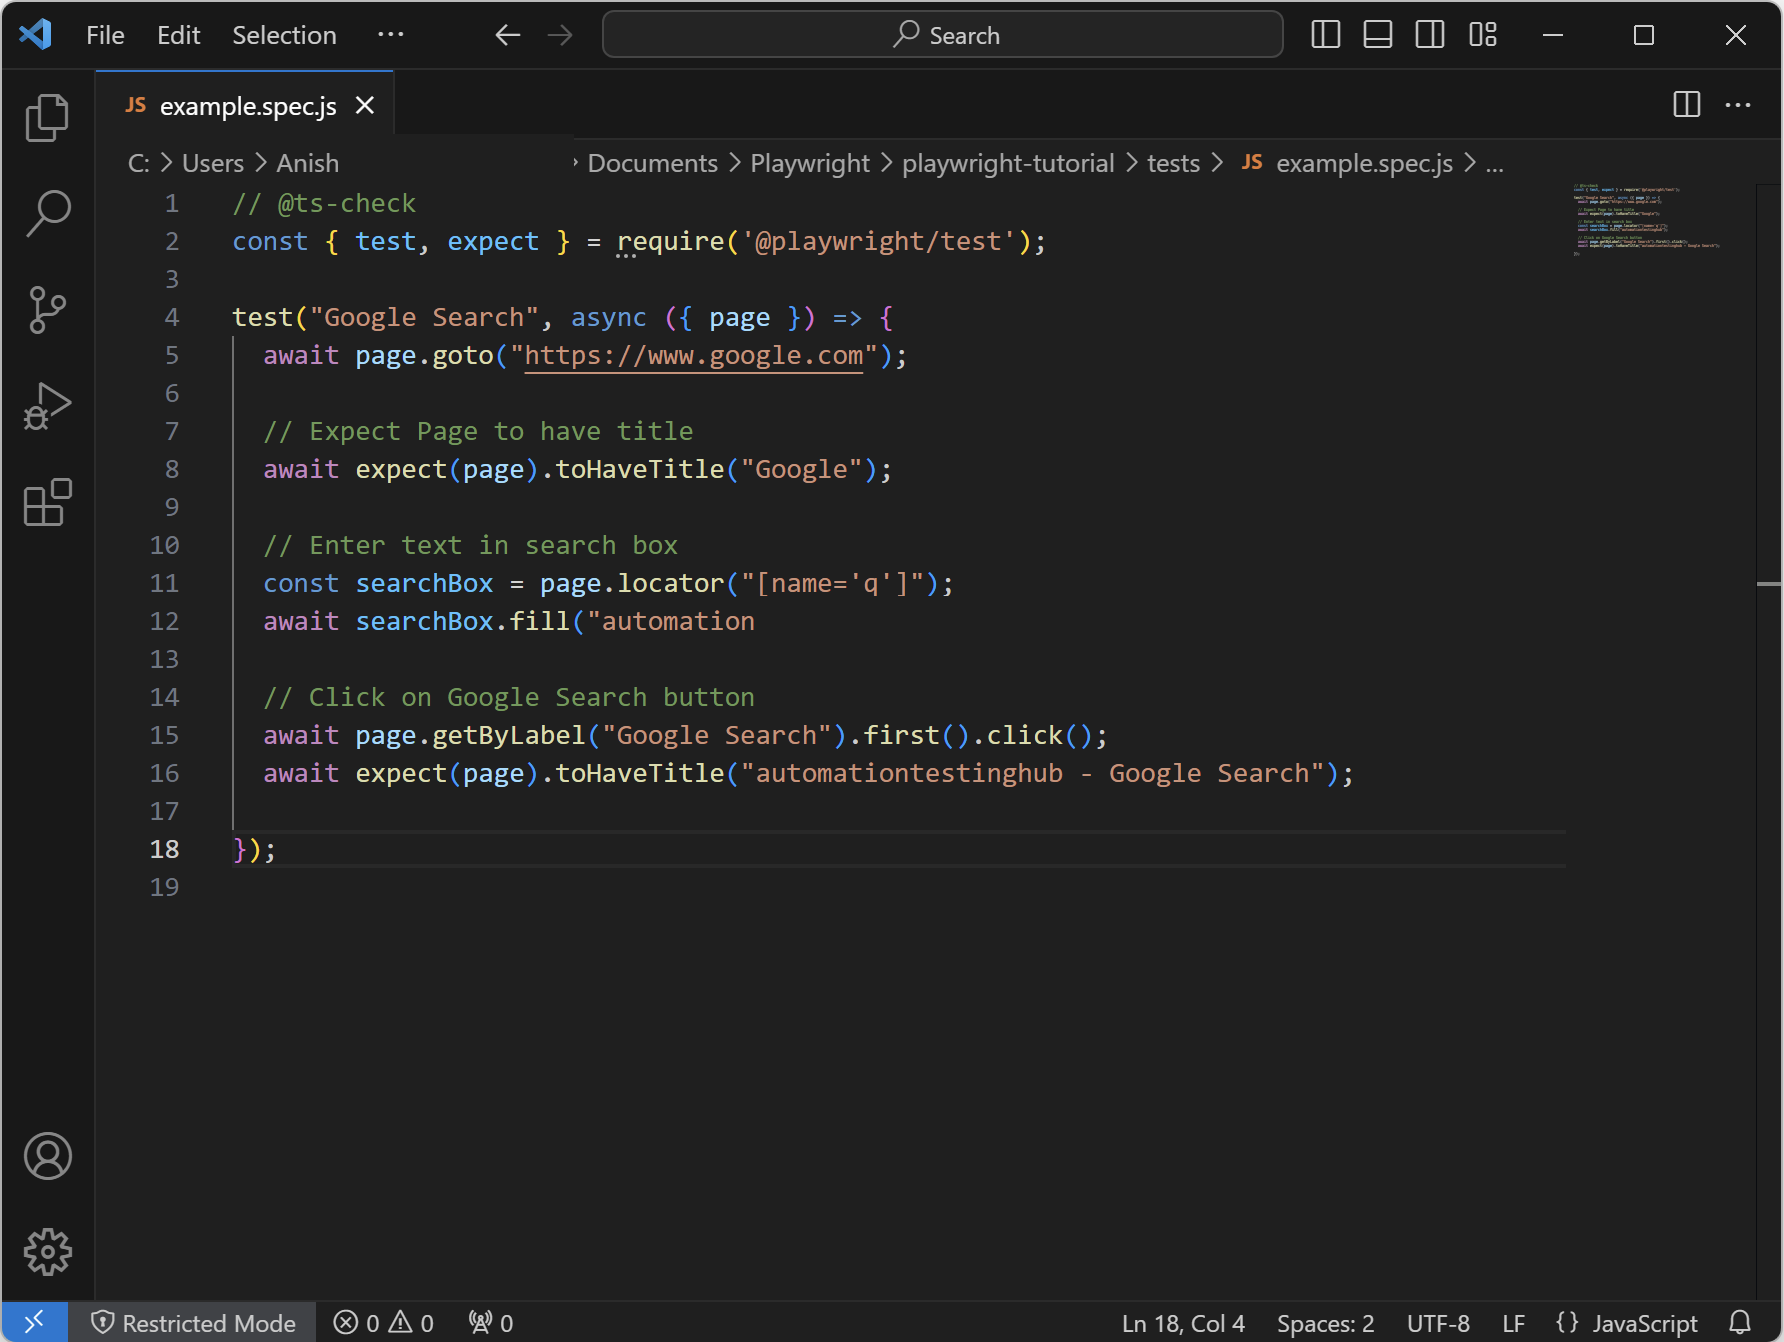
1) Go to tests folder in playwright-tutorial folder. Here you will see example.spec file
2) Open example.spec file in Visual Studio Code. You will notice that this file has 2 tests added already – test ‘has title’ and test ‘get started link’


3) Delete both the tests, and then copy paste the test script given below
test("Google Search", async ({ page }) => {
  await page.goto("https://www.google.com");

  // Expect Page to have title
  await expect(page).toHaveTitle("Google");

  // Enter text in search box
  const searchBox = page.locator("[name='q']");
  await searchBox.fill("automationtestinghub");

  // Click on Google Search button
  await page.getByLabel("Google Search").first().click();
  await expect(page).toHaveTitle("automationtestinghub - Google Search");

});
4) The code in example.spec file should now look like this. Save these changes

Running the test script
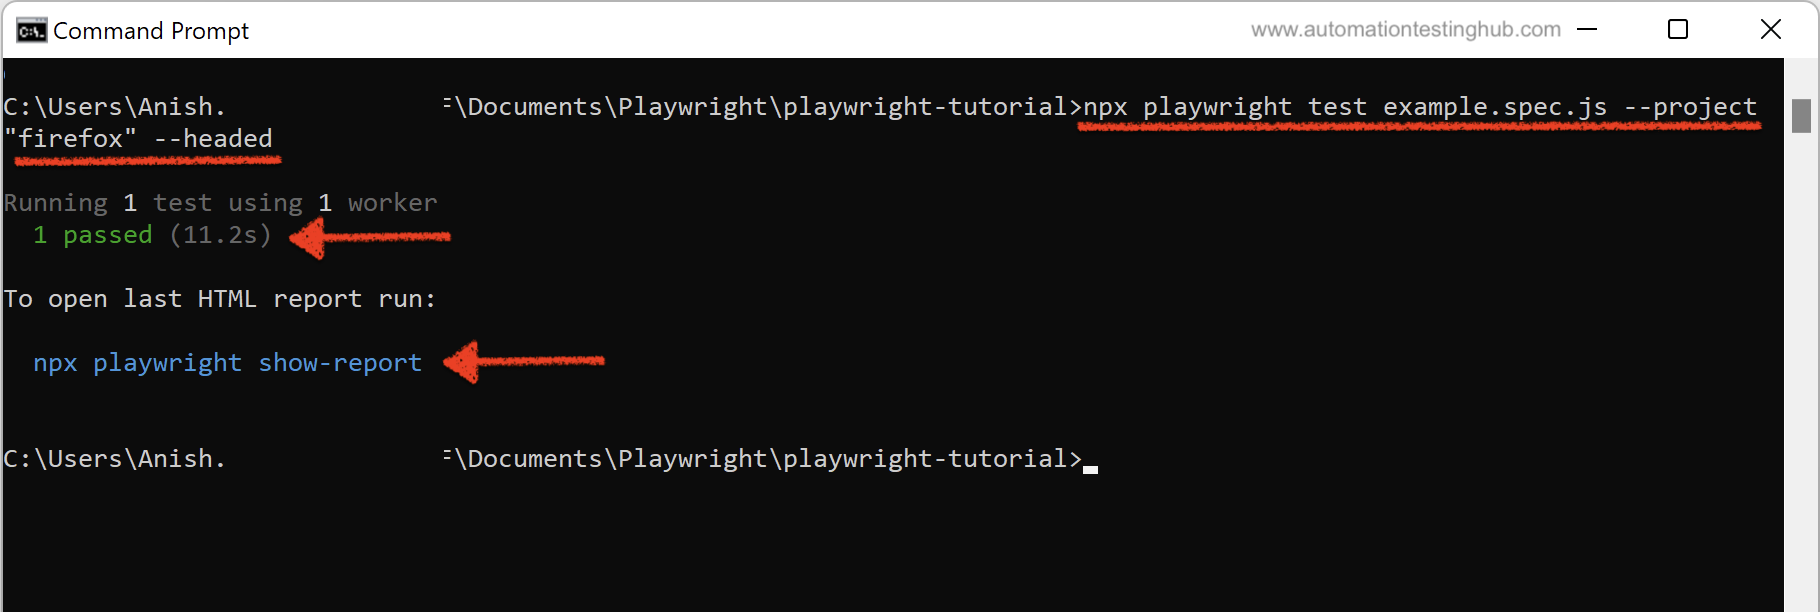
Let us now run this test script on Firefox browser (which was installed during Playwright installation process in the previous section). To run this test –
1) Go to command prompt or terminal
2) Type this command – npx playwright test example.spec.js --project "firefox" --headed and hit Enter
3) Since we have specified Firefox broswer with headed option, you will notice that once the execution starts, Firefox browser will get opened, the test script would get executed and once the execution is finished, the browser will automatically close as well.
4) Command prompt / terminal will display the success result as shown in the below image

From the above screenshot, you would have noticed that execution results are available in the form of HTML report as well. To view the HTML report, type npx playwright show-report and hit ENTER

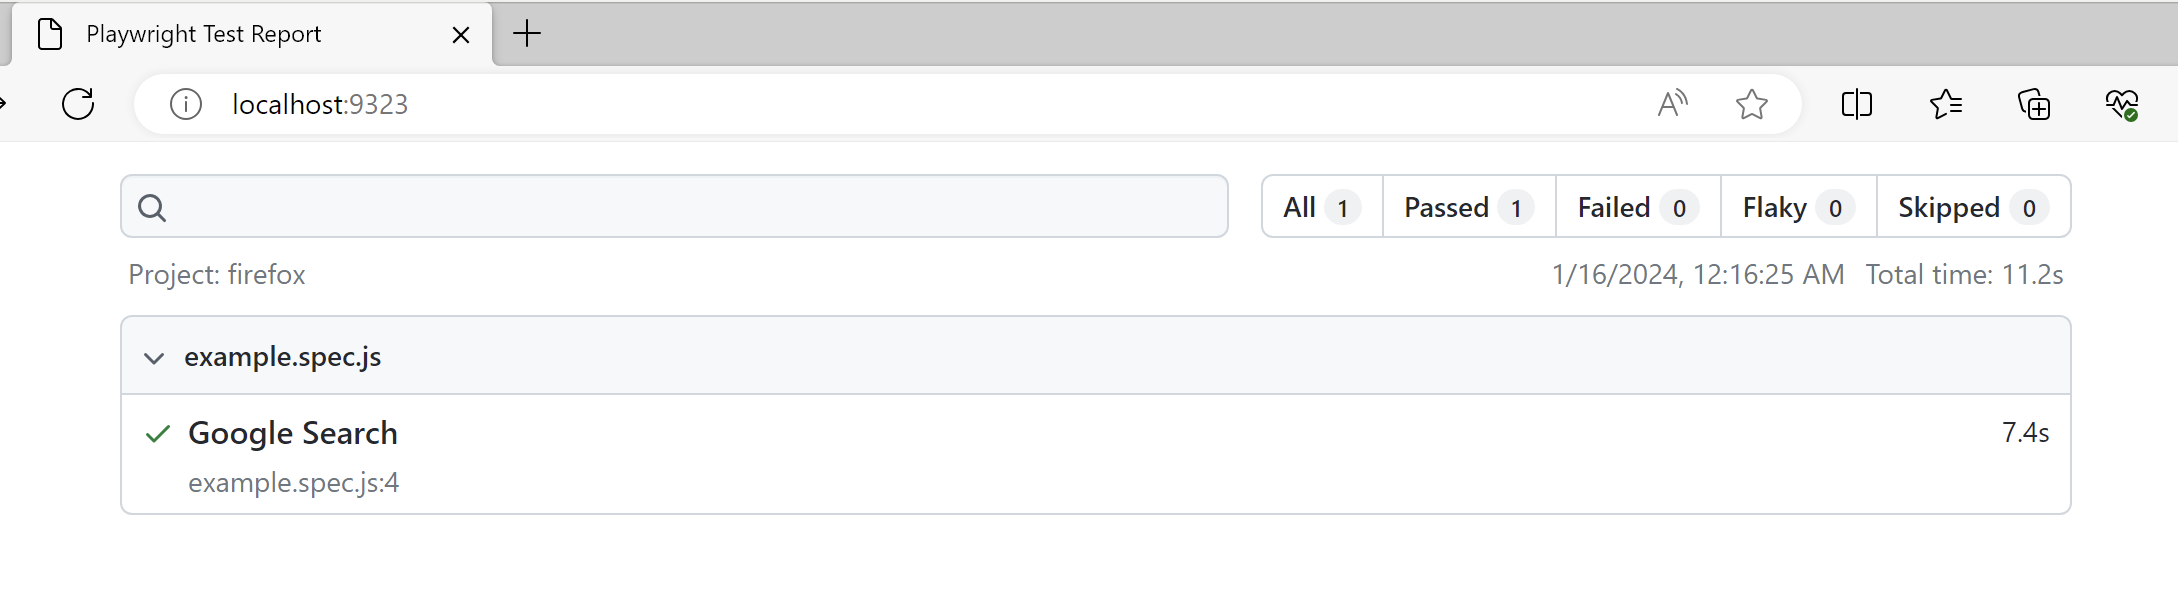
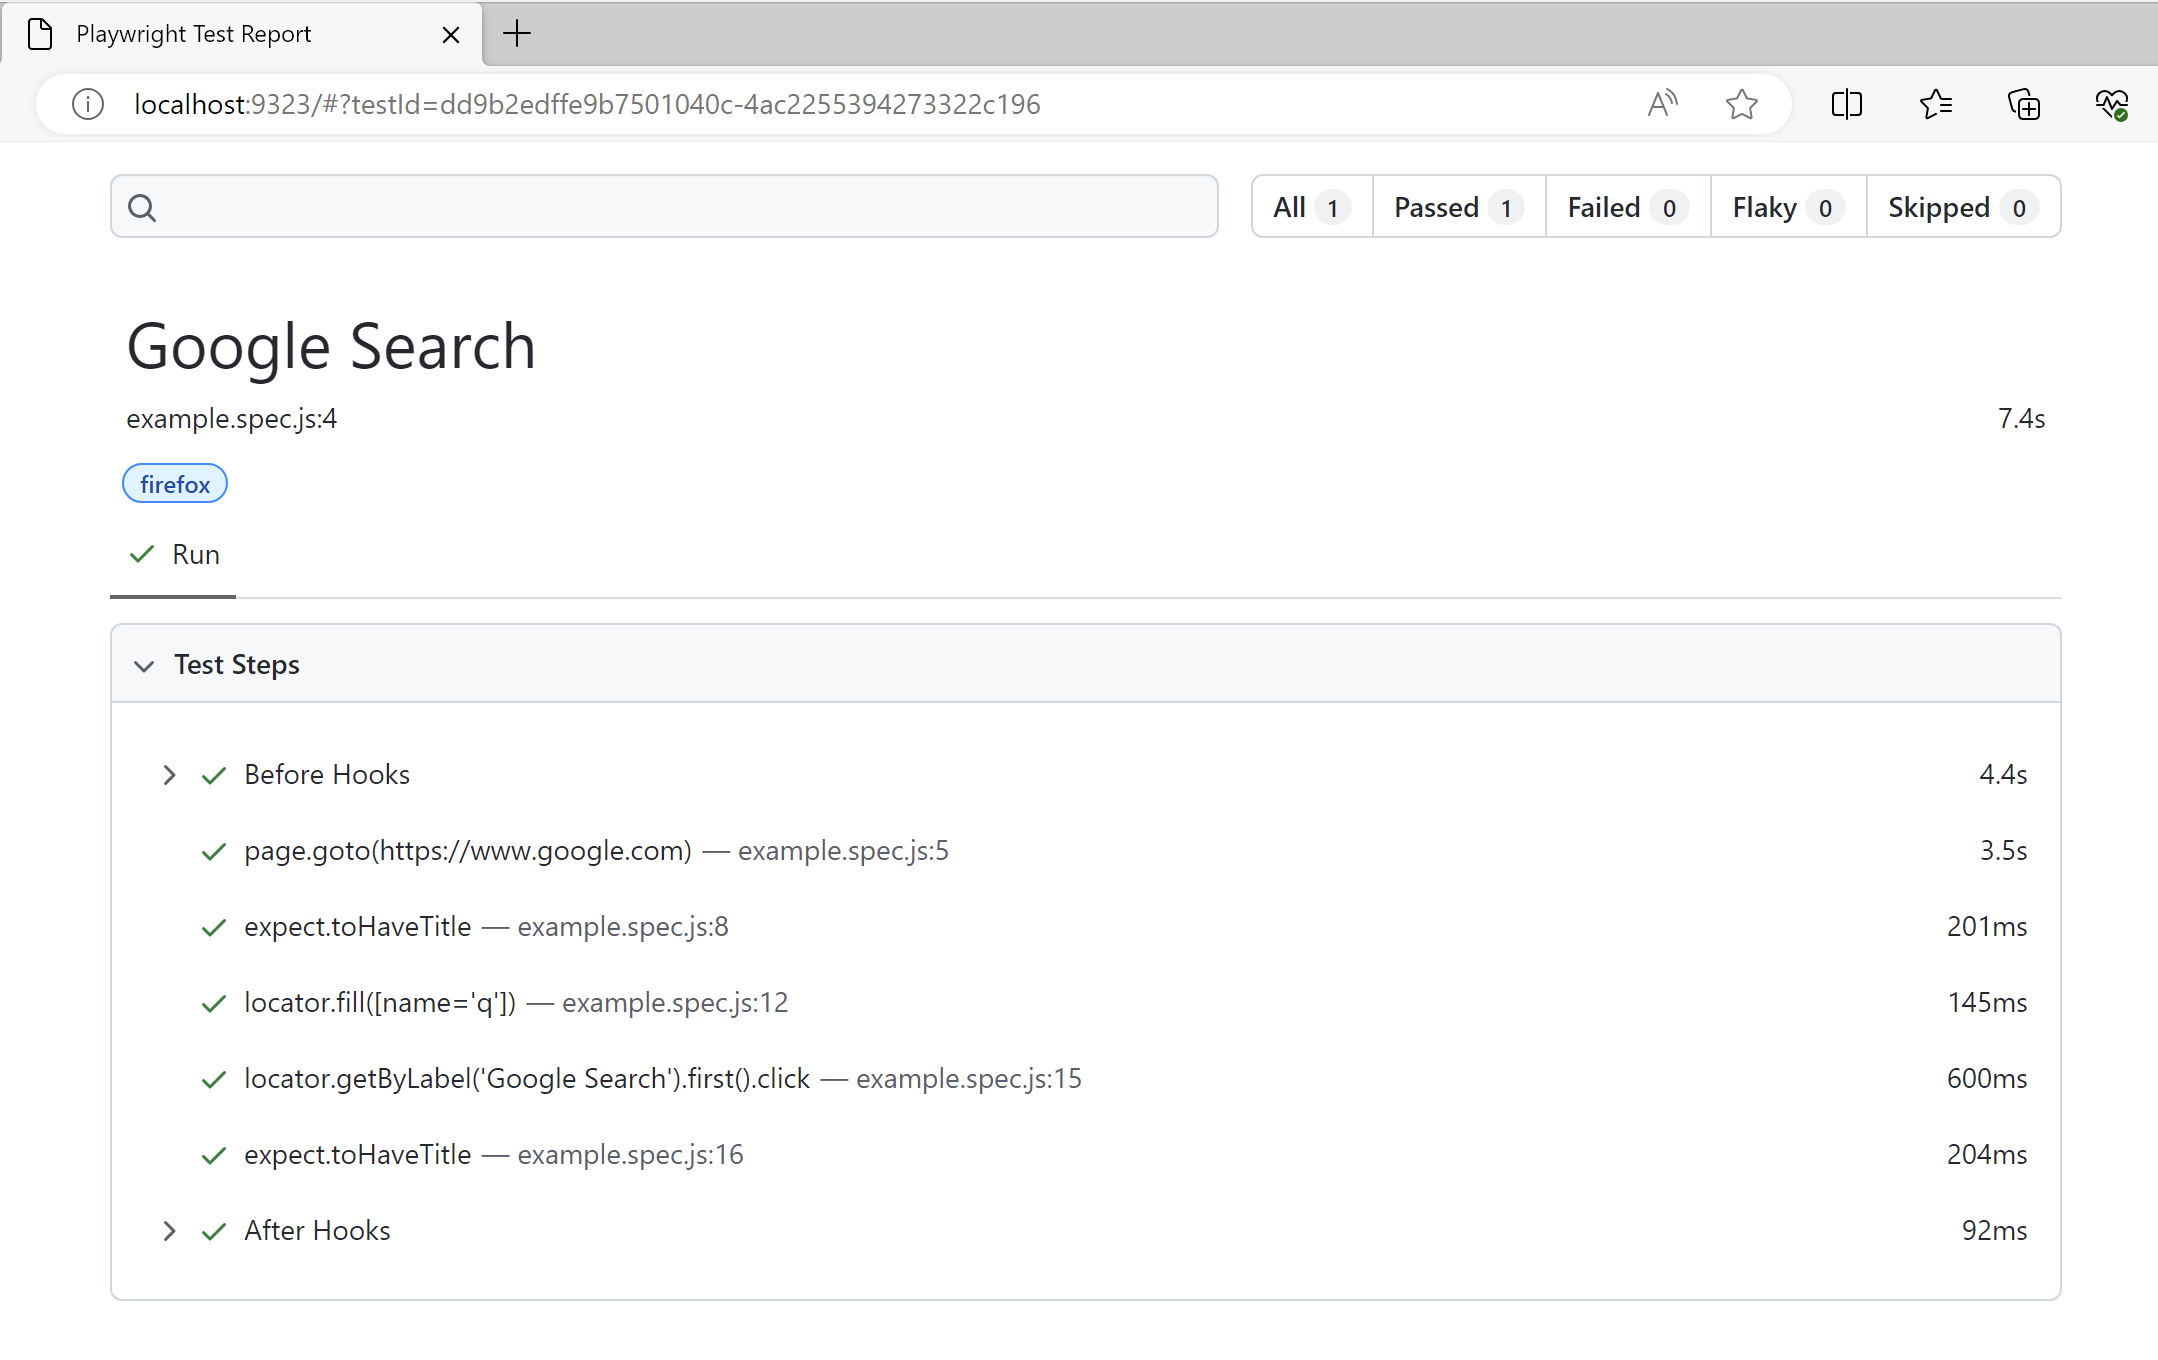
You can click on the test case (Google Search in this example), to view the detailed test steps as well

With this, we conclude our first article on Playwright testing tutorial where you learned how to install Playwright and write a basic test script. Stay tuned for more articles on Playwright automation testing.