

This is a short article on how you can run Selenium headless tests on Chrome and Firefox. With Selenium Webdriver version 3.6.0, its now super easy to run your scripts in headless mode on both Chrome and Firefox. Let us see how this works!!

Selenium Headless – How does it work
Starting from Selenium WebDriver v3.6.0, Selenium exposes a new method – setHeadless() as part of the Options class. You can just invoke this method during browser instantiation to run your scripts in headless mode.
Selenium WebDriver and Browser versions
The code in this article has been tested on the below versions of Selenium and browsers –
- Selenium WebDriver – v3.6.0
- ChromeDriver – v2.33
- GeckoDriver – v0.19.0
- Chrome Browser – v61
- Forefox Browser – v56.0.1
You can use any of these version or the newer versions to try this code.
Chrome Headless with Selenium
The code given below runs a sample test in Google Chrome in headless mode.
import org.openqa.selenium.By;
import org.openqa.selenium.Keys;
import org.openqa.selenium.WebDriver;
import org.openqa.selenium.chrome.ChromeDriver;
import org.openqa.selenium.chrome.ChromeOptions;

public class ChromeHeadless {

	public static void main(String[] args) {

		System.setProperty("webdriver.chrome.driver", "C:\\selenium_drivers\\chromedriver.exe");

		//Set Chrome Headless mode as TRUE
		ChromeOptions options = new ChromeOptions();
		options.setHeadless(true);

		//Instantiate Web Driver
		WebDriver driver = new ChromeDriver(options);
		driver.get("http://www.google.com");
		System.out.println("Page title is - " + driver.getTitle());

		//Search on Google
		driver.findElement(By.name("q")).sendKeys("selenium webdriver");
		driver.findElement(By.name("q")).sendKeys(Keys.ENTER);

		try {
			Thread.sleep(3000);
		} catch (InterruptedException e) {
			e.printStackTrace();
		}
		//Display number of results on Console
		System.out.println("Total Results - " + driver.findElement(By.id("resultStats")).getText());

		driver.close();
	}

}
Please note that the program uses couple of System.out.println statements just to show that the code works fine in headless mode. Try it out and see if it works for you. If you face any issues with the code, please check this link – Selenium WebDriver Setup and make sure that you have setup Selenium correctly.
Firefox Headless with Selenium
Code to launch Firefox in headless mode is given below –
import org.openqa.selenium.By;
import org.openqa.selenium.Keys;
import org.openqa.selenium.WebDriver;
import org.openqa.selenium.firefox.FirefoxDriver;
import org.openqa.selenium.firefox.FirefoxOptions;

public class FirefoxHeadless {

	public static void main(String[] args) {

		System.setProperty("webdriver.gecko.driver", "C:\\selenium_drivers\\geckodriver.exe");

		//Set Firefox Headless mode as TRUE
		FirefoxOptions options = new FirefoxOptions();
		options.setHeadless(true);

		//Instantiate Web Driver
		WebDriver driver = new FirefoxDriver(options);
		driver.get("http://www.google.com");
		System.out.println("Page title is - " + driver.getTitle());

		//Search on Google
		driver.findElement(By.name("q")).sendKeys("selenium webdriver");
		driver.findElement(By.name("q")).sendKeys(Keys.ENTER);

		try {
			Thread.sleep(3000);
		} catch (InterruptedException e) {
			e.printStackTrace();
		}
		//Display number of results on Console
		System.out.println("Total Results - " + driver.findElement(By.id("resultStats")).getText());

		driver.close();
	}
}
Screenshots with Headless Browser
Taking screenshots would work with the same approach that you use it when you run your scripts in non-headless mode. The below code shows shows how this can be implemented at a very basic level.
import java.io.File;
import java.io.IOException;
import org.apache.commons.io.FileUtils;
import org.openqa.selenium.OutputType;
import org.openqa.selenium.TakesScreenshot;
import org.openqa.selenium.WebDriver;
import org.openqa.selenium.chrome.ChromeDriver;
import org.openqa.selenium.chrome.ChromeOptions;
public class ChromeHeadlessWithScreenshot {
public static void main(String[] args) {
System.setProperty("webdriver.chrome.driver", "C:\\selenium_drivers\\chromedriver.exe");
//Set Chrome Headless mode as TRUE
ChromeOptions options = new ChromeOptions();
options.setHeadless(true);
//Instantiate Web Driver and open web page
WebDriver driver = new ChromeDriver(options);
driver.get("http://www.google.com");
System.out.println("Page title is - " + driver.getTitle());
//Take screenshot
File file = ((TakesScreenshot)driver).getScreenshotAs(OutputType.FILE);
try {
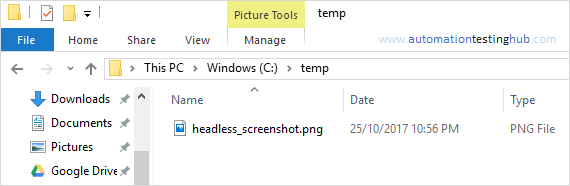
FileUtils.copyFile(file, new File("C:\\temp\\headless_screenshot.png"));
} catch (IOException e) {
e.printStackTrace();
}
driver.close();
}
}
Once your run the above code snippet, screenshot will be captured and saved in the location that you specified as shown below.

Please note that FileUtils class which saves the screenshot is part of org.apache.commons.io package. If you can’t find this with the Selenium JARs, then please download commons-io-2.6.jar JAR (or the latest version) from Commons IO link.
This was all about how you can get started with Headless Browser testing with Selenium using Chrome and Firefox. Please feel free to share your feedback with us using the comments section.
We share lots of additional information on Facebook, including interesting articles from other blogs as well. Like our page to get all these updates. See you there!!
