
This article will provide you with a detailed guide to setup Android Environment variables. This article is a continuation of our previous articles on Android, where you learned how to download and install Android Studio bundle and then how to install additional Android SDK tools.
The main Android environment variables that you would have to set are ANDROID_HOME and Path variables. If you have followed our Appium Tutorial series from the beginning, then you would remember that this article is similar to our previous article where we setup Java environment variables. Let’s now start with the setup process.
Find the folder location where you installed Android SDK
In the first step we will try to find the folder path where we have installed Android SDK –
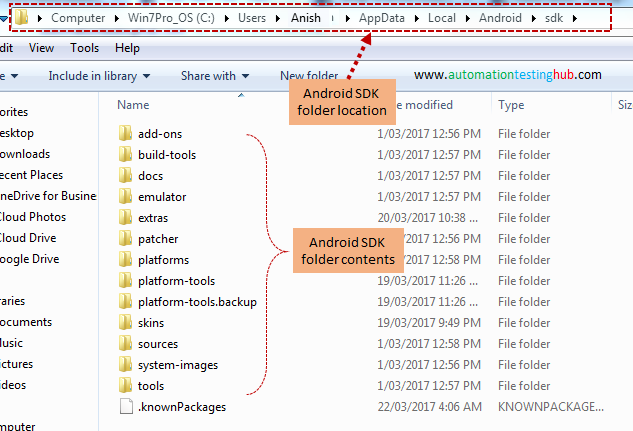
1. The default folder location where Android SDK is installed is – C:\Users\Anish\AppData\Local\Android\sdk. Please open this folder path and see if you have Android SDK folder in there with contents as shown below

Please note that if you try to open this folder location by going to each folder one by one (i.e. C > Users > YourUserName and so on… ), then you might not see the AppData folder as its a hidden folder. So, you will have to make hidden folders visible first
2. Copy the SDK folder location once you find it. For us, this folder location is – C:\Users\Anish\AppData\Local\Android\sdk
Setup Android Environment Variables – Setup ANDROID_HOME
Follow the steps given below to setup ANDROID_HOME environment variable –
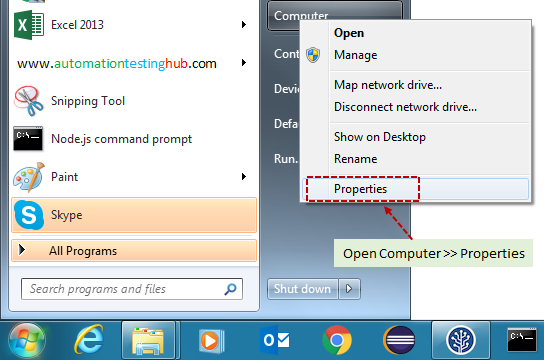
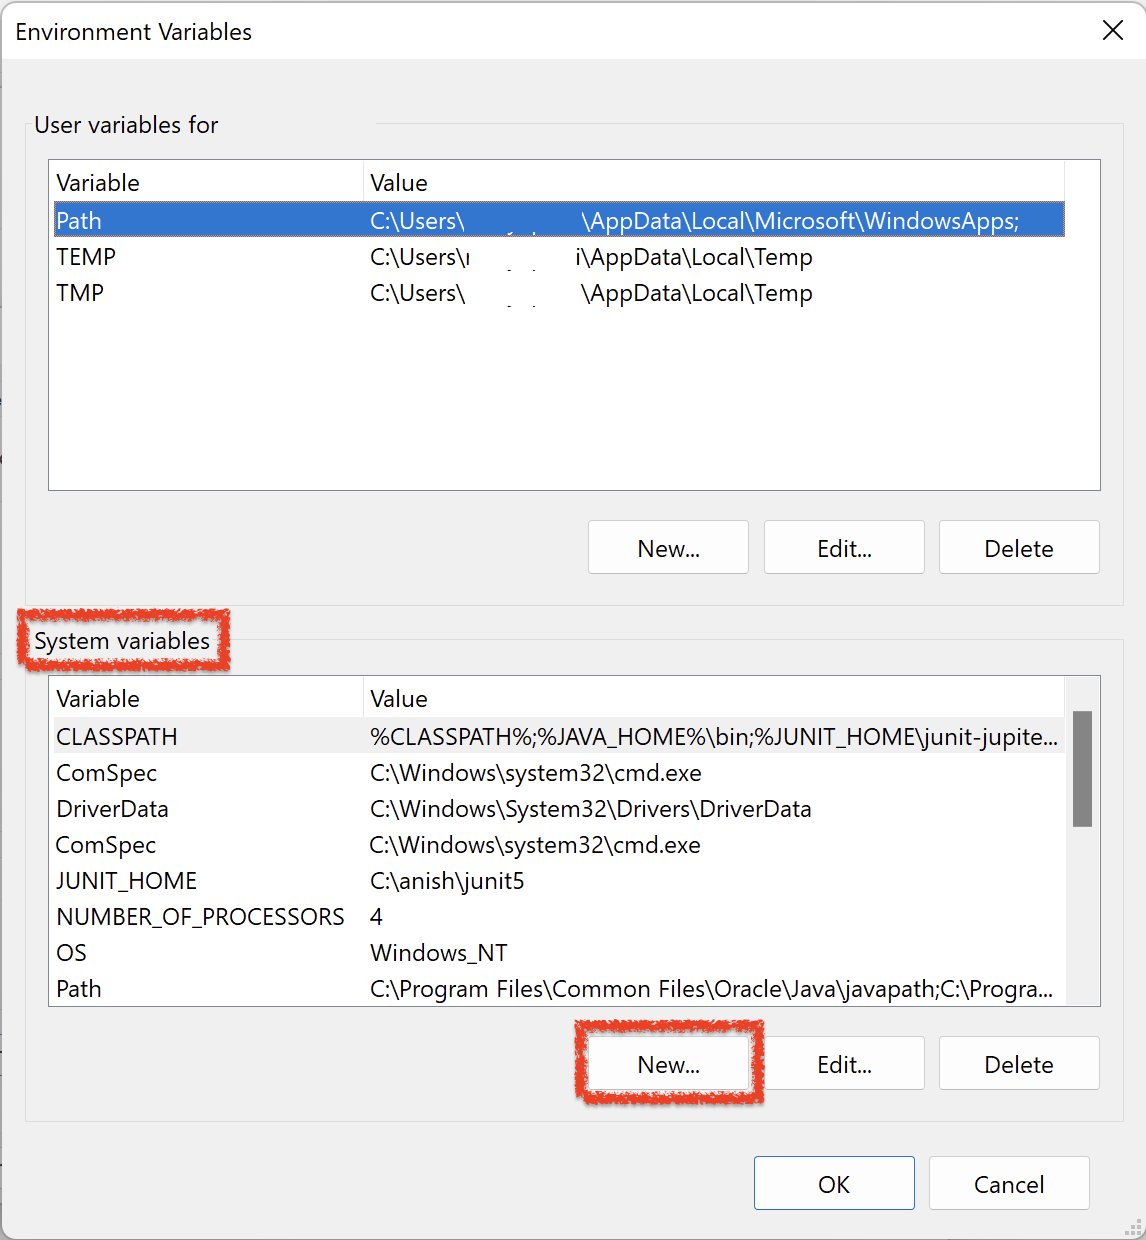
1. Click on Start menu. Then right click on Computer and select Properties option

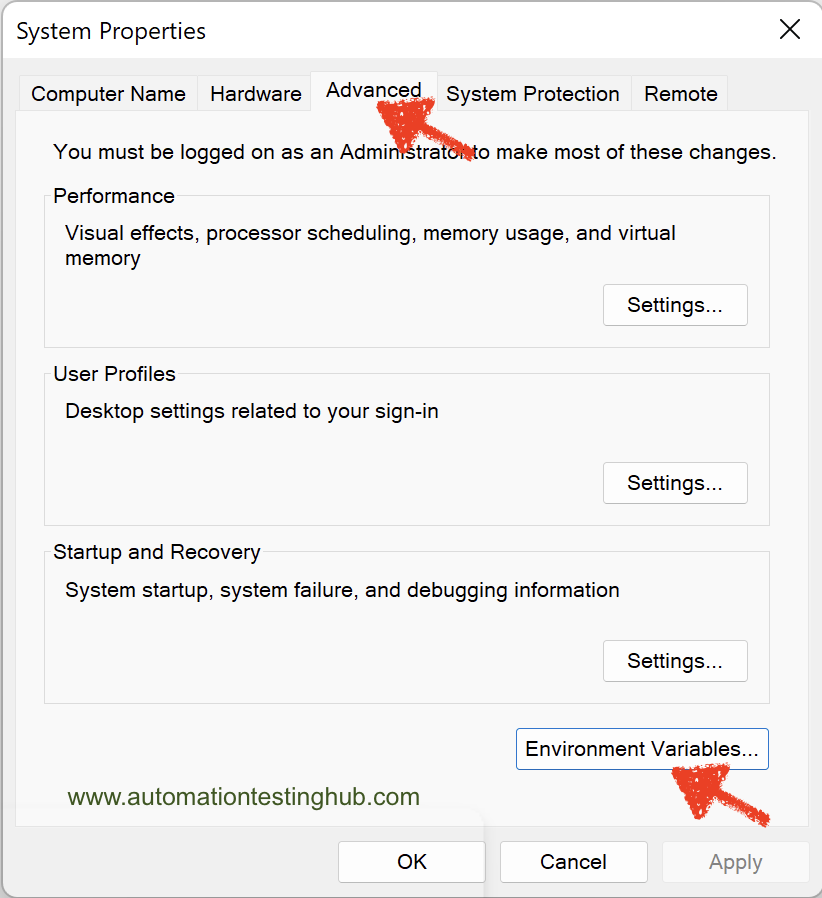
2. This would open the System Properties window as shown below. Now from the Advanced Tab, click on Environment Variables button

3. From the Environment Variables window, click on New button from System variables section

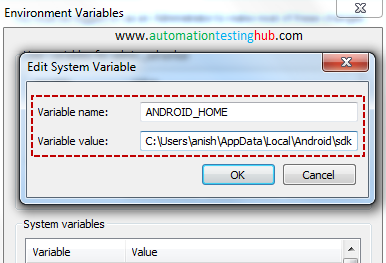
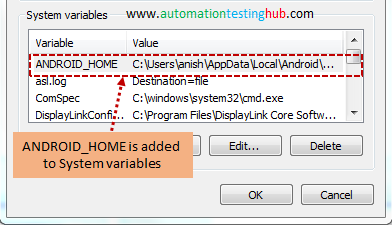
4. Enter ANDROID_HOME in Variable Name field and SDK folder location (C:\Users\Anish\AppData\Local\Android\sdk) in Variable value field as shown in below image (Please enter the correct folder location that you have in your machine)

5. Click on OK button. ANDROID_HOME variable will now be added to System variables

With this, we have successfully added ANDROID_HOME variable. Let us now see how to add the Path variable.
Folder locations to be added to Path variable
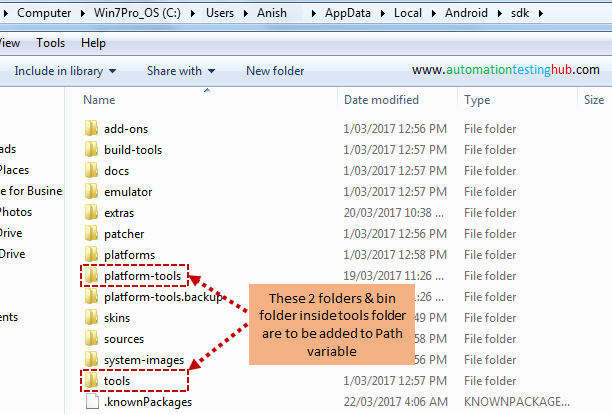
In Android SDK folder, there are three specific folders that you need to add to the Path variable. These folders are –
- platforms-tools folder which has path – C:\Users\Anish\AppData\Local\Android\sdk\platform-tools
- tools folder which has path – C:\Users\Anish\AppData\Local\Android\sdk\tools
- bin folder inside tools folder with path – C:\Users\Anish\AppData\Local\Android\sdk\tools\bin

Since we have already added ANDROID_HOME in System variables and its represented by – C:\Users\Anish\AppData\Local\Android\sdk, hence all these above three folder locations can be written as –
- %ANDROID_HOME%\platform-tools
- %ANDROID_HOME%\tools
- %ANDROID_HOME%\tools\bin
Let us now add all these three folder locations in Path variable.
Setup Path Variable
Follow the steps given below to setup Path variable –
1. In the Environment variables window, check that there is a variable called Path under System variables


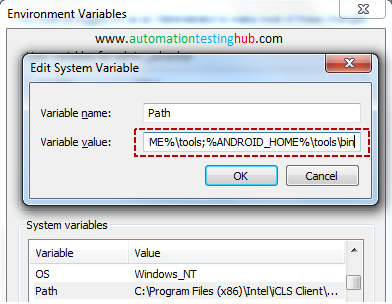
2. Select the Path variable and click on Edit button. Path variable window would be opened
3. Move over to the end in the Variable value text field. Put a semicolon (;) at the end and start adding all the 3 folder paths separated by semicolon (Semicolon acts as a delimiter between different folder locations added in the Path variable). You should have added all the 3 folder locations as this – ;%ANDROID_HOME%\platform-tools;%ANDROID_HOME%\tools;%ANDROID_HOME%\tools\bin

4. Click on OK button. All the three variables would now be added to the Path variables.
5. Close the Environment variable window by clicking on Ok button. With this, we have now successfully setup Path variable as well
Verify that Android Environment Variables have been set correctly
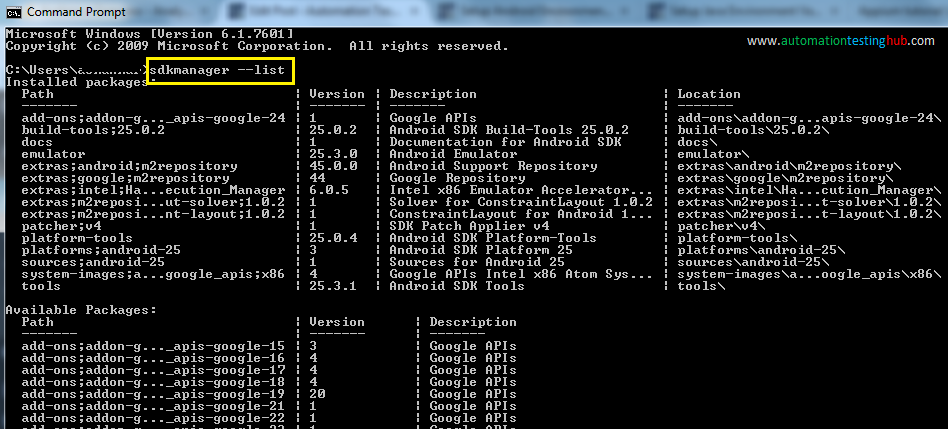
To verify that all the Android Environment Variables are correctly setup, open command prompt and run this command: sdkmanager – -list (please note that there should be no space between the 2 hyphens, as shown in the below image). This would list down all the installed and available packages which would look a bit like something as shown below (please wait for 3-5 seconds for the list to be displayed)

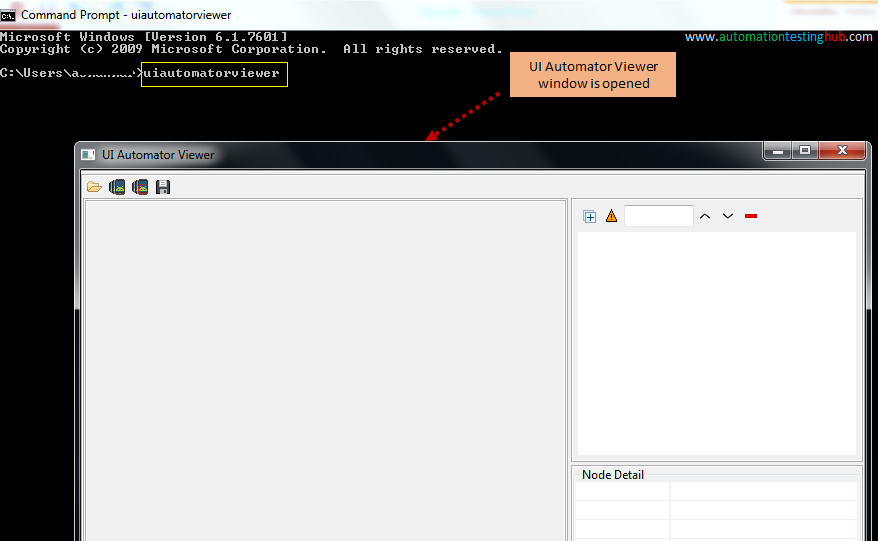
You can also run this command: uiautomatorviewer in command prompt. This will open UI Automator Viewer window as displayed below.

You can now close UI Automator Window and the command prompt. Both the above commands verify that the Android Environment Variables have been setup correctly. If you face any issues with any of the steps, or if you get any different output using these commands, then please let us know using the comments section. With this we complete our article series on installing Android and setting up Android environment variables. We will now move over to our next article, which is downloading and installing Appium Desktop client.
Next Article: Download and Install Appium Desktop App