Welcome to this next article in our Appium setup series. This article would cover in detail, the process of creating an Appium Project in Eclipse. We are trying to keep this process very simple and easy to understand, so we have broken down the complete Appium setup process into multiple articles. Once you complete this article, be sure to check out the remaining articles in our Appium Tutorial section.
Also, this article is more focused on helping you setup an Appium project from scratch. So we are keeping the project structure very basic for now. We will use a more realistic project structure at a later point in time, when we would start working on the frameworks. Let us now start with the process of creating Appium Project in Eclipse.
Open Eclipse IDE
We will create a new Java based project in Eclipse. Please make sure that you have installed Eclipse IDE. If not, you check out this guide on how to download and setup Eclipse IDE. Follow the steps given below to open Eclipse IDE –
1. Open the path where you have the unzipped Eclipse folder. Double click on eclipse.exe to open it

2. Once Eclipse starts opening, you would see the Eclipse logo
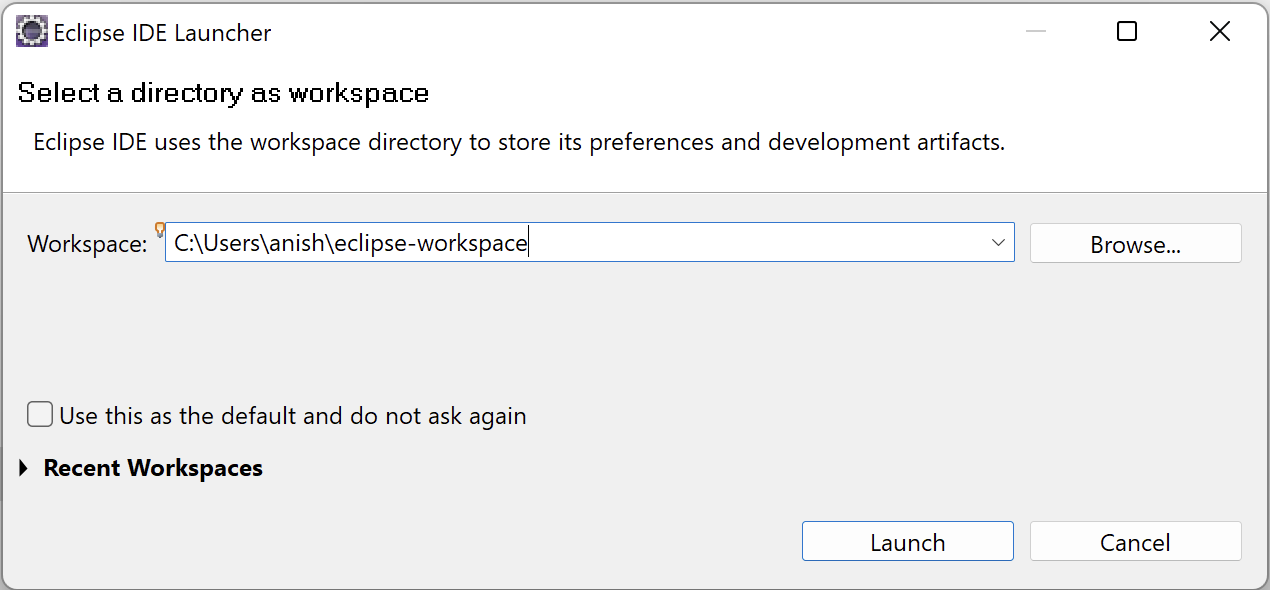
3. Next you would see Eclipse Launcher popup box. You can either leave the Workspace location as the default value, or you can browse to any folder path you wish. For this article, we are leaving it as default
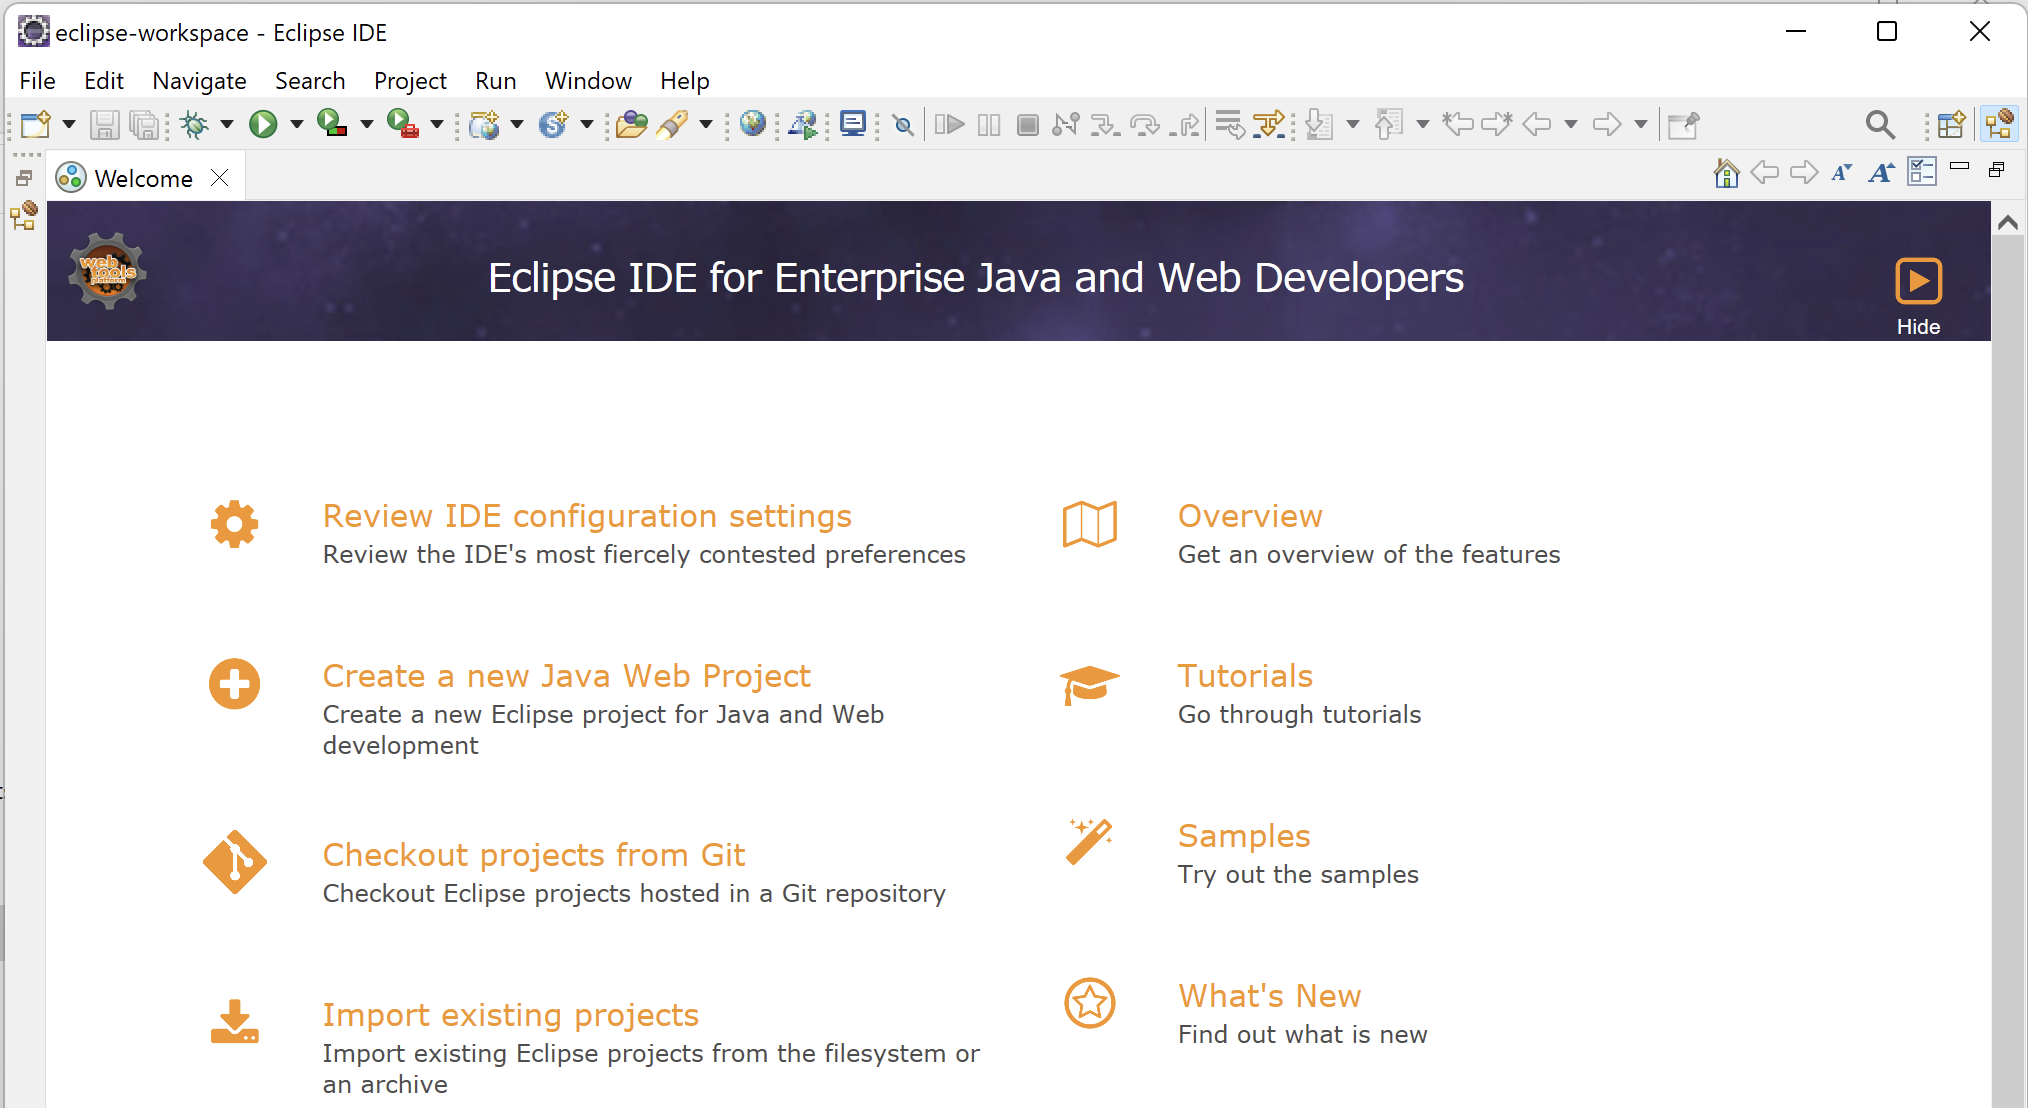
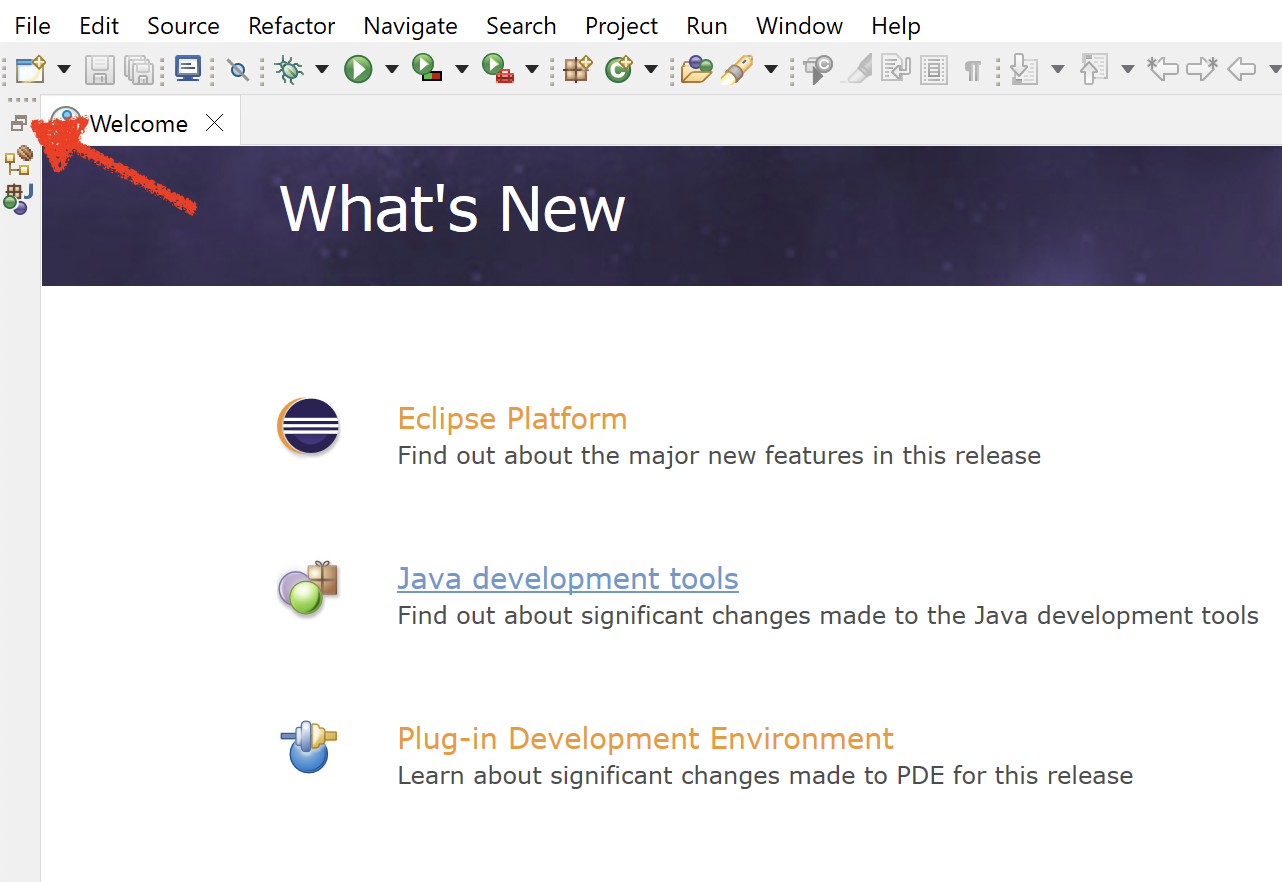
4. Click on Launch button. Eclipse would start loading all the files. Once its done, you will see the Eclipse IDE Welcome page like this
Create new Appium Project in Eclipse
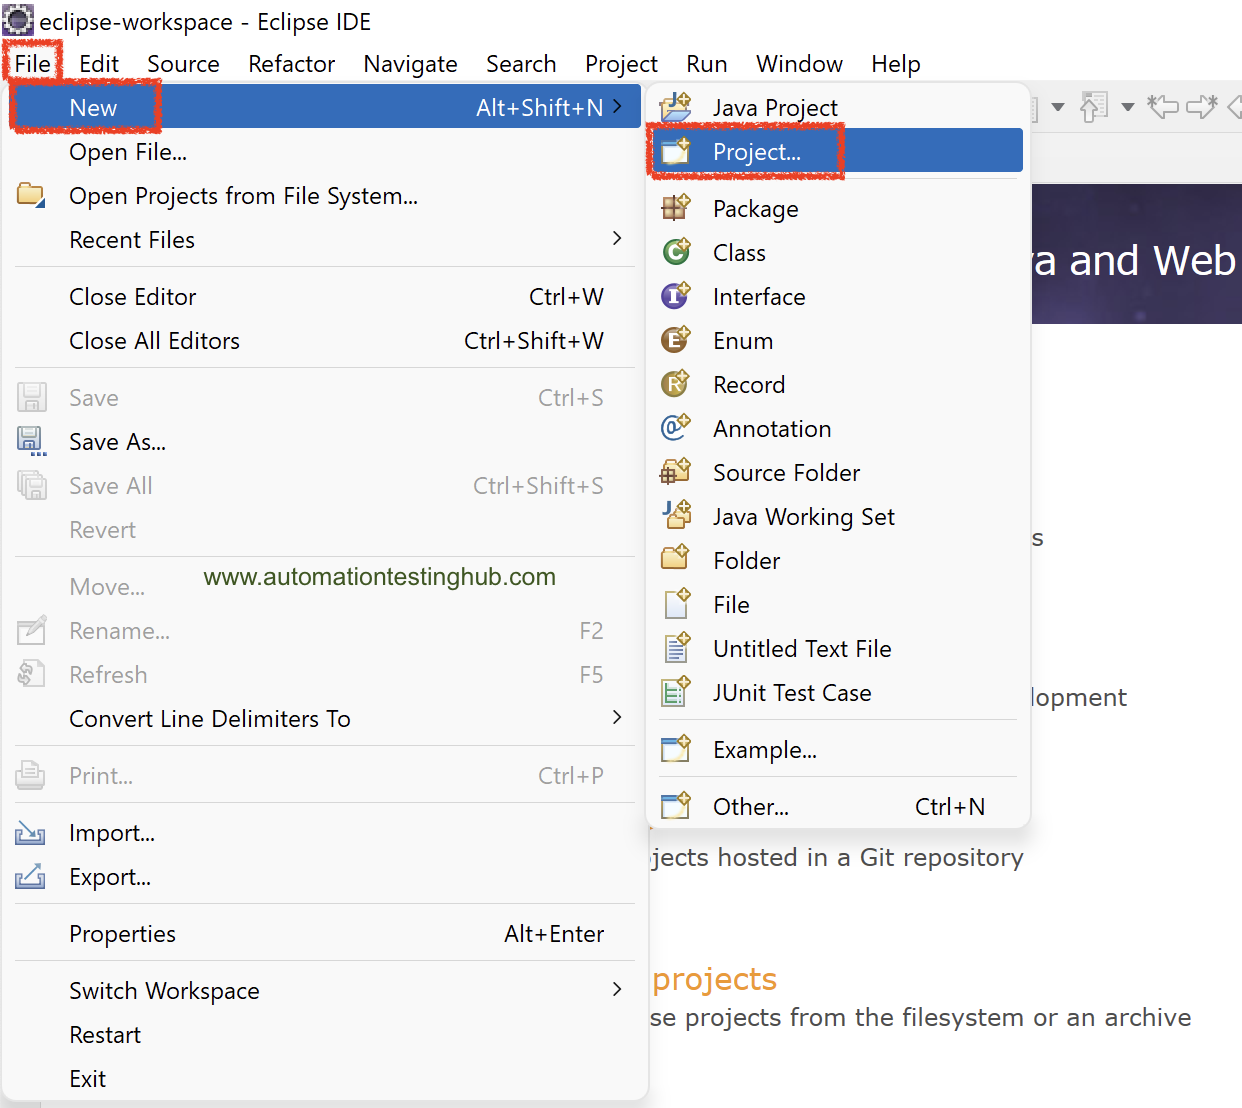
Create a new Java project in Eclipse by following the steps given below –
1. Select File -> New -> Project… option from Eclipse IDE
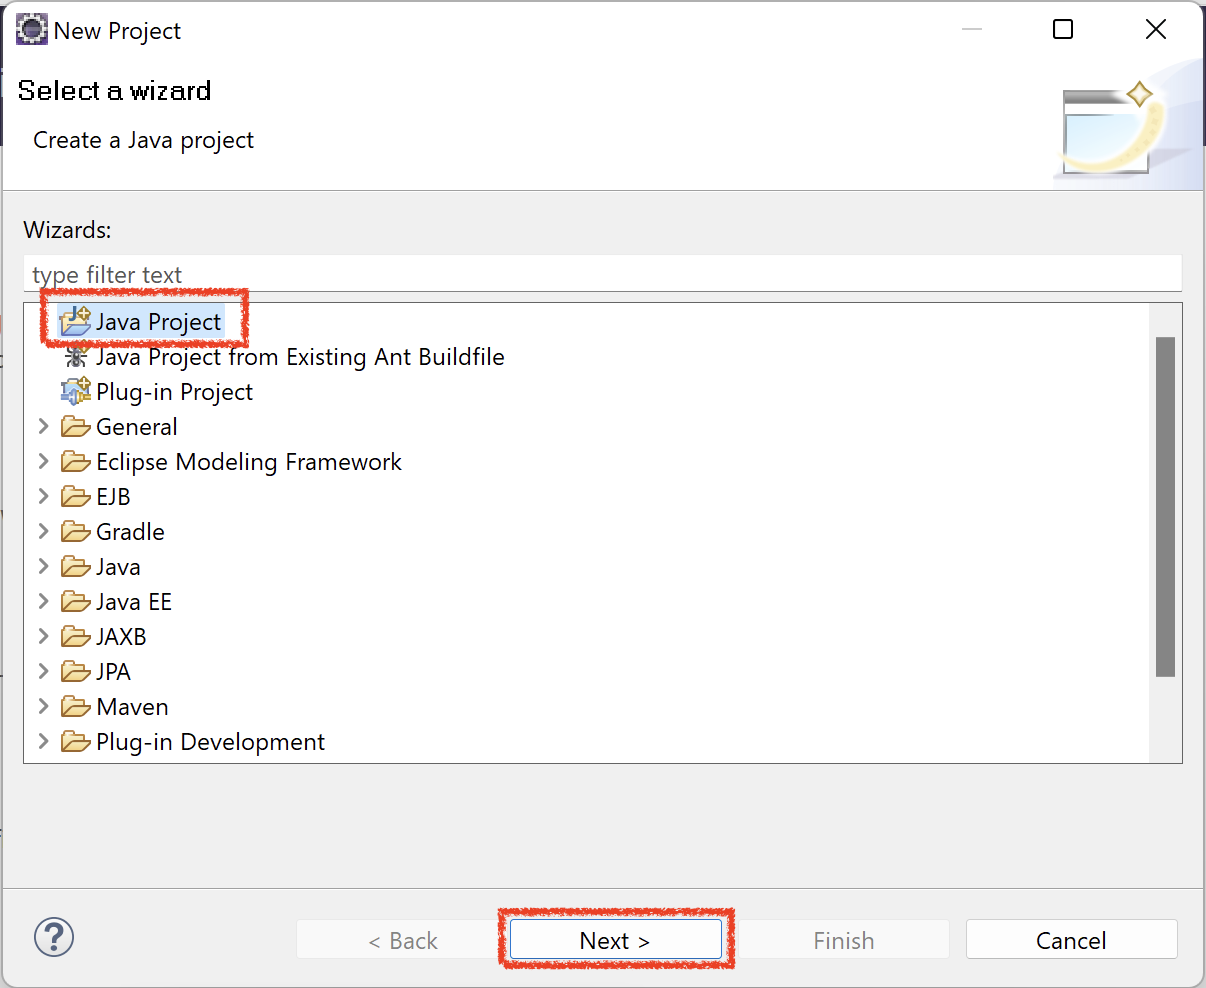
2. In the New Project popup box, select Java Project and then click on Next button
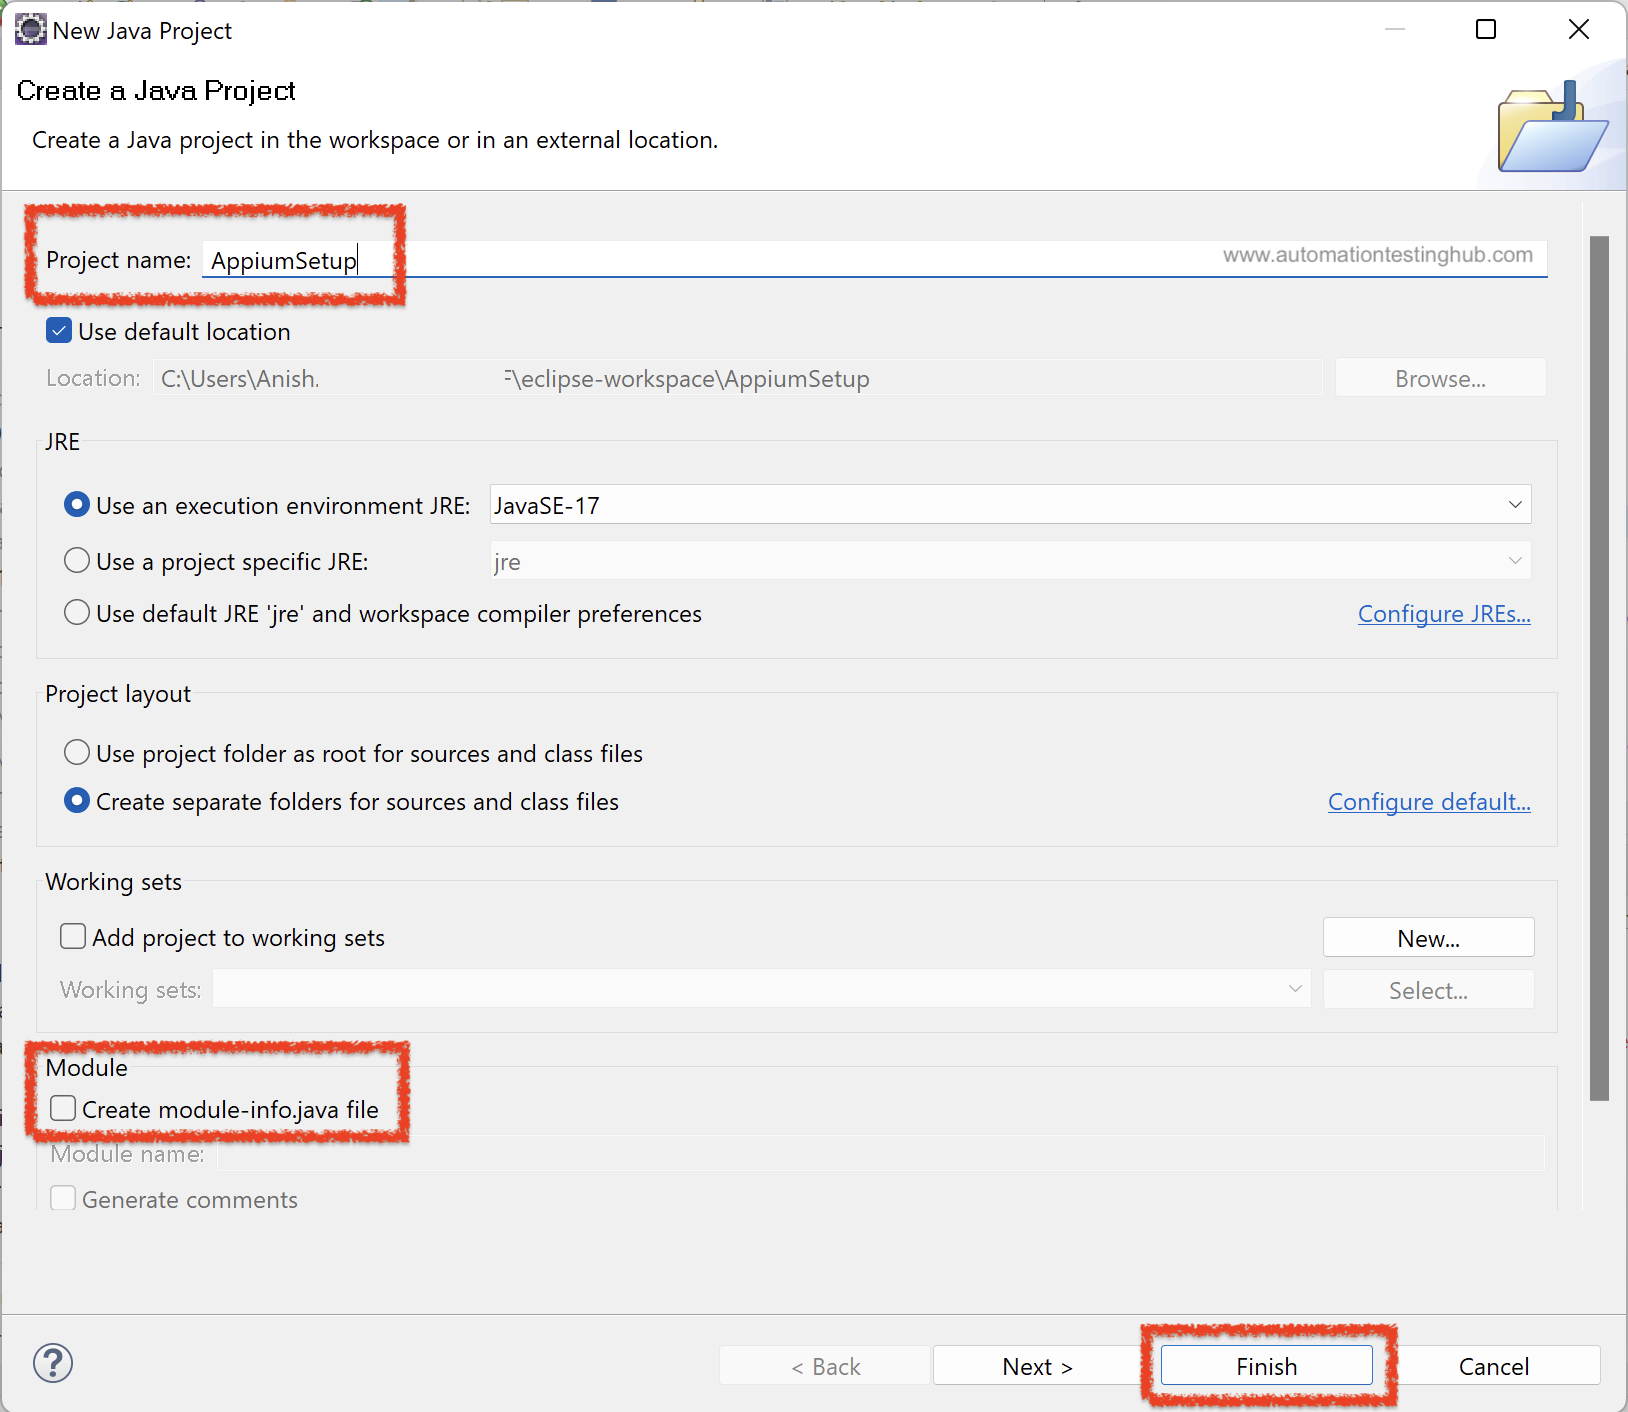
3. In the New Java Project popup box, write the project name as AppiumSetup.
4. Uncheck Create module-info.java file checkbox. Leave all the other fields as it is and then click on Finish button
5. If the panel at the left side is collapsed, then you can restore it as shown below
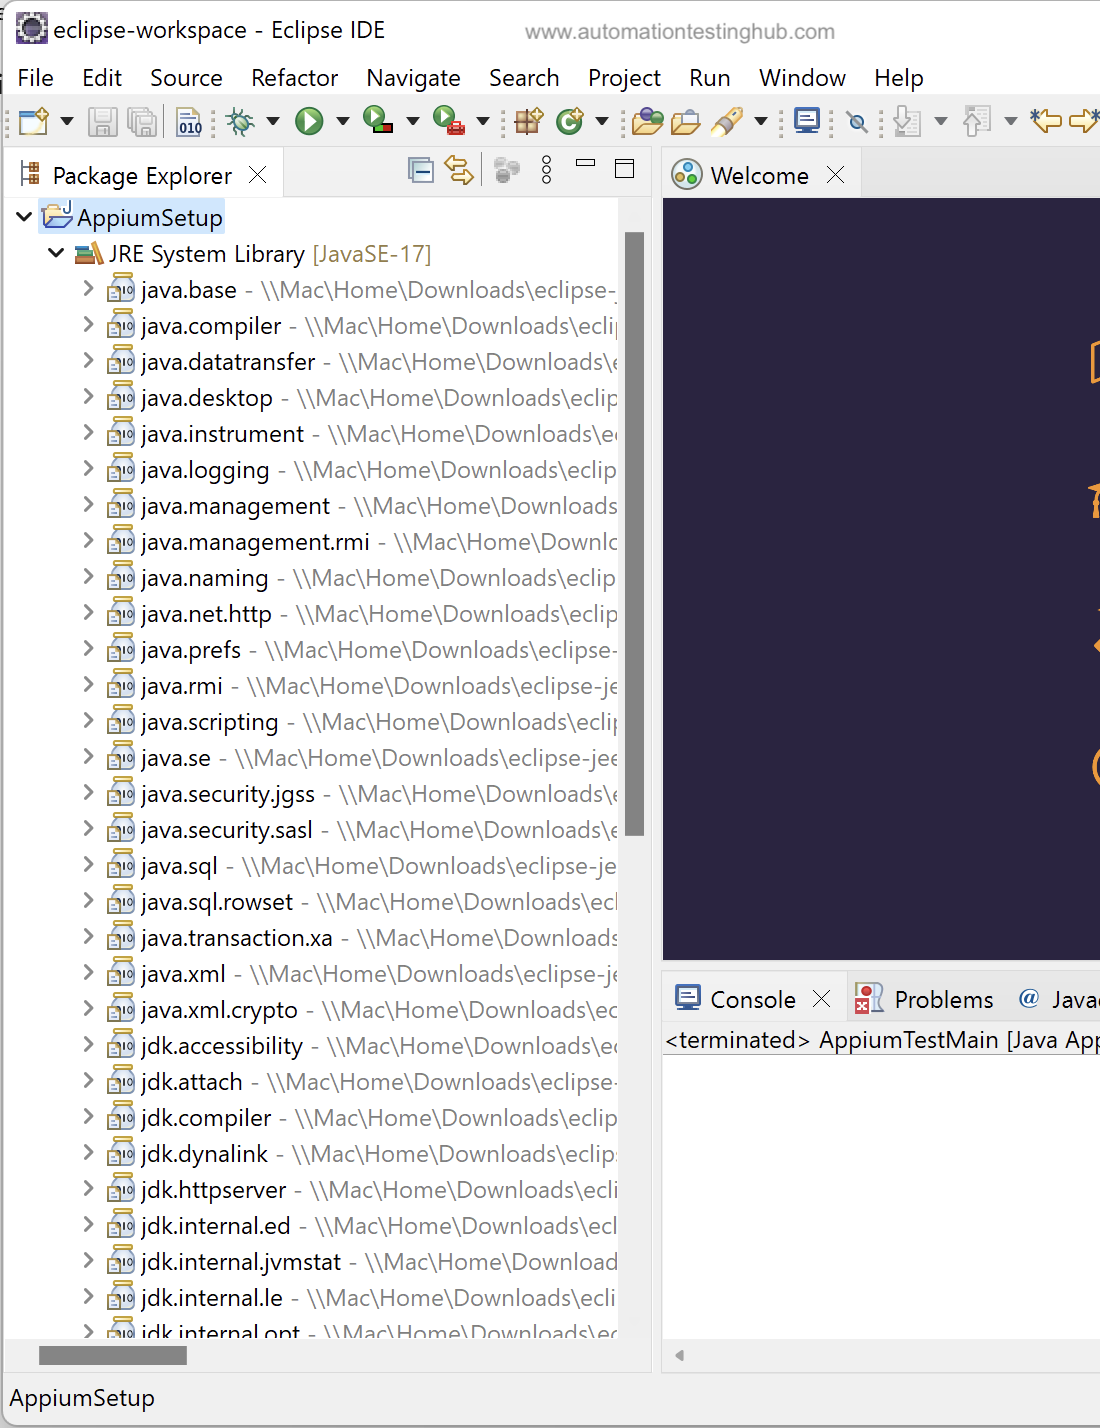
6. Eclipse IDE should now look like something as shown below. It would display your newly created project in the left side pane. If there are some additional panes on the right side (Tasks List, Welcome screen etc), then you can close those so that Eclipse IDE looks uncluttered

The new Appium project is successfully created in Eclipse. Let us now add the jar files to this project
Add Selenium and Appium jar files to your Eclipse Project
Expand ‘AppiumSetup’ project. You will see that it has 2 sub-folders or components inside it. These sub-folders are: src and JRE System Library. If you expand JRE System Library, you will see that it has some JAR files already added as shown in the below image. This is the minimum set of JAR files that is required to run a basic Java program.
Since you would be creating and running Appium scripts, you would need to add both Appium and Selenium jar files to your project. Follow the steps given below to add these jar files to your Appium project –
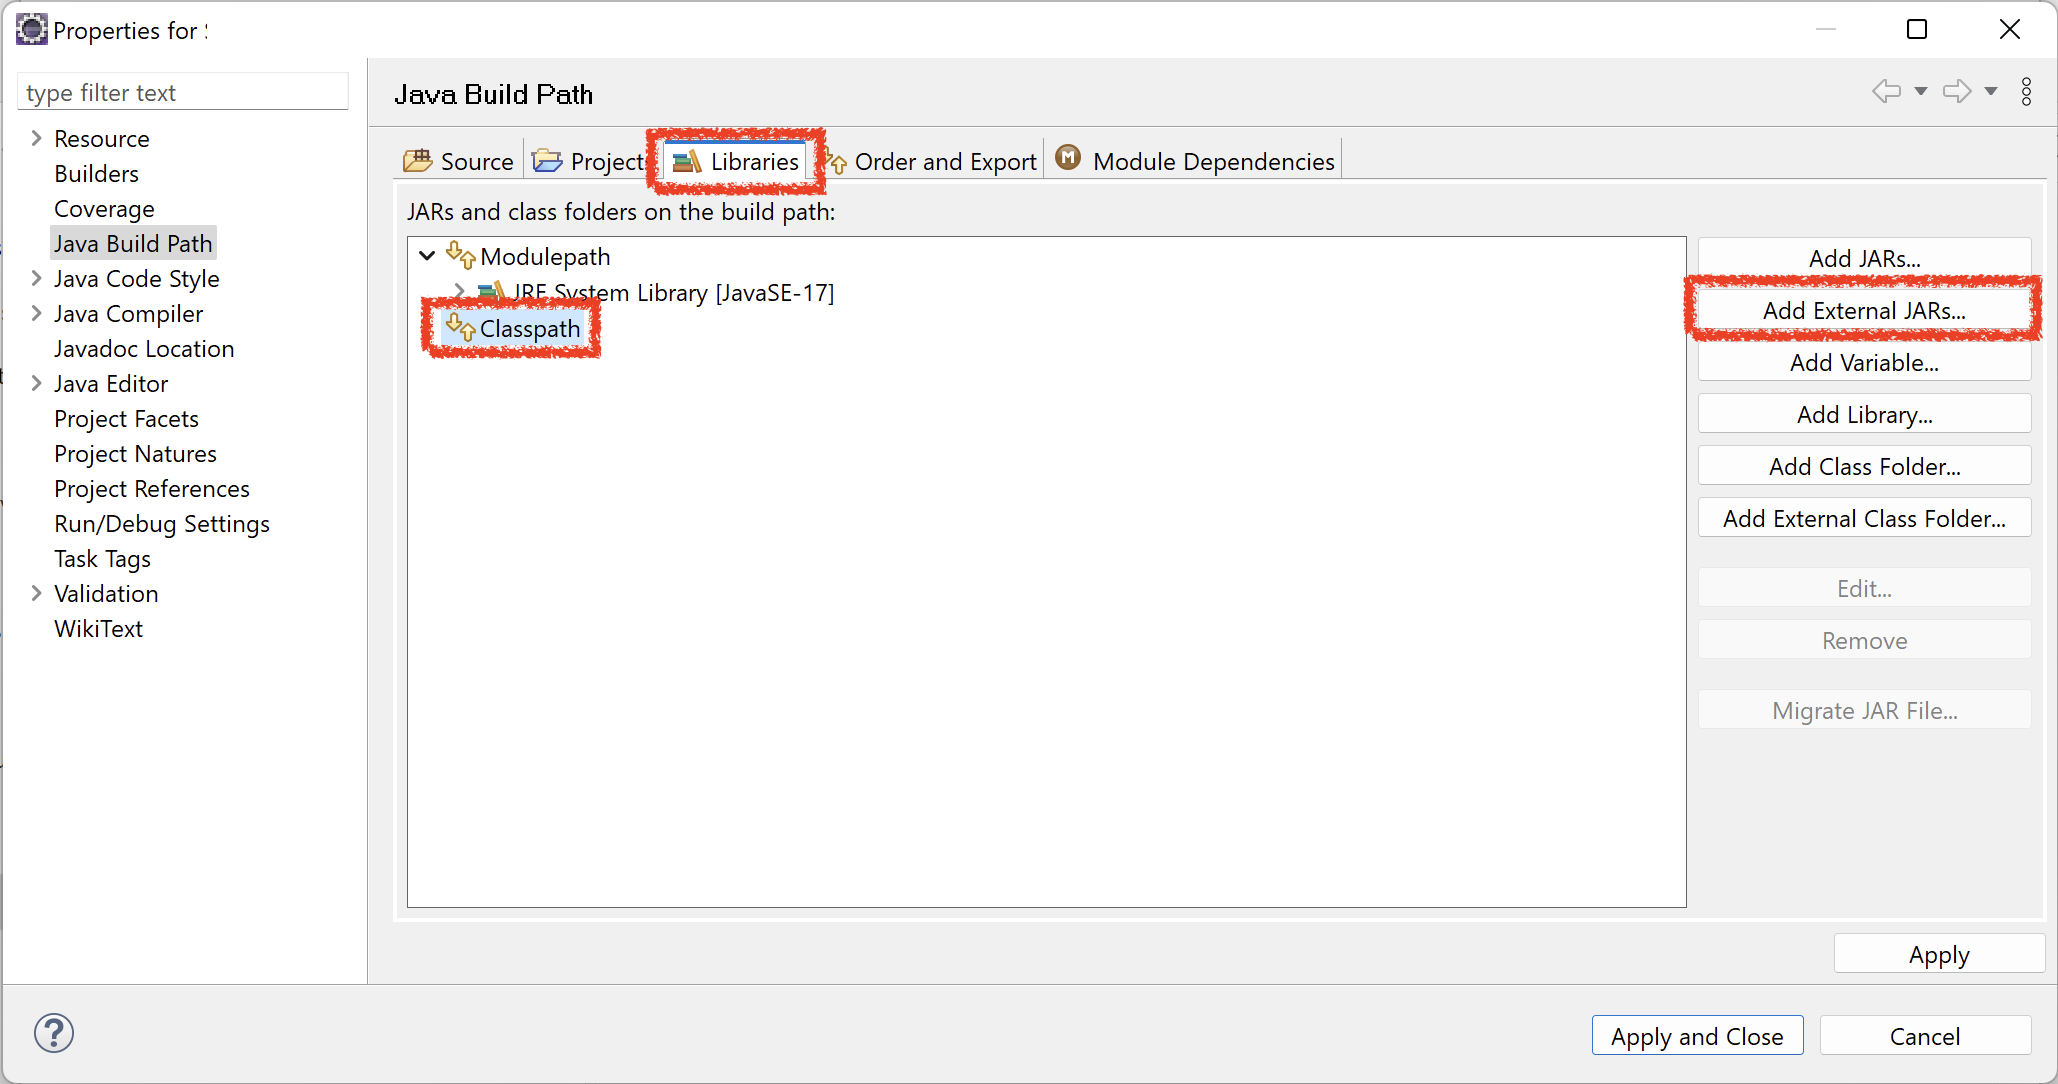
1. Right click on the Project. Then select Build Path > Configure Build Path… option

2. Properties window will get opened as shown below. From the Libraries tab, first select on Classpath and then click on Add External JARS… button.
3. Now navigate to the folder where you had downloaded Selenium WebDriver jar files. Select all the jar files from the selenium folder and click on Open button
Note: Version of jar files in the images might be different. Please make sure that you add the same jar files that you got from this article – download appium and selenium jar files
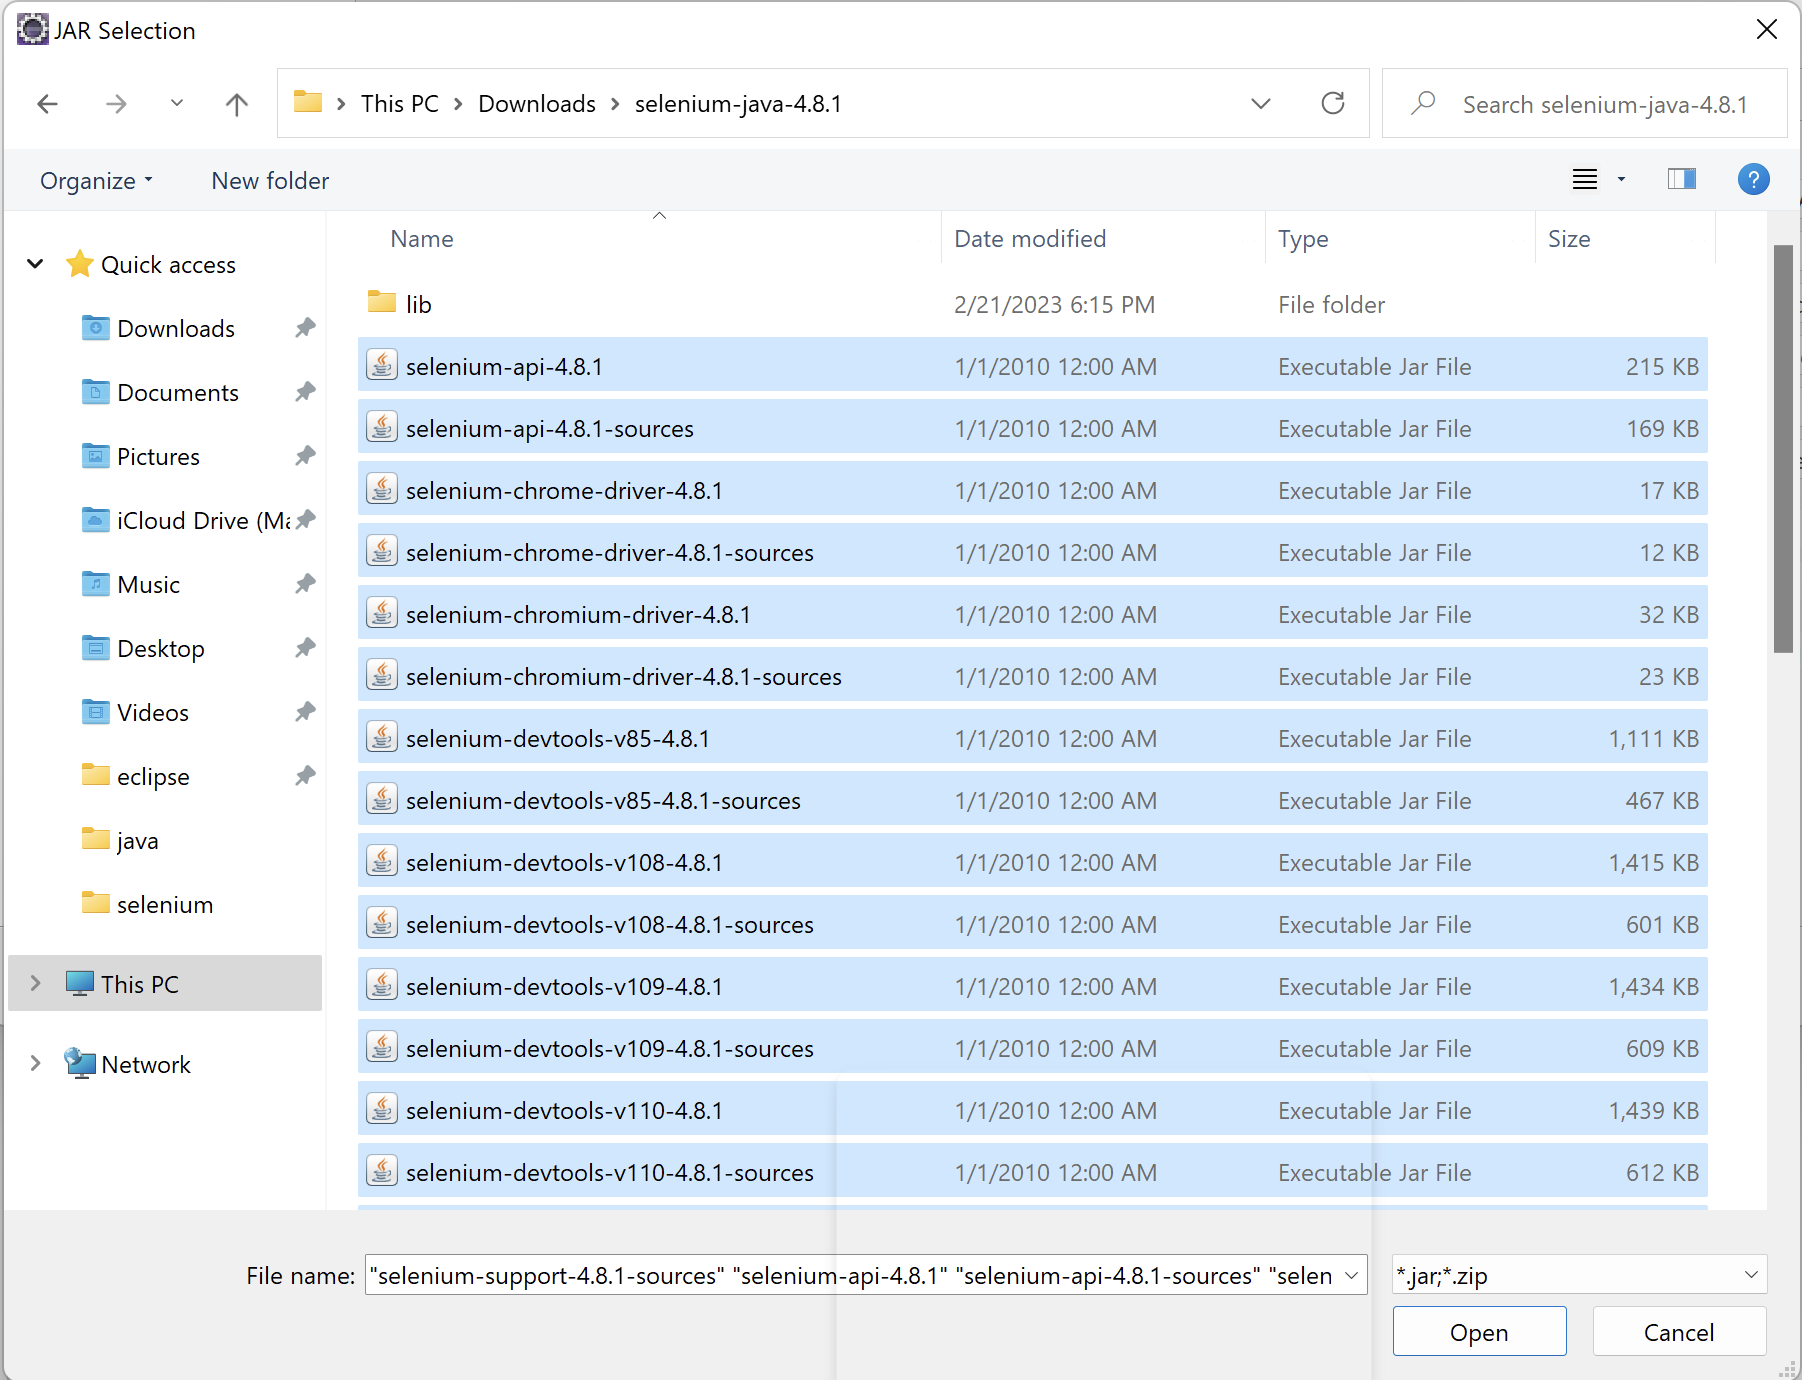
Do the same for all the JARs in the lib folder
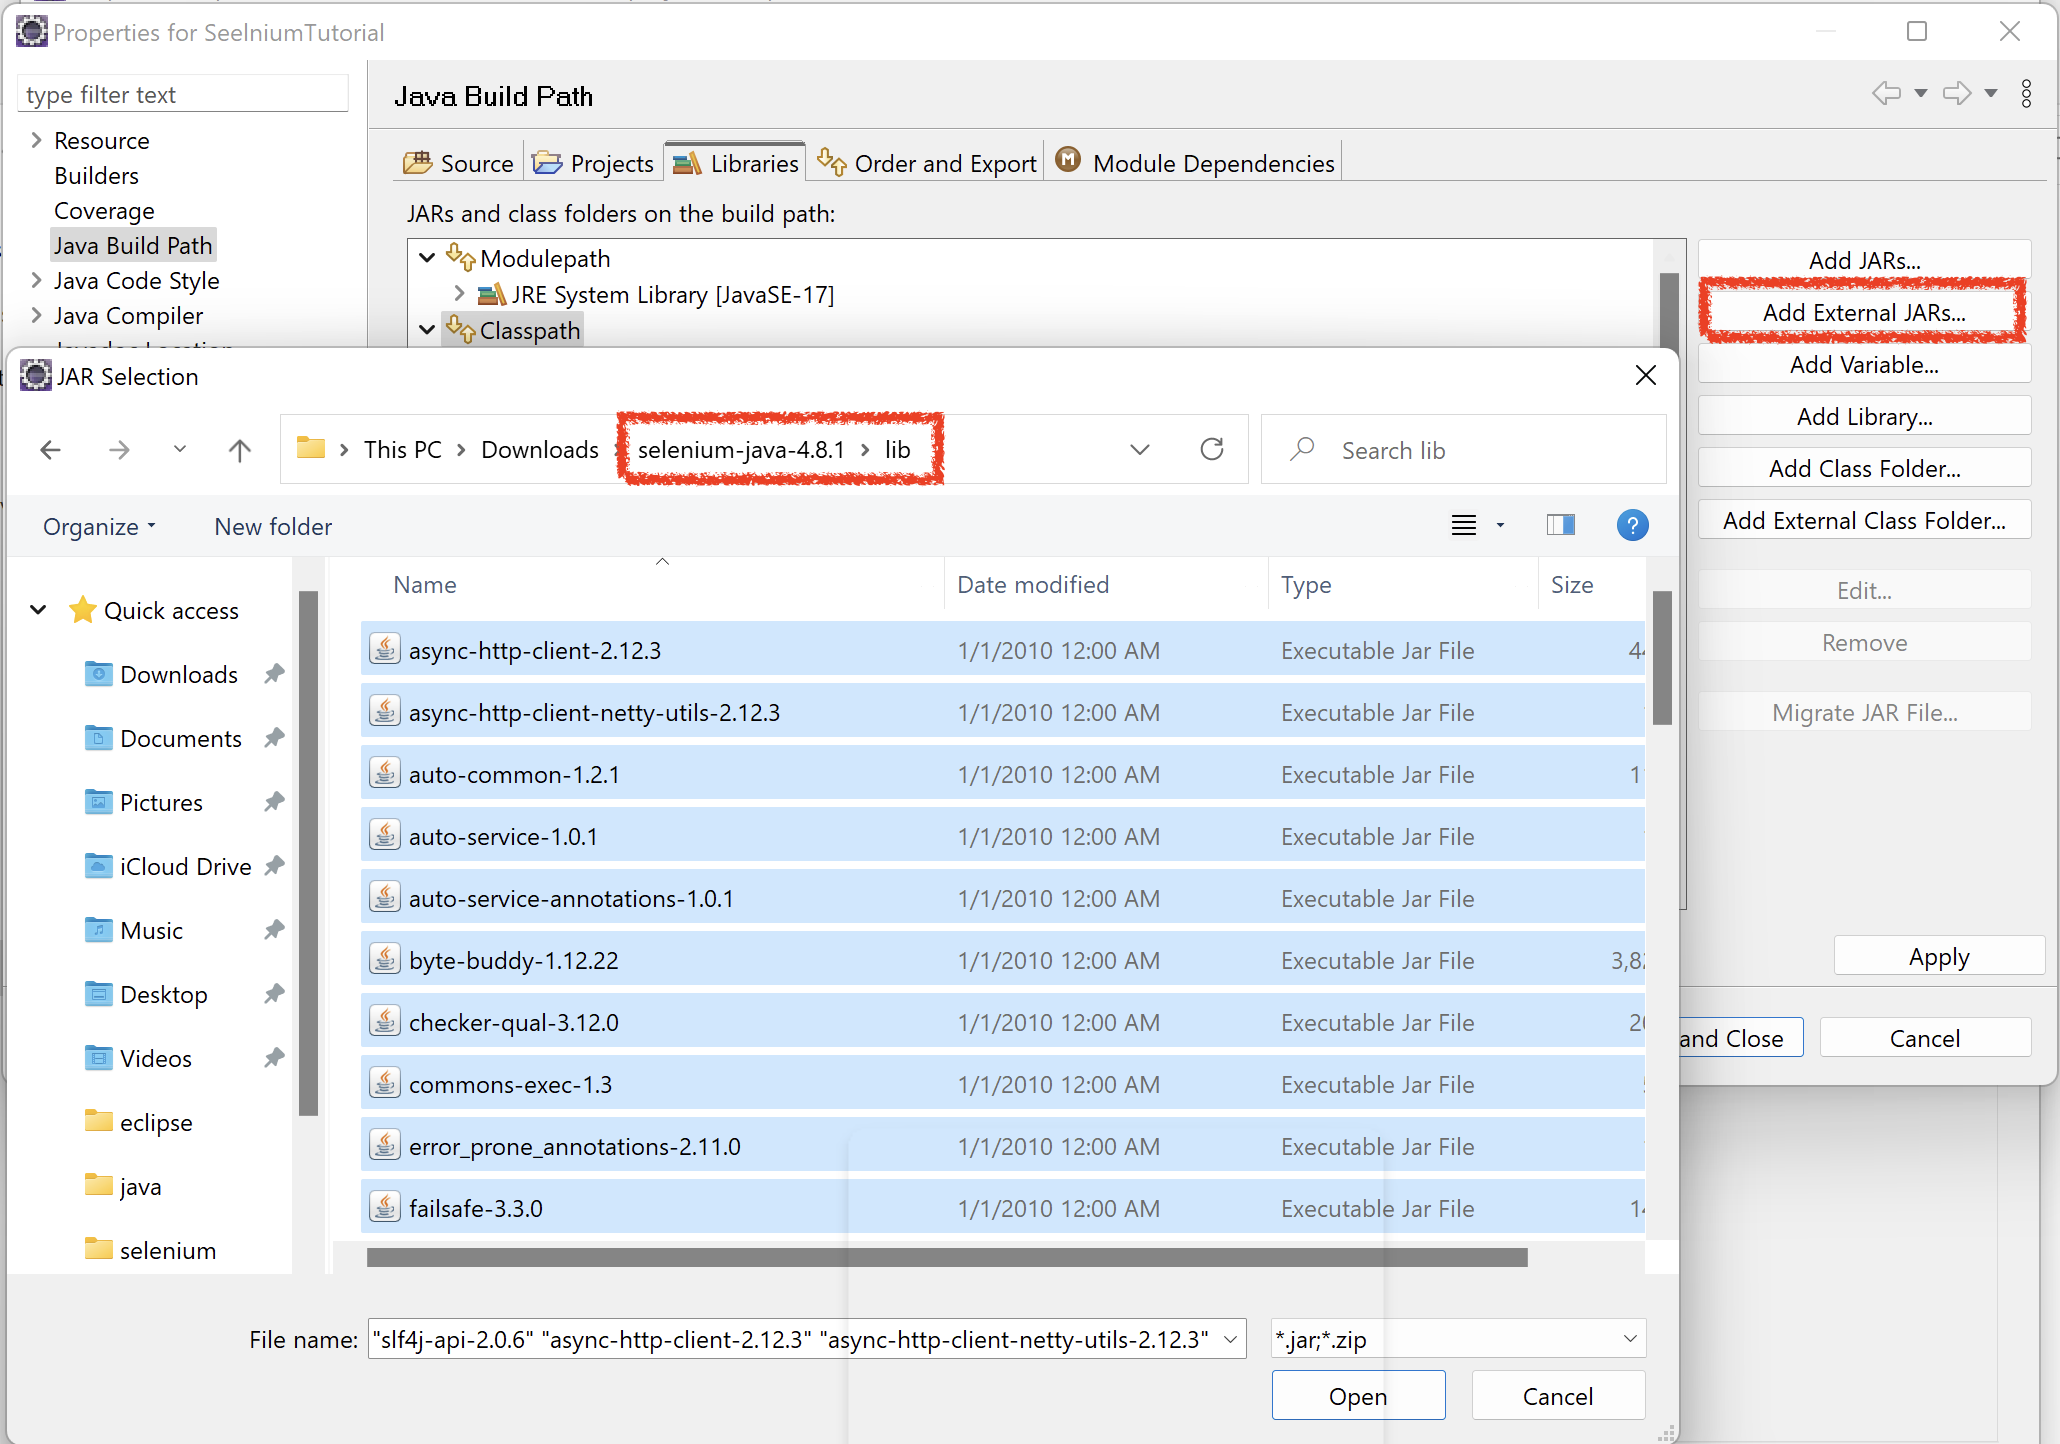
With this, you have now added all the Selenium libraries to the project. Now let us add the Appium Java Client jar file as well
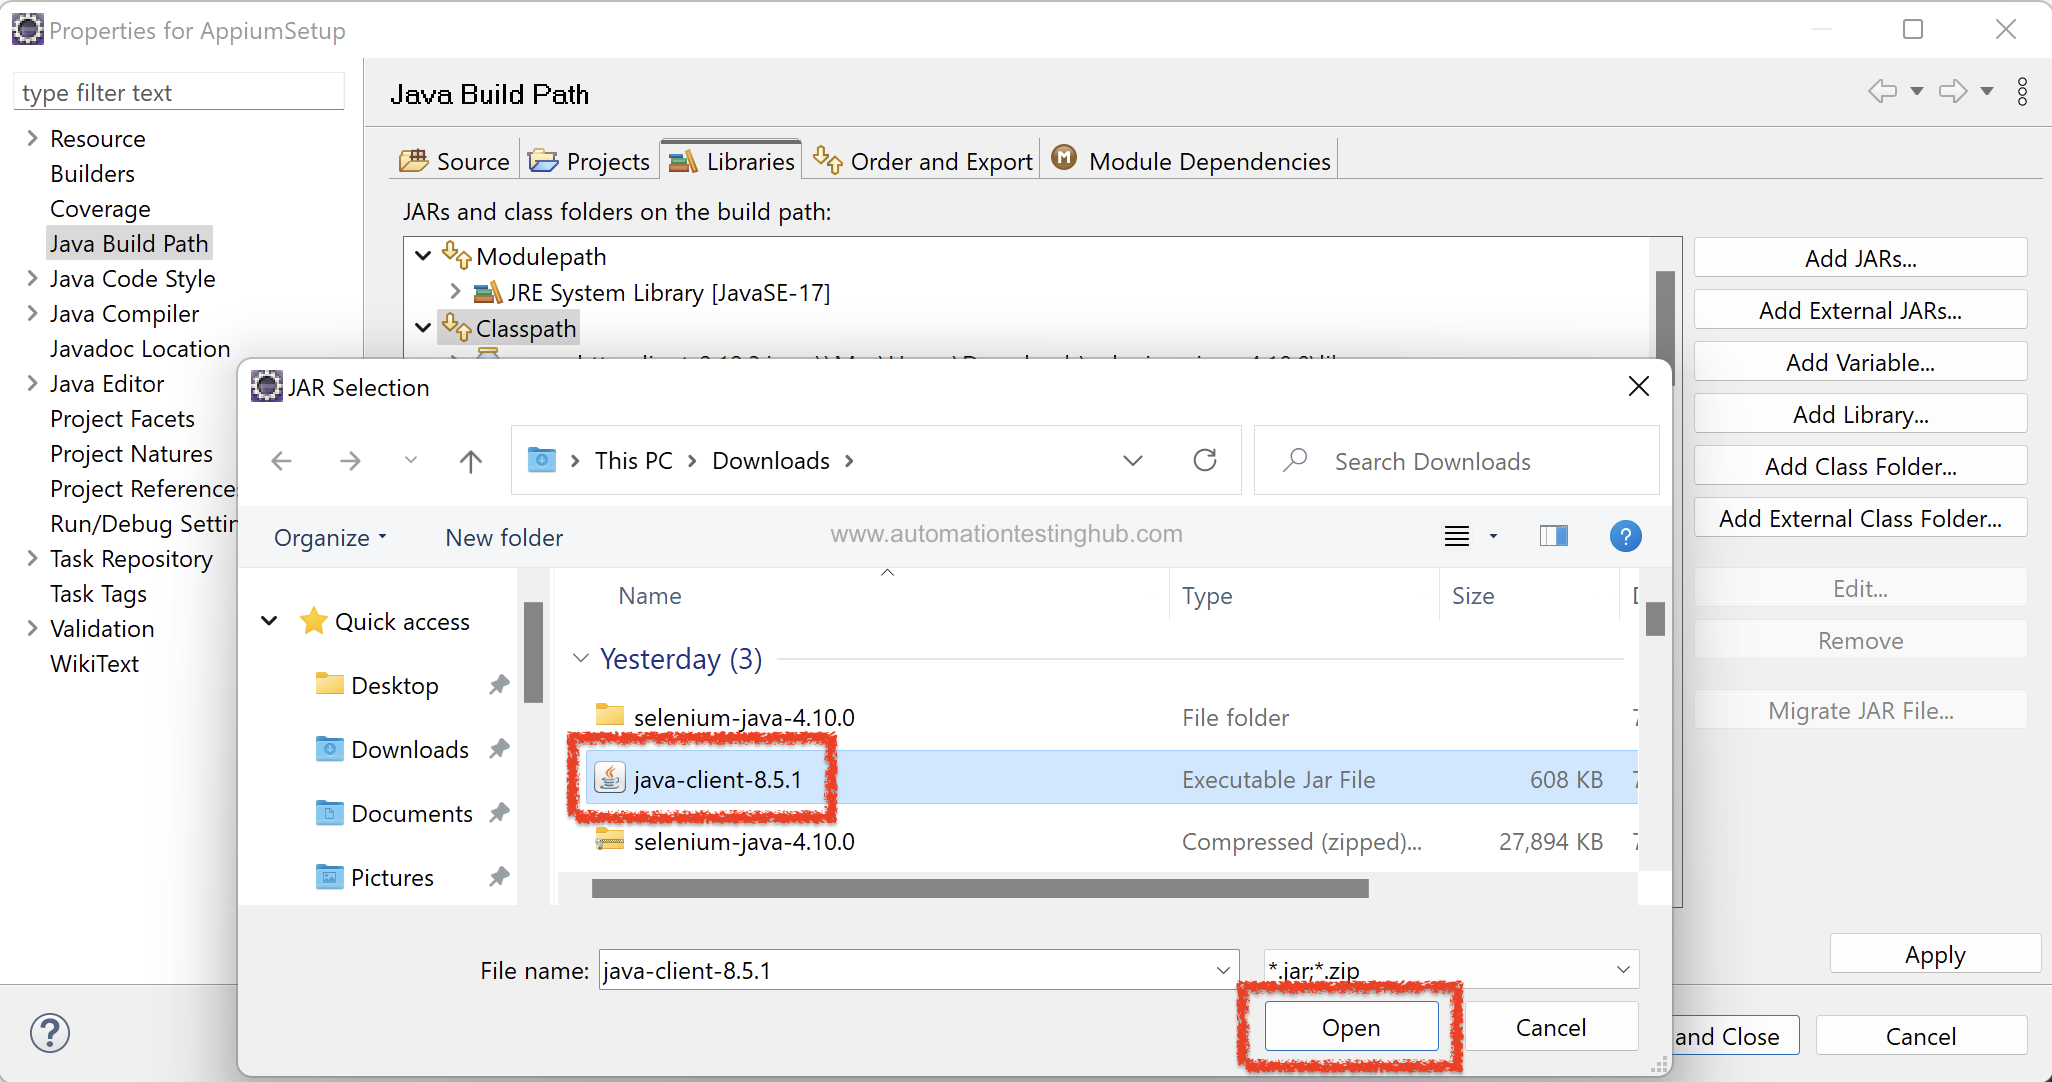
4. Again click on Add External JARs… button, and navigate to the folder where you have saved Java Client jar. Select the jar and click on Open button
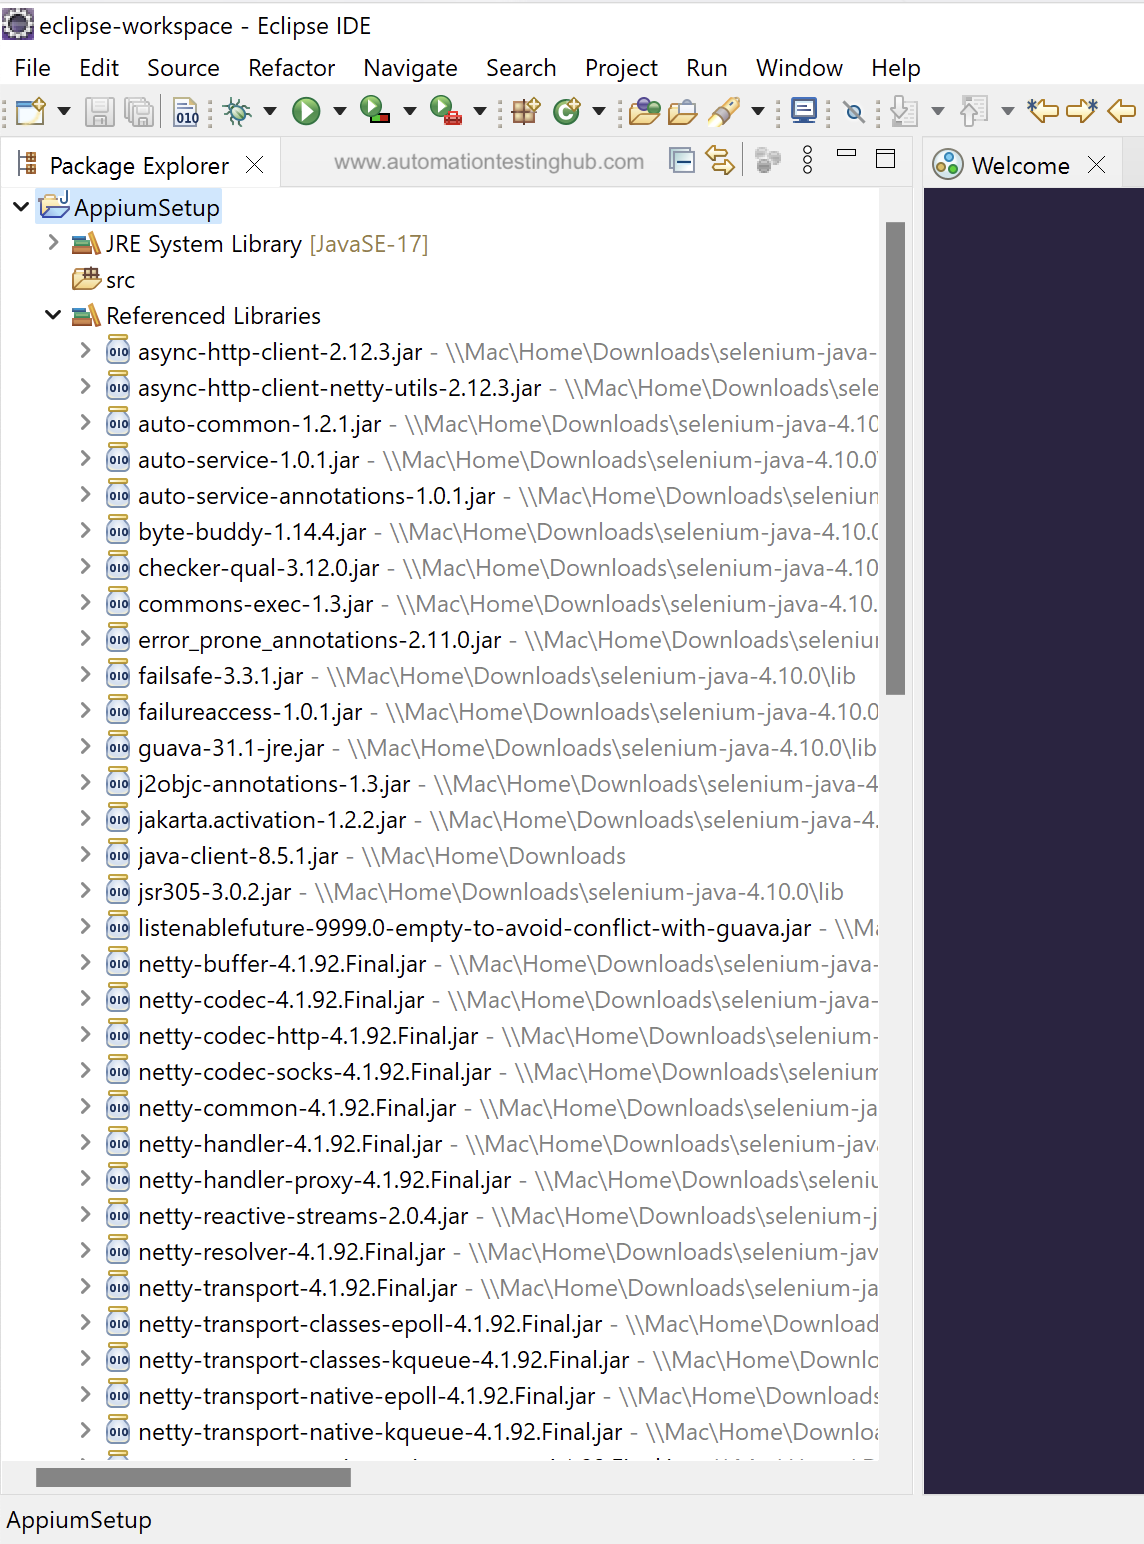
5. Once all the jar files have been added, click on Apply and Close button to close the Properties window. Notice that a new sub-section called Referenced Libraries is created inside the project folder. Expand this Referenced Libraries section. You will see that it lists down all the JAR files that you had added in the above steps
With this, we complete the process of creating a new project in Appium which included adding all the necessary JAR files. You can now switch over to the next article in our Appium Tutorial series, where you will learn about how to identify some important properties of the app which you want to automate.
Have any doubts or queries? Please feel free to contact us using our comments section.