In the previous article of this Selenium WebDriver tutorial series, you created a new Selenium project in Eclipse and added all the required Selenium JAR files. At this stage, your basic setup is complete.
Now it’s time to validate that setup.
Before we move into advanced topics like Maven, JUnit, or building a structured automation framework, we must first ensure that the environment works correctly. The simplest way to do that is by launching a browser using Selenium.
In this article, we will write a very basic Selenium script that launches the Chrome browser and opens a website. It may look simple, but this is the most important step in your Selenium learning journey. If this works without errors, you can confidently move forward with the rest of the tutorial series.
Launch Chrome browser and open a website
Why we are starting with a simple test script?
Before we move to Maven, JUnit or frameworks, we first need to confirm that our Selenium setup works correctly. Hence, this first test script is intentionally basic.
What this test will do –
- Launch the Chrome browser
- Open the Google homepage
What this test will NOT do –
- Use JUnit
- Use Maven
- Use any test framework
- Perform assertions
Launching the browser is where a lot of beginners get stuck and see errors in their Eclipse console. This is due to the fact that a lot of times, users do some or the other mistake with Java and Selenium setup. Sometimes, users also use some different versions of the tools and the steps to configure that might be slightly different. Therefore it’s important that you get this process right, and that you are at least able to launch a browser and perform some interactions with it.
Without any further delay, let us see the steps you need to perform to write your first Selenium test script.
Steps to create a basic Java class in Eclipse
In Java, we create classes in which we write our code. Also, we combine similar classes together in packages. So let us now start by creating a package, and then adding a class to it.
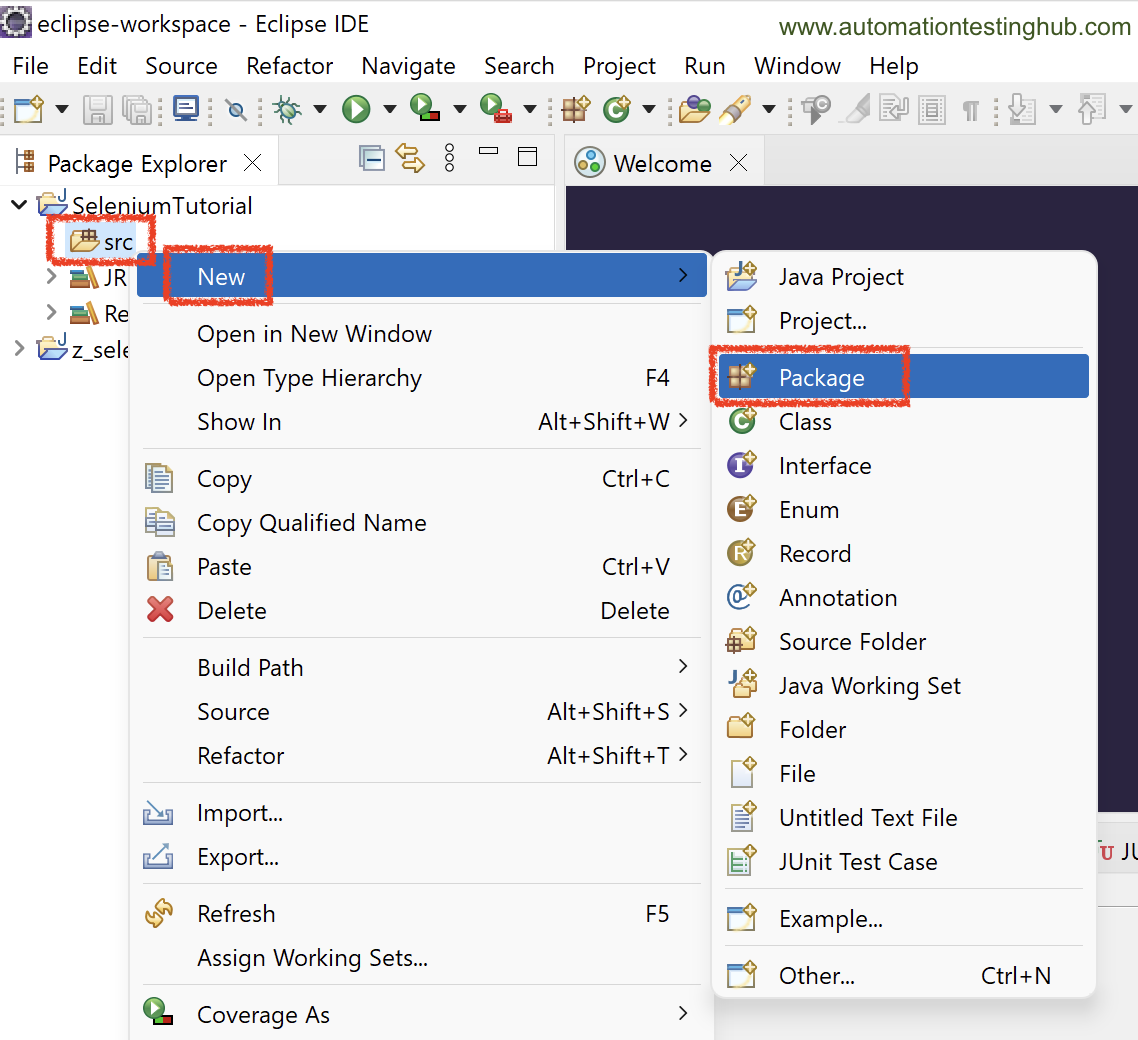
1) Right click on src folder. Then select New > Package
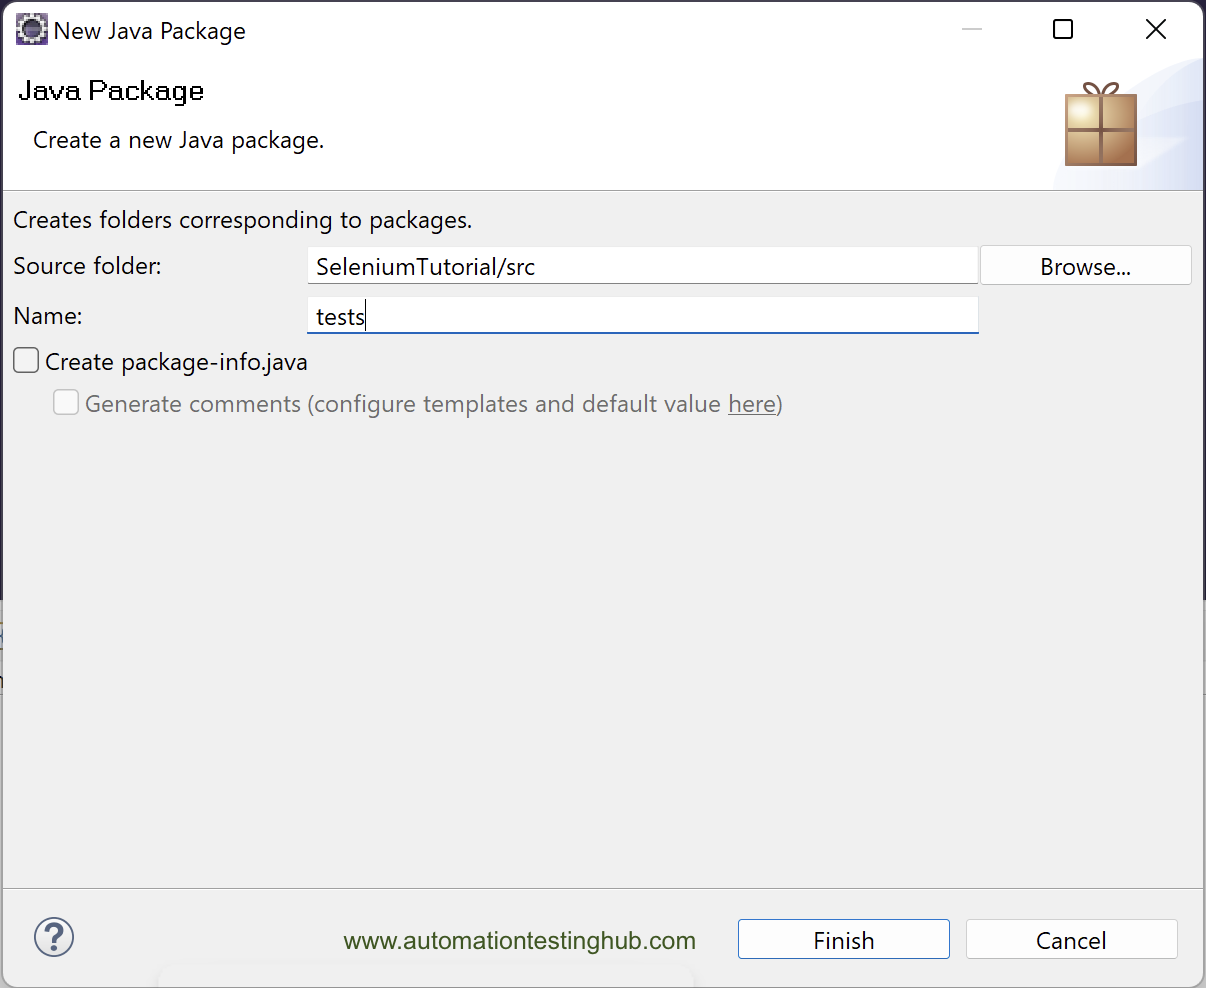
2) In the New Java Package popup window, enter name as tests and click on Finish button (you can give any package name you want)
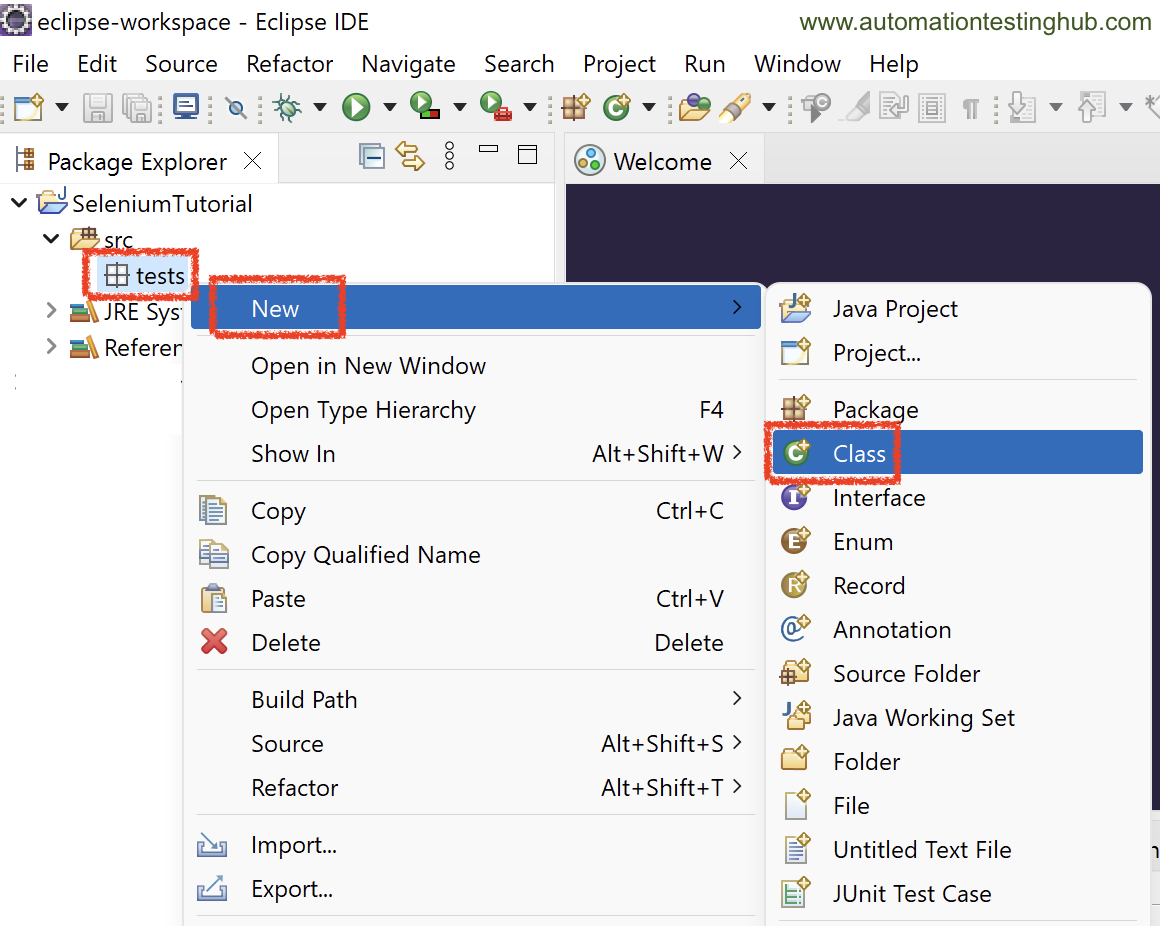
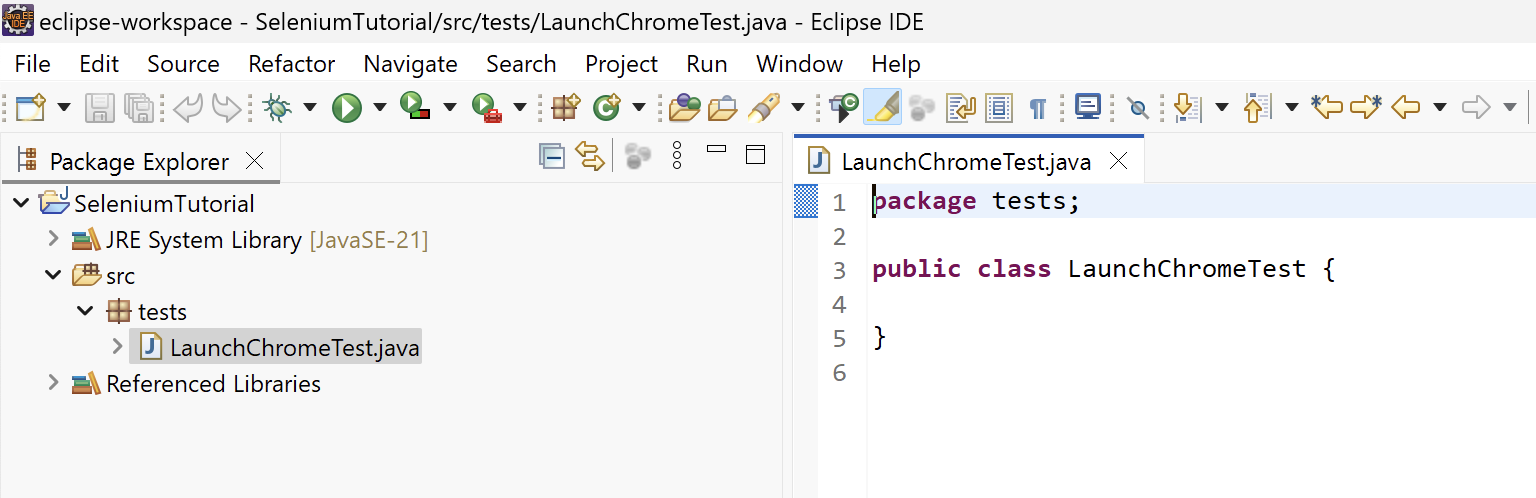
3) You will now see that this new package is displayed under src folder. Right click on the package, and then Select New > Class
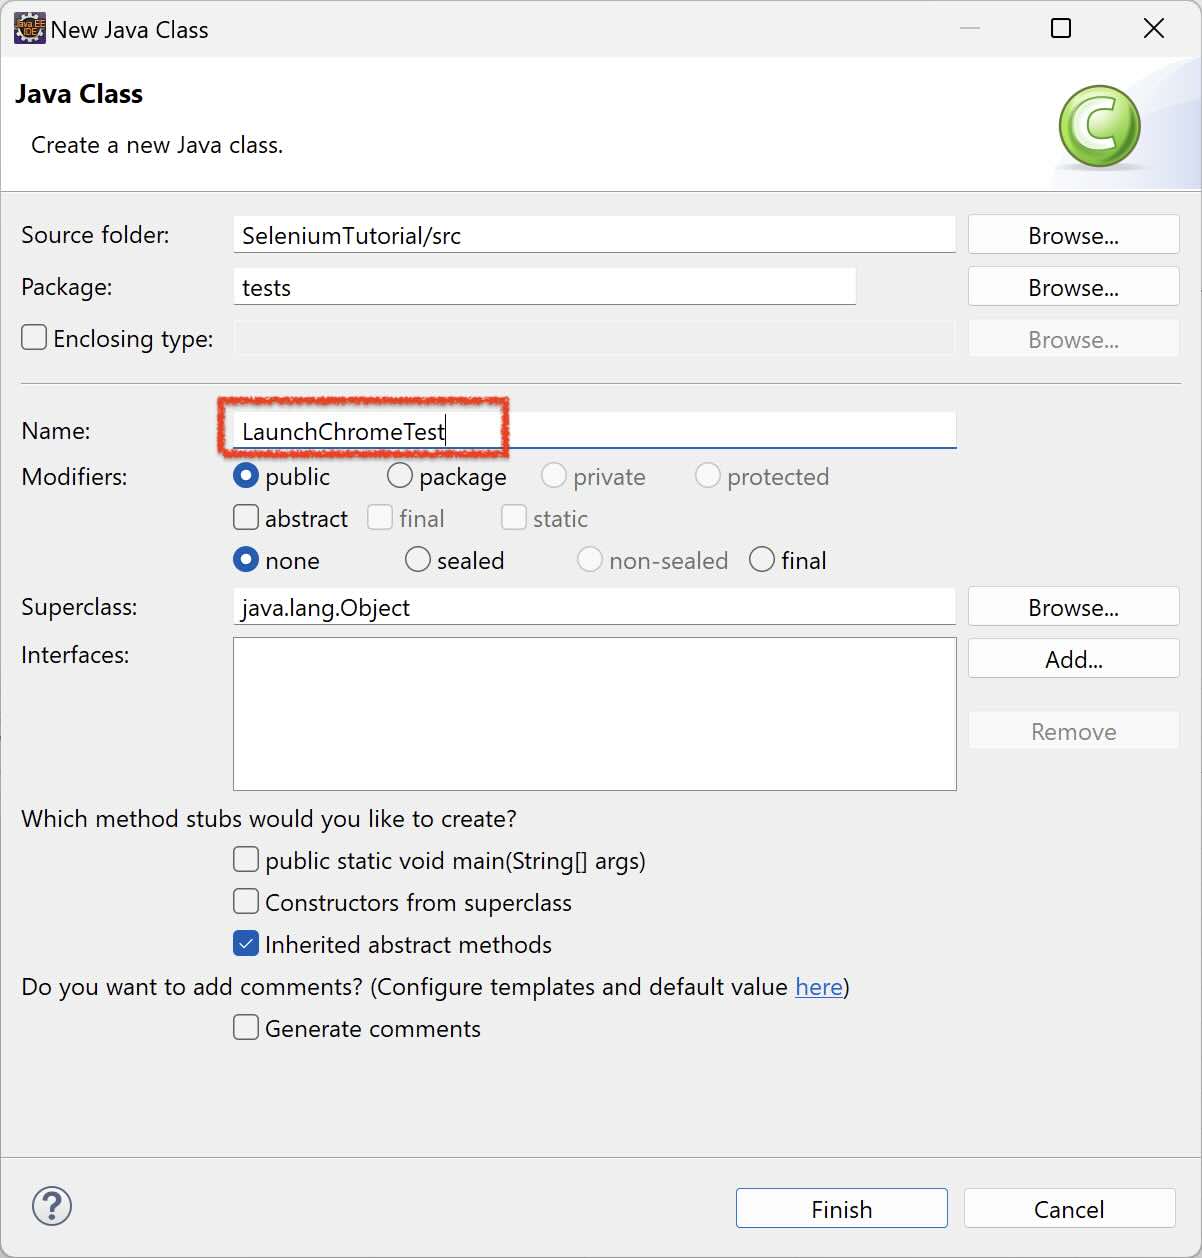
4) In the New Java Class popup window, write the name as LaunchChromeTest and then click on Finish button
5) The new class is now created and it looks as shown below. This is where you would be writing your Selenium test script to launch Chrome browser
Writing Your First Selenium Script to Launch Chrome
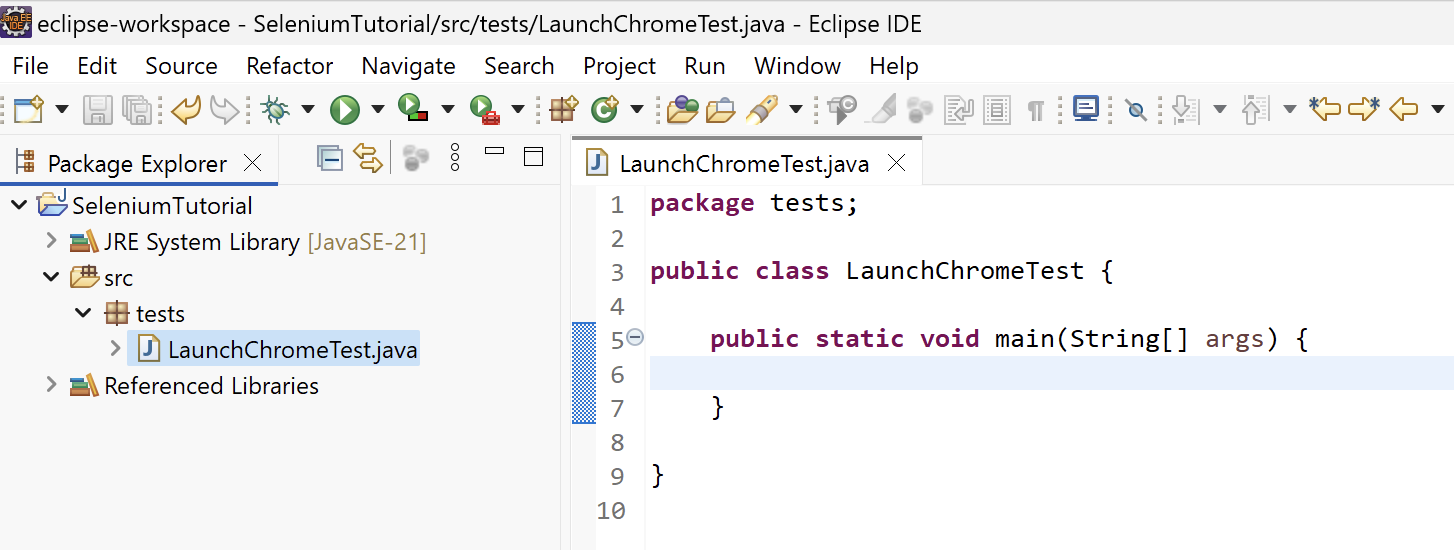
1) Inside this class, we will now create the main() method. The main() method is the entry point of any Java program. Without it, Java will not be able to execute your script.
Add the following code inside the class:
public static void main(String[] args) {

}
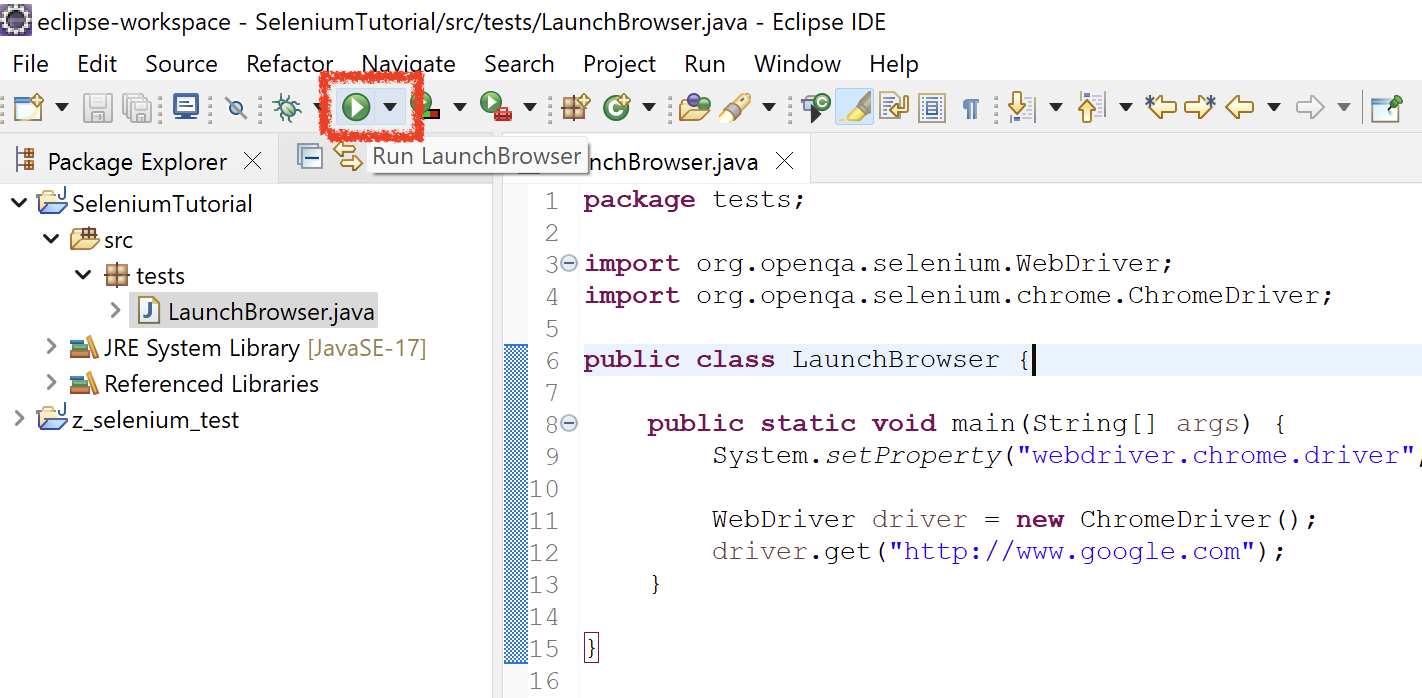
2) We will now add the full Selenium code inside the main() method to launch the Chrome browser. To make it easier, just copy and paste the following code into your class.
package tests;

import org.openqa.selenium.WebDriver;
import org.openqa.selenium.chrome.ChromeDriver;

public class LaunchChromeTest {

	public static void main(String[] args) {
		WebDriver driver = new ChromeDriver();
		driver.get("https://www.google.com");
	}

}
This script does two simple things:
- Creates a new instance of the Chrome browser
- Opens the Google homepage
If your Selenium setup is correct, this code should launch Chrome without any errors. The complete code should look like this –

Run the script
To run the script, click the Run icon in the Eclipse toolbar.
Alternatively, right-click anywhere inside the class and select Run As → Java Application.
If everything is configured correctly, a new Chrome window will open and load the Google homepage.
Congratulations!! If Chrome launched successfully, your Selenium setup is working correctly.
You have now completed the most important milestone in your Selenium learning journey. From here, we can start building a more structured and scalable automation setup.
What’s Next in the Selenium Tutorial Series
In the upcoming articles, we will gradually enhance this basic project by:
- Converting it into a Maven project
- Introducing JUnit to write proper test cases
- Organising test classes more effectively
- Building toward a maintainable automation framework