Appium Inspector is the next set of articles in our Appium Tutorial series. This is a series of 4-5 articles which would help you learn the process of identifying elements on your mobile app. Let us start this by understanding what Appium inspection process actually is.
What is Appium Inspection Process?
In very simple words, Appium inspection is the process using which you can identify or find elements in your mobile app. If you want to automate any scenario in your mobile app, then you would need to follow these 2 steps –
- Step 1: Identify the element uniquely
- Step 2: Perform action on the identified element
Appium inspection process helps you solve the first step mentioned above. For example, let us suppose that you have an app with a login screen. Now your task is to enter username and password in this screen. Here, Appium inspection process would help you “inspect” the screen and then let you uniquely identify the text fields. This way you will be able to write code which enters login id and password in the correct fields.
Let us now have a look at the tools that you can use to inspect these elements.
Different Appium Inspectors that help you identify elements in mobile app
There are many different tools that help you inspect elements in mobile apps. But for our Appium Tutorial series, we will cover the most popular and widely used tools (and supported by Android or Appium). These tools are –
- UIAutomatorViewer: This is a tool provided by Android Studio that lets you inspect elements in your mobile app
- Appium Desktop Inspector: The latest version of Appium GUI (Appium Desktop) comes with an inspector. You can use this inspector for both Android and iOS apps (for iOS apps, you would need a Mac)
In this article, we will start with the basics of UIAutomatorViewer. The next few articles in this series will cover in detail, the different ways using which you can inspect your mobile app using both UIAutomatorViewer and Appium Desktop Inspector.
How to open UIAutomatorViewer
UIAutomatorViewer comes with Android Studio installation package. So when you install Android Studio, UIAutomatorViewer would automatically get installed with it. There are 2 ways in which you can open UIAutomatorViewer. You can follow any of these methods to open it –
Important Note: Please make sure that you have followed our Appium Tutorial guide and have installed the latest version of Android Studio and correctly setup the Android environment variables.
Method 1: Open UIAutomatorViewer from Command Prompt This is the easiest way of opening UIAutomatorViewer. Just follow the steps given below to open it –
Step 1.1: Open command prompt
Step 1.2: Type uiautomatorviewer and then hit Enter
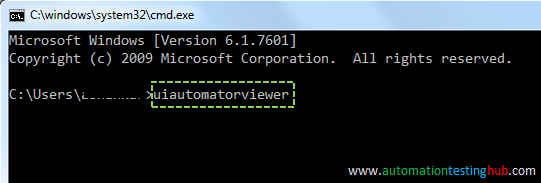
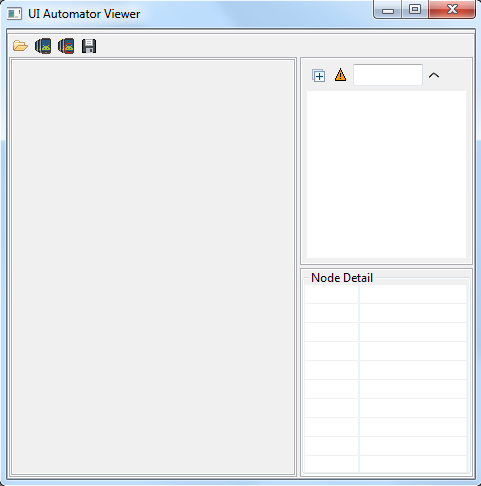
Wait for a couple of seconds. UIAutomatorViewer window would open as shown below
Method 2: Open UIAutomatorViewer from its folder location UIAutomatorViewer is installed on your machine as a .bat file. Using this method, you will navigate to the folder location where it is installed and then open it. Follow the steps given below to use this approach –
Step 2.1: Open the folder location where UIAutomatorViewer is installed. Generally, this location is – C:\Users\Anish\AppData\Local\Android\sdk\tools\bin (Replace ‘Anish’ with the username that you have on your machine)
Step 2.2: Check that this bin folder contains uiautomatorviewer
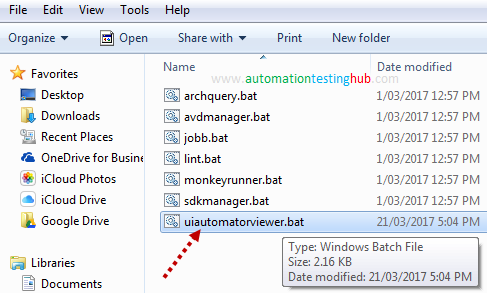
Step 2.3: Double click on uiautomatorviewer. It will open UI Automator Viewer window in a couple of seconds
As we had mentioned above, you can use any of these methods to open UI Automator Viewer.
Connect your mobile phone to your machine using USB
Before you start inspecting elements of your mobile app, you first need to connect your mobile device to your machine via USB. Follow the below steps to do this –
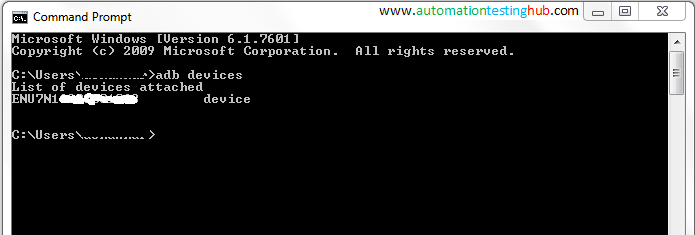
Step 1: Connect your mobile phone to your machine via USB
Step 2: To make sure that the phone is connected properly, open command prompt and run adb devices command.
When you run this command, it would show the mobile phone’s Device ID. This means that the mobile phone is connected properly to your machine.
Step 3: You will now need to open the app which you want to inspect. As with the previous articles in our Appium Tutorial series, we will be using Google Play Store app as an example in this case as well. So, open Play Store app on your phone
Inspect mobile app using UI Automator Viewer
Follow the steps given below to inspect your mobile app with UI Automator Viewer –
Step 1: Make sure that your mobile phone is connected properly with USB. Also, ensure that it is unlocked and Play Store app is opened
Step 2: Now click on Device Screenshot icon in UI Automator Viewer (this is the second icon as shown in the below image)
![]()
Note: You would have noticed that there are other icons next to Device Screenshot icon you have just clicked. In this article, we are not going to explain the functionality of these icons. We will cover these in our upcoming articles on Appium Inspector.
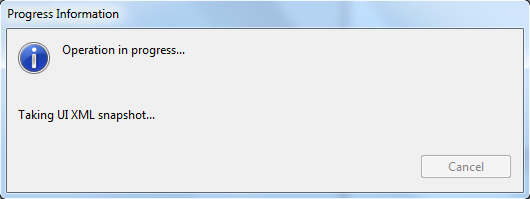
Step 3: You will see a popup message which shows the progress information as shown below
Step 4: Wait for a few seconds for UI Automator Viewer to process all the information on your screen. Once this is done, UI AUtomator Viewer will load the screenshot of your phone as shown in the below image
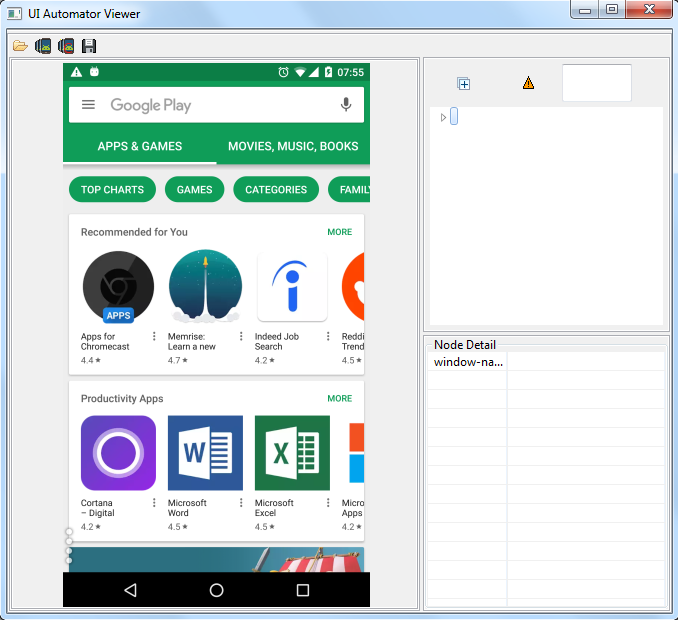
Step 5: Now, hover your mouse pointer anywhere on the device screenshot. You will see that some information gets displayed on the right side panes

Let’s understand whats happening here
Let us now pause for a moment and try to understand what happened here. When you click on Device Screenshot icon, then UI Automator Viewer does the following three things –
- It first captures details of all the objects visible on the screen in XML format.
- Then it captures the screenshot of the mobile screen in PNG format
- Once the above details are captured, UI Automator Viewer shows both these things in the UI
Important Note: Technically speaking, UI Automator Viewer just captures your mobile screen. So whatever is displayed on the device, UI Automator Viewer would capture that. Be it any app, or your home screen or even lock screen.
3 main sections in UI Automator Viewer
From the below image, you can see that UI Automator Viewer has 3 main sections –
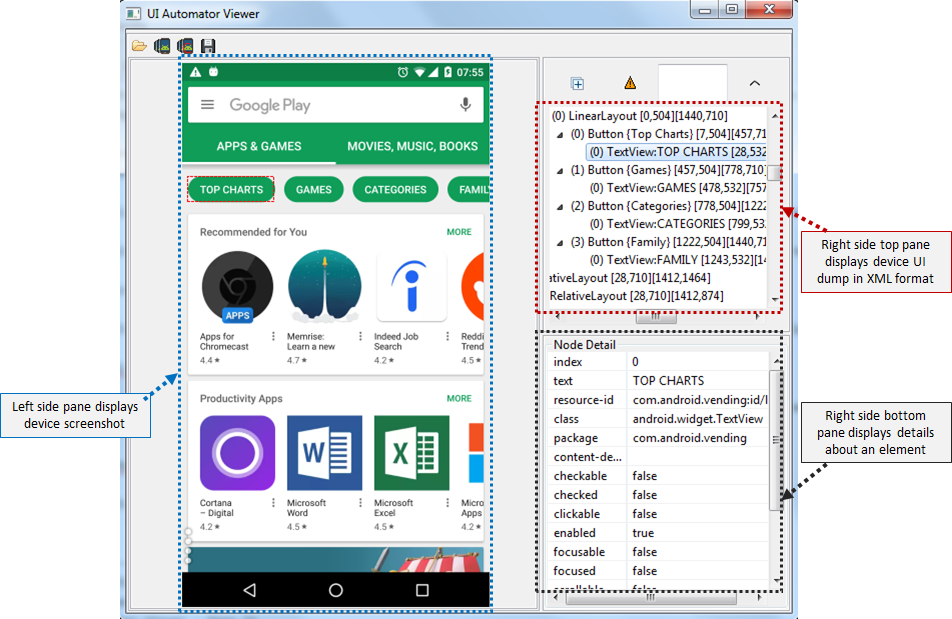
1. Left Side Pane: This pane shows the device screenshot. This is an interactive image, where you can click or hover your mouse pointer over any element on the screenshot.
2. Right Side Top Pane: This pane shows the entire XML structure of the screen. This XML structure shows very basic details about each control – control name, its text (if available) and its coordinates.
3. Right Side Bottom Pane: This is an important pane which shows all the details of a control. Whatever element you select from the screenshot, this pane will show its entire details such as its text, class name, package name etc. This is the pane from where you will get information on how to identify an element uniquely.
Till now, we have talked about the basics of UI Automator Viewer, how to open it and how you can load mobile app’s screenshot in it. We will stop this article here and cover the remaining part in the next article. There are multiple ways in which you can identify an element with Appium. We will discuss all that and much more in our upcoming articles on Appium Inspector.
Try it Yourself Activity: In one of the sections above, we have mentioned that you need to connect your mobile device to your computer using USB cable. Did you know that you can do this in wireless mode as well? Check out this article which shows how you can run your Appium test scripts over WiFi. Using this article as a reference, try to connect your mobile device via WiFi and then see if you can inspect any elements.
Feel free to contact us if you have face any issues with any of the sections above, or if you have any feedback for us. We would love to hear your feedback as it helps us improve our articles and make it more useful for all our readers.