This is a continuation of our previous article where we covered the detailed steps on how you can setup Appium for running script on mobile browsers. This article would help you write the actual code with which you can launch Chrome browser on mobile device. The test script that you would see in this article would just focus on opening the browser in the mobile device. We will extend this test script in the next article to include object interactions and other things as well.
Let us first start with the topics that we will cover in this article.
Topics covered in this article
This article covers the below topics, which you can follow to run your test script
- Start Appium Server
- Get details of the mobile device
- Write Appium test script
- Run your test script and check that it launches Chrome browser on mobile device
Let us now work with each of these topics one by one.
Start Appium Server
We are going to use Appium Desktop App to start the Appium server. Follow the steps given below to do this –
1. Go to Start -> All Programs and look for Appium
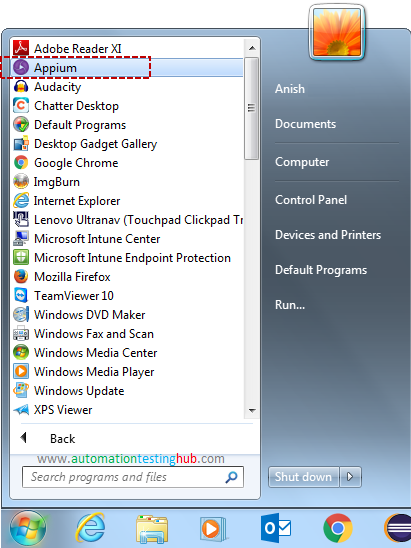
2. Click on Appium to open Appium Desktop (it might take 20-30 seconds for Appium Desktop to open)
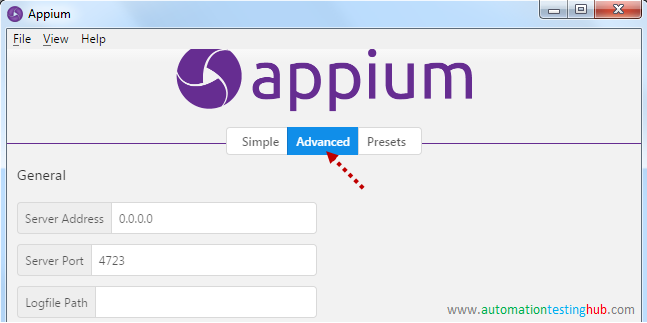
3. Once Appium Desktop opens, navigate to the Advanced tab as shown below
4. Enter the following values in the fields as shown in the below image –
- Server Address – 0.0.0.0
- Server Port – 4723
- Allow Session Override – tick the checkbox
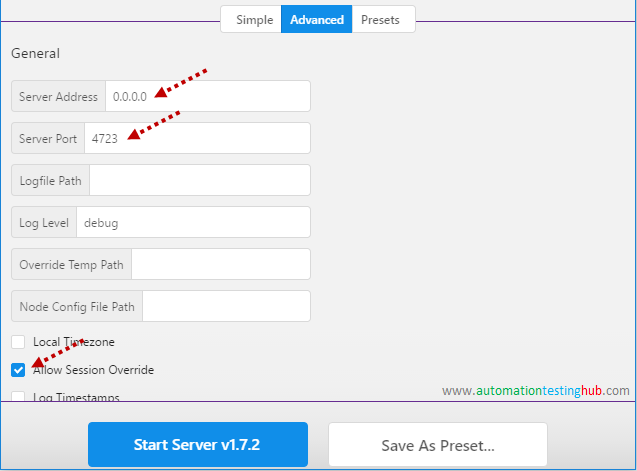
Note: Why did you tick “Allow Session Override” checkbox? When you run an Appium test script, it creates a new session on the Appium server. If this session doesn’t close properly, then your script would fail when you re-run it. This is because the previous session still exists and thus, Appium server is not able to create a new session.
And when you tick the checkbox, you provide Appium the capability to override the existing session when you re-run scripts. This would ensure that your scripts don’t fail due to session related issues.
5. Leave all other fields as it is, and then click on Start Server v1.7.2 button
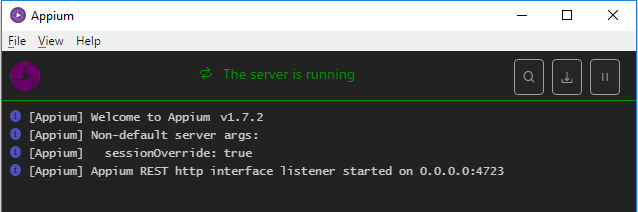
6. Appium server would start and you would see the screen as shown below
Let us now move over to the next section.
Get your Mobile Phone’s Device ID
Appium identifies your mobile phone using its Device Id (also called as its UDID). For example, consider a scenario where you have multiple mobile phones connected to your machine using USB cables. Now when you run your Appium test script, Appium would detect that you have multiple devices connected. So it would need the Device ID, so that it can connect to the correct device and run the scripts on that device. Let us see how you can find the Device ID (or UDID) of your mobile phone –
1. Connect your mobile device to your computer using USB cable. (If your mobile device shows some popup after connecting, then accept that popup)
2. Now open command prompt and run this command: adb devices
3. Once you run this command, you would see the details of the device as shown in the below image (if you see some other response such as “daemon not running. daemon started successfully”, then run the command again)

4. From the above screenshot the Device ID is – ENUL6303030010. Note down the device ID that you get for your phone, because you would need to provide that in your Appium test script.
5. Keep your mobile device connected to the USB cable. It needs to remain this way when you run your script.
Get your Mobile Phone’s Android version
You would also need to provide your mobile phone’s Android version number in the Appium script. To find this, open your mobile phone and go to Setting > About Phone. In About Phone screen, you can see the Android version as shown below –
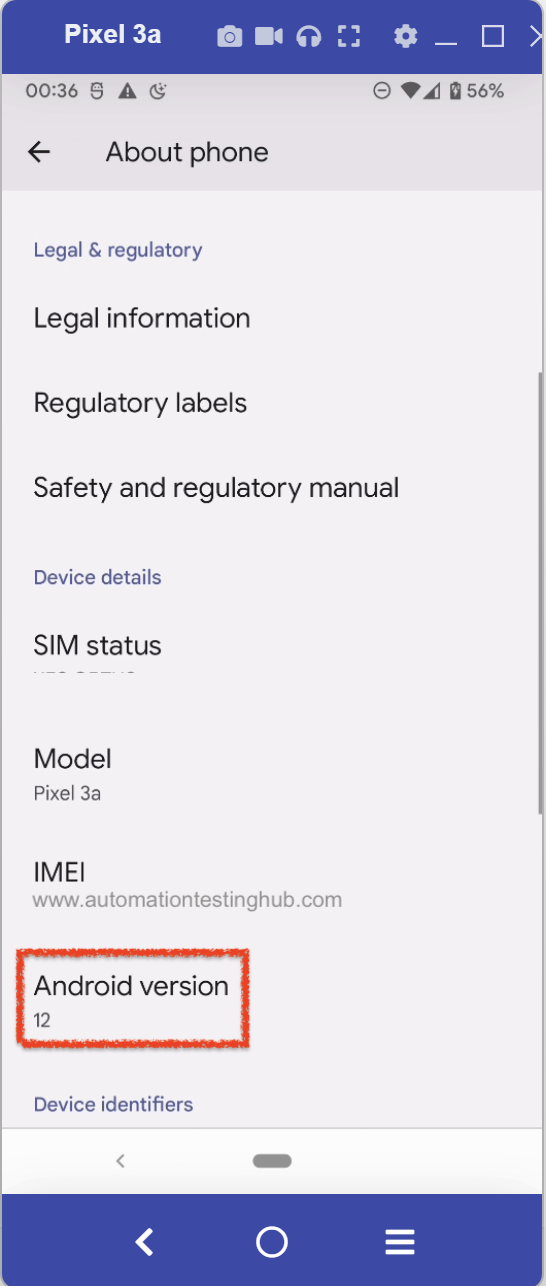
Please note that the exact process to check the Android version might differ from phone to phone. If you have difficulties finding it on your device, then please check for the steps on internet.
Write Appium test script to launch Chrome browser
Now comes the part where you write the test script to launch the mobile browser. We will first create a new package and class in our Eclipse project and then would add the code to it. You can do this by following the steps given below:
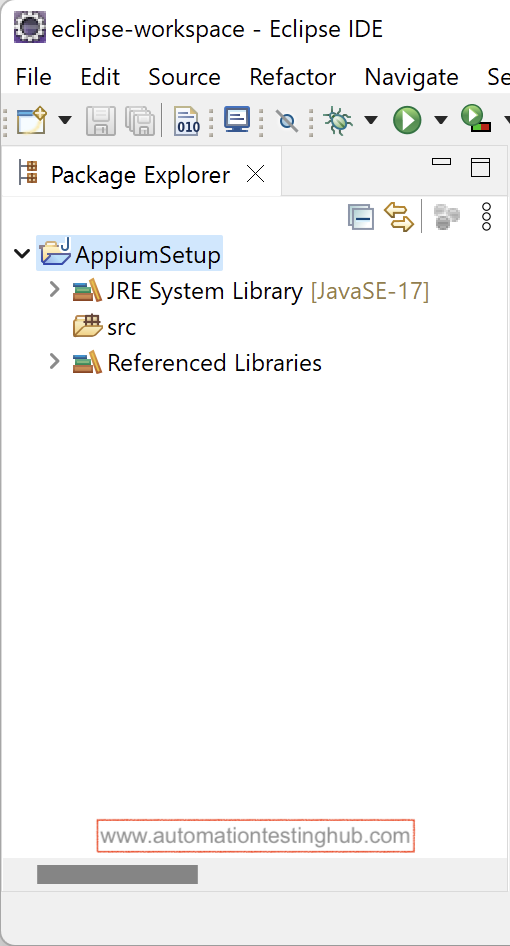
1. Open the Appium project that we had created in this article – Create new project in Eclipse. It should look something like this –
2. In the Appium project in Eclipse, right click on src folder. Then select New > Package

3. In the popup window, enter package name as browser_tests and then click on Finish button

4. You can see that a new package called tests is created under src folder. Right click on this package and select New > Class option
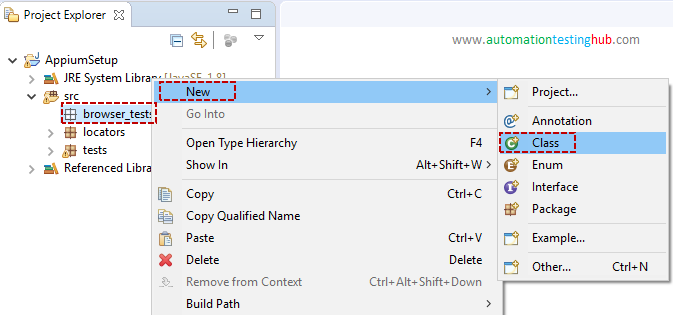
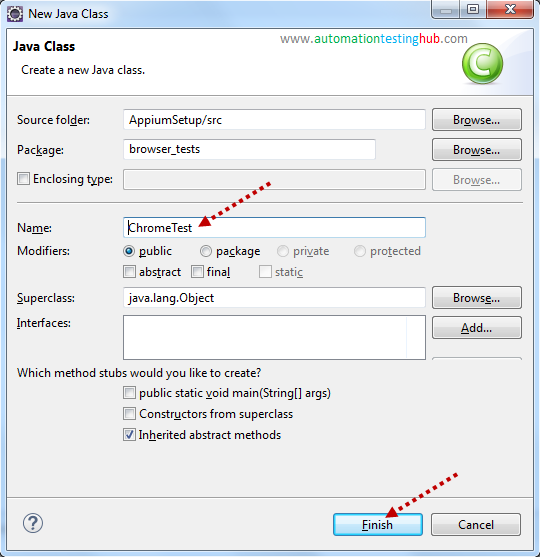
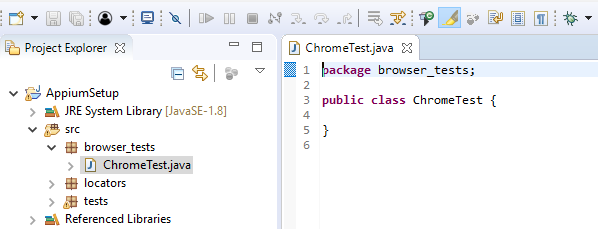
5. In the popup window, enter the class name as ChromeTest and then click on Finish button
6. The new class would be created as shown below. This is the place where you will add your code.
7. In this article, we will provide you with the complete code that you would need to launch the browser on mobile device. Don’t worry if you are not able to understand some of the details in the code. We will work on a separate article, where we will explain the code in detail.
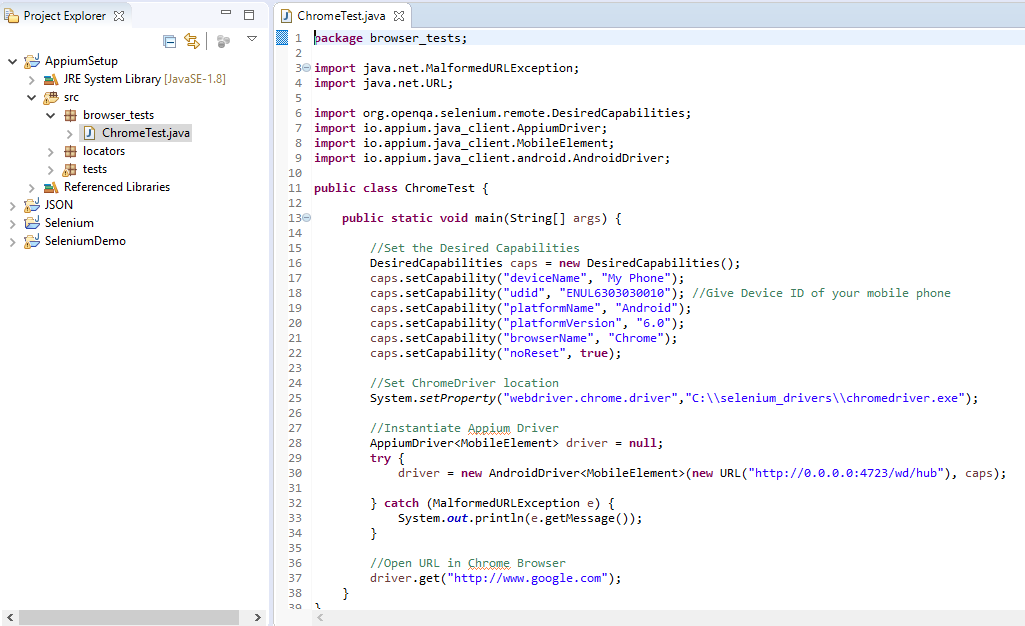
8. For now, delete all the content in ChromeTest.java class and replace it with the code given below. Also, please make sure that you replace all the desired capabilities and chromedriver location (lines 18, 19, 20 and 25) as per your device.
package browser_tests;

import java.net.MalformedURLException;
import java.net.URL;

import org.openqa.selenium.remote.DesiredCapabilities;
import io.appium.java_client.AppiumDriver;
import io.appium.java_client.MobileElement;
import io.appium.java_client.android.AndroidDriver;

public class ChromeTest {

	public static void main(String[] args) {

		//Set the Desired Capabilities
		DesiredCapabilities caps = new DesiredCapabilities();
		caps.setCapability("deviceName", "My Phone");
		caps.setCapability("udid", "ENUL6303030010"); //Give Device ID of your mobile phone
		caps.setCapability("platformName", "Android");
		caps.setCapability("platformVersion", "6.0");
		caps.setCapability("browserName", "Chrome");
		caps.setCapability("noReset", true);

		//Set ChromeDriver location
		System.setProperty("webdriver.chrome.driver","C:\\selenium_drivers\\chromedriver.exe");

		//Instantiate Appium Driver
		AppiumDriver driver = null;
		try {
			driver = new AndroidDriver(new URL("http://0.0.0.0:4723/wd/hub"), caps);

		} catch (MalformedURLException e) {
			System.out.println(e.getMessage());
		}

		//Open URL in Chrome Browser
		driver.get("http://www.google.com");
	}
}
9. Your code in Eclipse should look like this. Press Ctrl + S keys to save this test script.
Note: Currently, this code snippet clears all the cookies, and deletes all browser history & saved passwords before launching Chrome browser.
Run Appium test script
You have written your Appium test script. Its now time to run it. Please make sure that your mobile device is connected to your computer with USB and its unlocked. To run the script, click on the run icon from the toolbar.

With this, your script would start running and you would see that it launches Chrome browser first and then it opens the url after few seconds. This entire process might take 10-15 seconds because Appium has to connect to your mobile device first. A good approach would be to run your script and then monitor the Appium Desktop screen. You would notice that Appium Desktop screen should start showing some logs. This way you will know that your Appium test script is running.
Congratulations!!! With this, you have completed the first step of mobile browser automation – which is to launch the chrome browser on your mobile device with Appium. If you have faced any issue while running the script, or if your browser does not launch, then please let us know using the comments section.
What’s Next?
In our next article, we will cover the detailed steps on how you can identify the elements in your website using Appium Desktop. With this, you will be able to go one step further and write full fledged test scripts that run on your mobile device.
We are in the process of adding more articles in our Appium tutorial series. You can follow us on our Facebook page to keep track of our latest articles.