

This is a continuation of our previous articles on Appium element inspection, where we covered the basics of UI Automator Viewer and learned how you can use it to inspect elements in your mobile app. There are few more points that we will cover in this article. It’s mostly related to an additional functionality of UIAutomatorViewer, and then some of the current limitations of UI Automator Viewer (or Android automation in general).
Let’s jump over to the first section.
Save UI Automator Viewer Screenshot and Object Hierarchy Dump
You can actually save the Screenshot and XML dump (containing information of all elements) of the screen that you are currently inspecting. This is helpful especially when you are working with multiple screens on your app. In such a scenario, one option is to inspect each of the screens every time you want to use it. This would be cumbersome especially when you have to return to a previous screen multiple times.
Also, this approach always keeps your phone hooked on to the USB. This can be annoying if you have a USB cable with short length. So a good alternative would be to just save the screenshot and XML for each screen beforehand. Once you get all the screenshots, you can just use UIAutomatorViewer to open the previous screens from your system, rather than inspecting it every time.
Let’s see the steps that you can follow to save your screenshots and object hierarchy files.
1. Connect your mobile device to computer using USB. Open Google Play Store app on your phone
2. Now open UIAutomatorViewer and click on Inspect button to load the entire screen
3. Click on Save icon. It will ask for the location, where the screenshot has to be saved
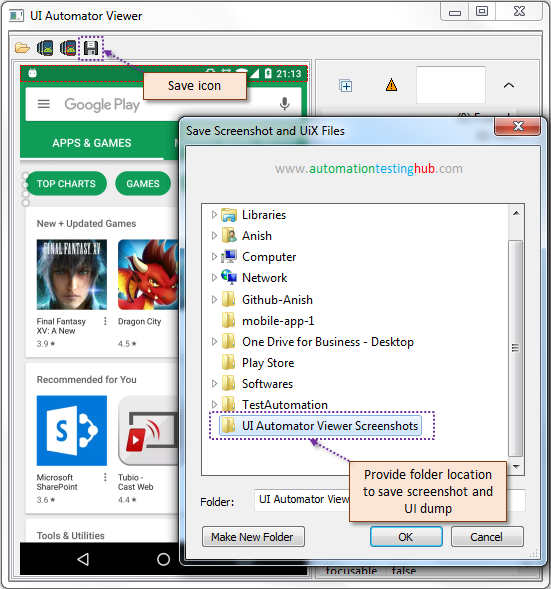

4. Select any folder and click on OK to save it (we are saving it in a folder called – UI Automator Viewer Screenshots)
5. The screenshot and object hierarchy dump will be saved in the folder you selected. Open the folder and check that there are 2 files stored there. One is the screenshot, which is a .png file. Other one, a .uix file, is the object hierarchy dump.


6. This way you can inspect all the screens initially and then save it on your machine.
Open saved screenshot and UI dump
Opening the screenshot and object hierarchy dump in UIAutomatorViewer is pretty straightforward –
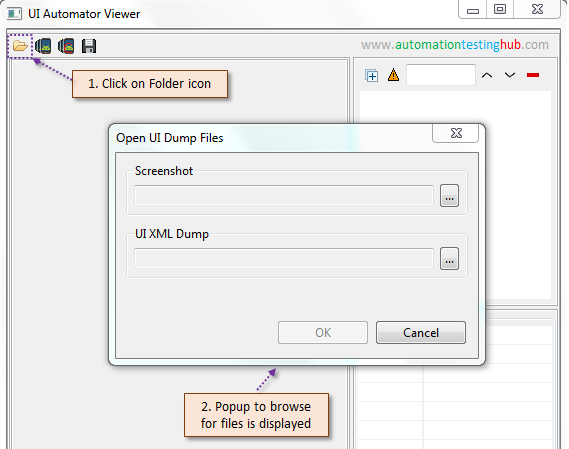
1. Click on folder icon from UI Automator Viewer window menu. It will display Open UI Dump Files popup as shown below

2. Click on the Browse button for Screenshot section, navigate to the folder where you saved the screenshot and select the screenshot
3. Do the same for UI XML dump as well. Once you select both the files, then the OK button would get enabled
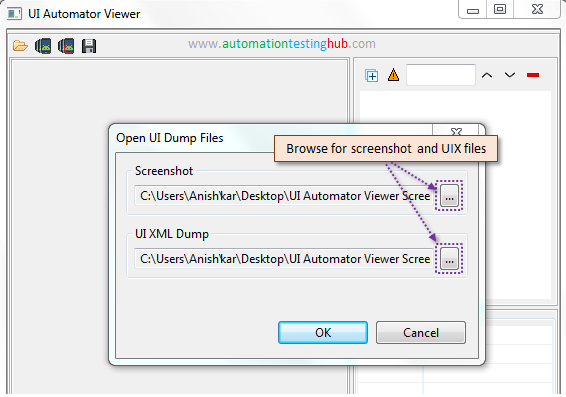

4. Click on OK button. The screenshot and its UI dump would be displayed in UI Automator Viewer window.
Try using this approach a few times, especially when you are frequently navigating back and forth on the screens of your app. You will soon realize that this is a very good approach to follow.
Current limitations with Mobile Automation
In this section, you will learn about some of the limitations that you would face with mobile automation. Some of these are specific to Android automation, and few are generic which would apply to both Android and iOS.
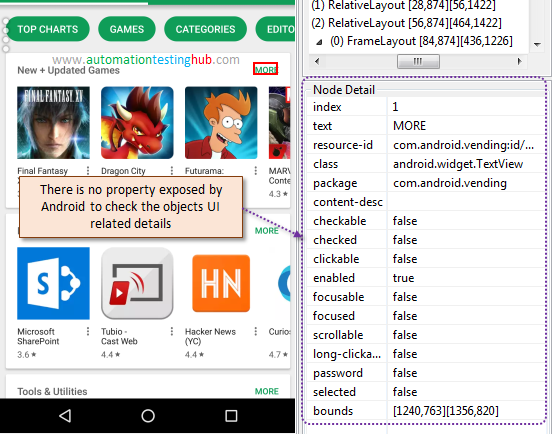
1. One of the major limitations right now is that you can’t verify the look and feel of the elements on your mobile app. For example, you can’t check the color, font type, font size etc of texts, buttons and other elements in your mobile app. Text alignment, whether the text is bold or italic cannot be checked using Appium. But you can verify these HTML and CSS related things with Selenium on web browsers.
This is not a shortcoming of Appium. Its just that the underlying Android/iOS frameworks don’t expose these properties to be used by Appium. With UI Automator Viewer, you will see that Android doesn’t provide any property for you to verify the element’s UI.

2. Another limitation is the lack of a good method to identify XPaths. For web automation, you have tools like Firebug, which help you identify the Xpath. But UI Automator Viewer doesn’t provide this facility.
Please Note: Appium Desktop provides a way using which you can identify XPaths. But that is also a pretty basic way. With Appium, you would mostly have to figure out the Xpaths on your own.
3. Now this one is Android specific. With Android, you can only work with the objects that are currently visible on the screen. UI Automator Viewer would not show you the elements which are not currently displayed on the screen. Let us check out an example to understand this.
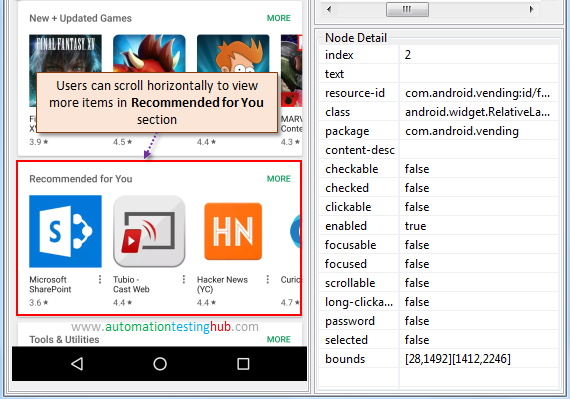

Have a look at Recommended for You section from the above image. Currently it shows 3 items fully and the 4th item is partially visible. But you would be able to scroll left and right on this section to view more items. However, when you inspect this screen, UI Automator Viewer will show you only 4 items in this section.
Now consider a scenario, where you have to write a script which prints the names of all the items in this section. Since Android returns only what is visible on the screen, you will have to write a loop with the logic given below –
- Fetch the list of all the items from the Recommended for You section
- Scroll horizontally so that next set of items is displayed
- Fetch the new list of items
- Scroll horizontally again, and keep on fetching new items till no new items are displayed
With this kind of logic, your code will get bit complex. But as we said, this is a limitation only with Android. If you use Appium with iOS, you will not face this issue. This is because iOS would return the entire list of items on the screen. Suppose if there are 20 items in Recommended for You section, iOS will return the list of all the elements, even though only 3-4 of them are actually visible on the screen.
This was all about some of the current limitations with mobile automation. Do you know about any other shortcoming? Let us know about it using the comments section.
With this we complete our 3 part article series on UI Automator Viewer. We still have couple of more articles where we will cover the process of element identification using Appium Desktop tool itself. Bookmark our Appium Tutorial link, where we will provide links to all these upcoming articles.