

This article provides a detailed guide where you will learn how to download the latest version of Selenium ChromeDriver. You will also see how you can setup Selenium ChromeDriver in multiple ways, and then write code which can launch Chrome browser using Selenium.
Note: This article is a part of our Selenium Tutorial series. Please make sure that you have installed the latest version of Selenium WebDriver in order to avoid compatibility issues with Chrome.
What tool versions are we going to use for Selenium ChromeDriver setup?
In this article, we will work with the latest and stable versions of Selenium, ChromeDriver and Google Chrome. The versions that we are going to use are –
- Selenium – version 3.11.0
- Chrome Browser – version 66
- ChromeDriver – version 2.39
What is ChromeDriver?
Before we begin, let us check out some basics of ChromeDriver. When you write test scripts in Selenium, you use WebDriver to launch and communicate with different browsers. You will generally do this with the below line of code –
WebDriver driver = new ChromeDriver();
//or
WebDriver driver = new FirefoxDriver();
Here, WebDriver is an open source tool for automated testing of webapps across many browsers. It provides capabilities for navigating to web pages, user input, JavaScript execution, and more. ChromeDriver simply helps WebDriver do this job on Chrome. In more technical words, ChromeDriver is a standalone server which implements WebDriver’s wire protocol for Chromium.
Download Selenium ChromeDriver
We would recommend you to download the latest version of ChromeDriver, mainly because it supports the latest versions of Chrome, and secondly it contains all the bug fixes. Let us see the steps that you can follow to download Selenium ChromeDriver –
1. Open ChromeDriver download page – https://sites.google.com/a/chromium.org/chromedriver/downloads
2. This page contains all the versions of Selenium ChromeDriver. We are interested in the latest version of ChromeDriver, which is ChromeDriver 2.39 (as on 7th Jun 2018), as shown in the below image.


3. Click on ChromeDriver 2.39 link. You will be navigated to ChromeDriver download page which contains ChromeDriver for Mac, Windows and Linux operating systems.


4. Click on chromedriver_win32.zip to download ChromeDriver for Windows.
5. Once the zip file is downloaded, you can unzip it to retrieve chromedriver.exe
This completes the Selenium ChromeDriver download process. Let us see how you can setup ChromeDriver in your project. As shown in the below image, this can be done in 2 different ways –

If you have worked on Selenium automation before with some different browsers, then you would have realized that these 2 methods of setup are similar to what you do with other WebDriver variants. If you use GeckoDriver for Firefox, EdgeDriver, InternetExplorerDriver, or SafariDriver for Mac, the process remains the same. Let us have a detailed look at each of these steps one by one.
Method 1: Use webdriver.chrome.driver system property
With this method, you will have to add an additional line of code in your test case. Follow the steps given below to use this method –
1. Copy the entire path where you unzipped chromedriver.exe. Let us assume that the location is – D:\Drivers\chromedriver.exe. You will need to add System.setProperty with the driver location to your code.
2. Code to launch Chrome browser would look like this –
public class ChromeTest {

	@Test
	public void LaunchChrome_Method1() {
		System.setProperty("webdriver.chrome.driver","D:\\Drivers\\chromedriver.exe");

		WebDriver driver = new ChromeDriver();
		driver.get("http://www.google.com");
	}
}
3. Run this code to verify that it works fine. It launches a new browser window and opens google.com.
Did you observe that there is a message – ‘Chrome is being controlled by automated test software’ which comes up when you launch browser with ChromeDriver?
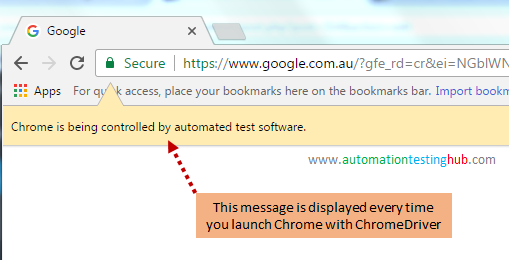

This message would come up every time you launch Chrome. To remove this message, you would need to use disable-infobars argument from ChromeOptions class in your code. The code snippet for this is given below –
public class ChromeTest {

	@Test
	public void LaunchChrome_Method1() {
		System.setProperty("webdriver.chrome.driver","D:\\Drivers\\chromedriver.exe");

		ChromeOptions options = new ChromeOptions();
		options.addArguments("disable-infobars");

		WebDriver driver = new ChromeDriver(options);
		driver.get("http://www.google.com");
	}
}
Try it out and check if you are able to launch Chrome browser without the message. Let us now jump over to the next method of setting up ChromeDriver.
Method 2: Set property in Environment Variables
With this approach, you will need to add ChromeDriver’s folder location to environment variables. The steps to follow this approach are given below –
1. Copy the entire folder location where chromedriver.exe is saved. If the entire path is D:\Drivers\chromedriver.exe, then the folder location would be D:\Drivers\
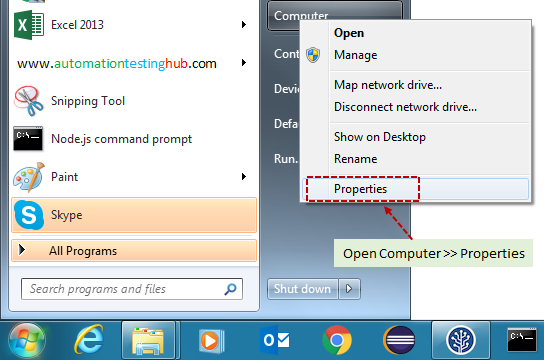
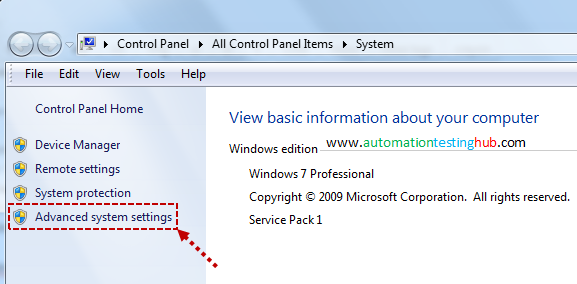
2. You have to now open environment variables window in your machine. To do this, click on Start menu. Then right click on Computer and select Properties option

3. Now click on Advanced System Settings option

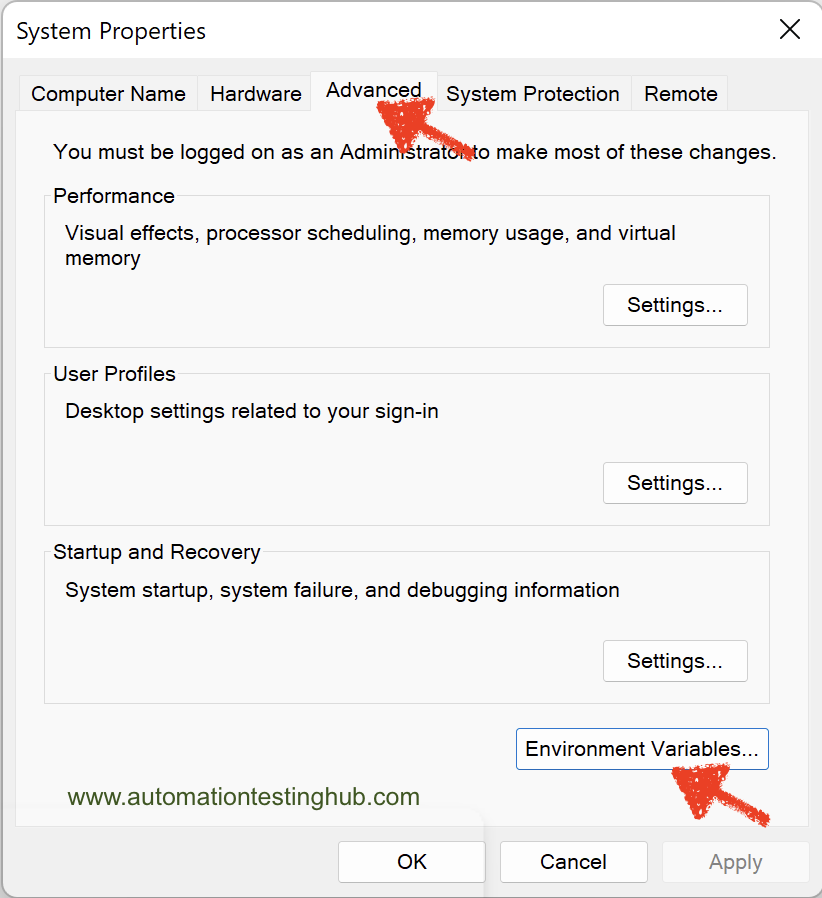
4. This would open the System Properties window as shown below. Now from the Advanced Tab, click on Environment Variables button

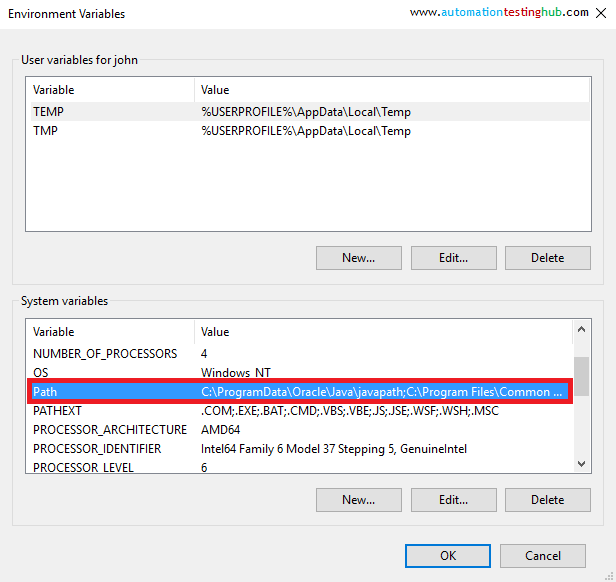
5. Check that there is a variable named Path under System variables section as shown in below image

6. Select the Path variable and click on Edit button. Now move to the end of the Variable value field, then add a semi colon (;) and then ChromeDriver’s folder location (which in our case is – D:\Drivers\)
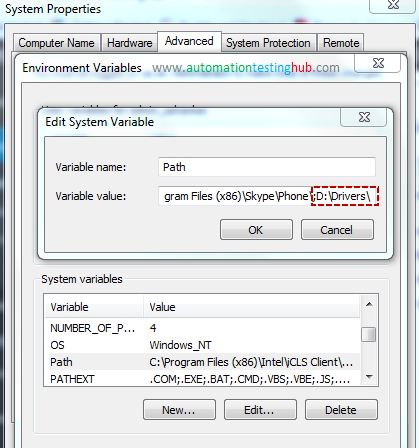

Note: Path variable contains multiple different values, and semi-colon acts as a separator between these multiple values.
7. Click OK buttons to close all the windows. Since you have now set the driver path in Environment variables, so you don’t need to provide it in your code. The new code to launch Chrome would look like this –
public class ChromeTest {

	@Test
	public void LaunchChrome_Method2() {
		ChromeOptions options = new ChromeOptions();
		options.addArguments("disable-infobars");

		WebDriver driver = new ChromeDriver(options);
		driver.get("http://www.google.com");
	}
}
8. Run the code to see if it works fine.
This completes our article on how to download latest ChromeDriver for Selenium and use it to launch Chrome browser. Try it out and let us know if this worked for you. Feel free to contact us using comments section if you face any issue while implementing this.
Bonus Tip: It’s a good approach to keep your browser maximized while running test scripts. And a good way to do this is to maximize the browser when you launch it for the first time. With Selenium ChromeDriver, you can do this using ChromeOptions class. The code snippet is given below –
public class ChromeTest {

	@Test
	public void LaunchChrome_Method2() {
		ChromeOptions options = new ChromeOptions();
		options.addArguments("disable-infobars");
		options.addArguments("--start-maximized");

		WebDriver driver = new ChromeDriver(options);
		driver.get("http://www.google.com");
	}
}
Do you have any useful tips which you take care of while launching the browser? You can share it with us using the comments section.