This article walks you through the process of downloading and installing Java as part of the initial setup for test automation.
If you are starting with browser automation using Selenium or mobile automation using Appium, Java is one of the essential prerequisites. It is the programming language used throughout our Selenium and Appium tutorial series to write and execute automated test scripts.
Before you download Java, it’s important to understand why Java is required and which Java version you should install for automation testing. We’ll cover both of these briefly before moving on to the installation steps.
Why Java is required for Selenium and Appium?
Selenium and Appium support multiple programming languages, including Java, Python, C#, JavaScript, and Ruby. While you don’t strictly need Java for Selenium or Appium, a programming language is mandatory to write and execute automation test scripts.
In our Selenium and Appium tutorial series, we are using Java as the primary programming language. Java is widely adopted in the test automation ecosystem, has strong community support, and integrates seamlessly with tools commonly used alongside Selenium and Appium, such as build frameworks and test runners.
For Appium – especially Android automation – Java plays an even more important role, as we need it to run tests and support underlying tools such as the Android SDK and Appium server components.
How Much Java Is Required for Selenium and Appium?
You don’t need advanced Java skills to get started with Selenium or Appium. For most automation work, basic Java knowledge is sufficient, and you can learn more as you build real test scenarios.
At a minimum, you should be comfortable with:
- Basic Java syntax – variables, data types, and strings
- Control statements –
if-else, loops (for,while) - Methods and classes – calling methods and creating simple classes
- Object-oriented concepts – understanding objects and class structure
- Exception handling – handling common runtime errors
- Collections – working with lists and maps to manage test data
That’s enough to write, understand, and maintain Selenium and Appium test scripts effectively.
Which Java version should you install?
For modern Selenium and Appium automation, not all Java versions are supported. Use the guidance below to avoid compatibility issues.
- Java 11 (Minimum supported version)
- Selenium officially dropped support for Java 8 since September 2023
- Current Selenium releases require Java 11 as the minimum supported version
- Appium Java Client also set the minimum Java version to 11 since v9.0
- Java 17 and Java 21 (LTS)
- Long-Term Support (LTS) release
- Stable, widely adopted, and fully compatible with Selenium and Appium
- Java 25 (LTS)
- Also an LTS release (released in September 2025)
- Since it is a newer release, it is generally safer to use the previous LTS version for better stability and compatibility
Recommendation: Install Java 21 (LTS) for the best balance of stability, compatibility, and long-term support.
JDK vs JRE – Which One Do You Need?
When downloading Java, you’ll see options for both JDK and JRE.
- JDK (Java Development Kit)
- Required to write, compile, and run Selenium and Appium tests
- JRE (Java Runtime Environment)
- Not sufficient for test automation
- Can only run Java applications, not develop or compile test code
Always install the JDK, not just the JRE.
Download Java Development Kit (JDK 21) on Windows
Follow the steps given below to download the latest version of JDK 21 on Windows 10 or Windows 11 –
1. Open this link – https://www.oracle.com/java/technologies/downloads/
2. Scroll down a bit and the select JDK 21, and then Windows
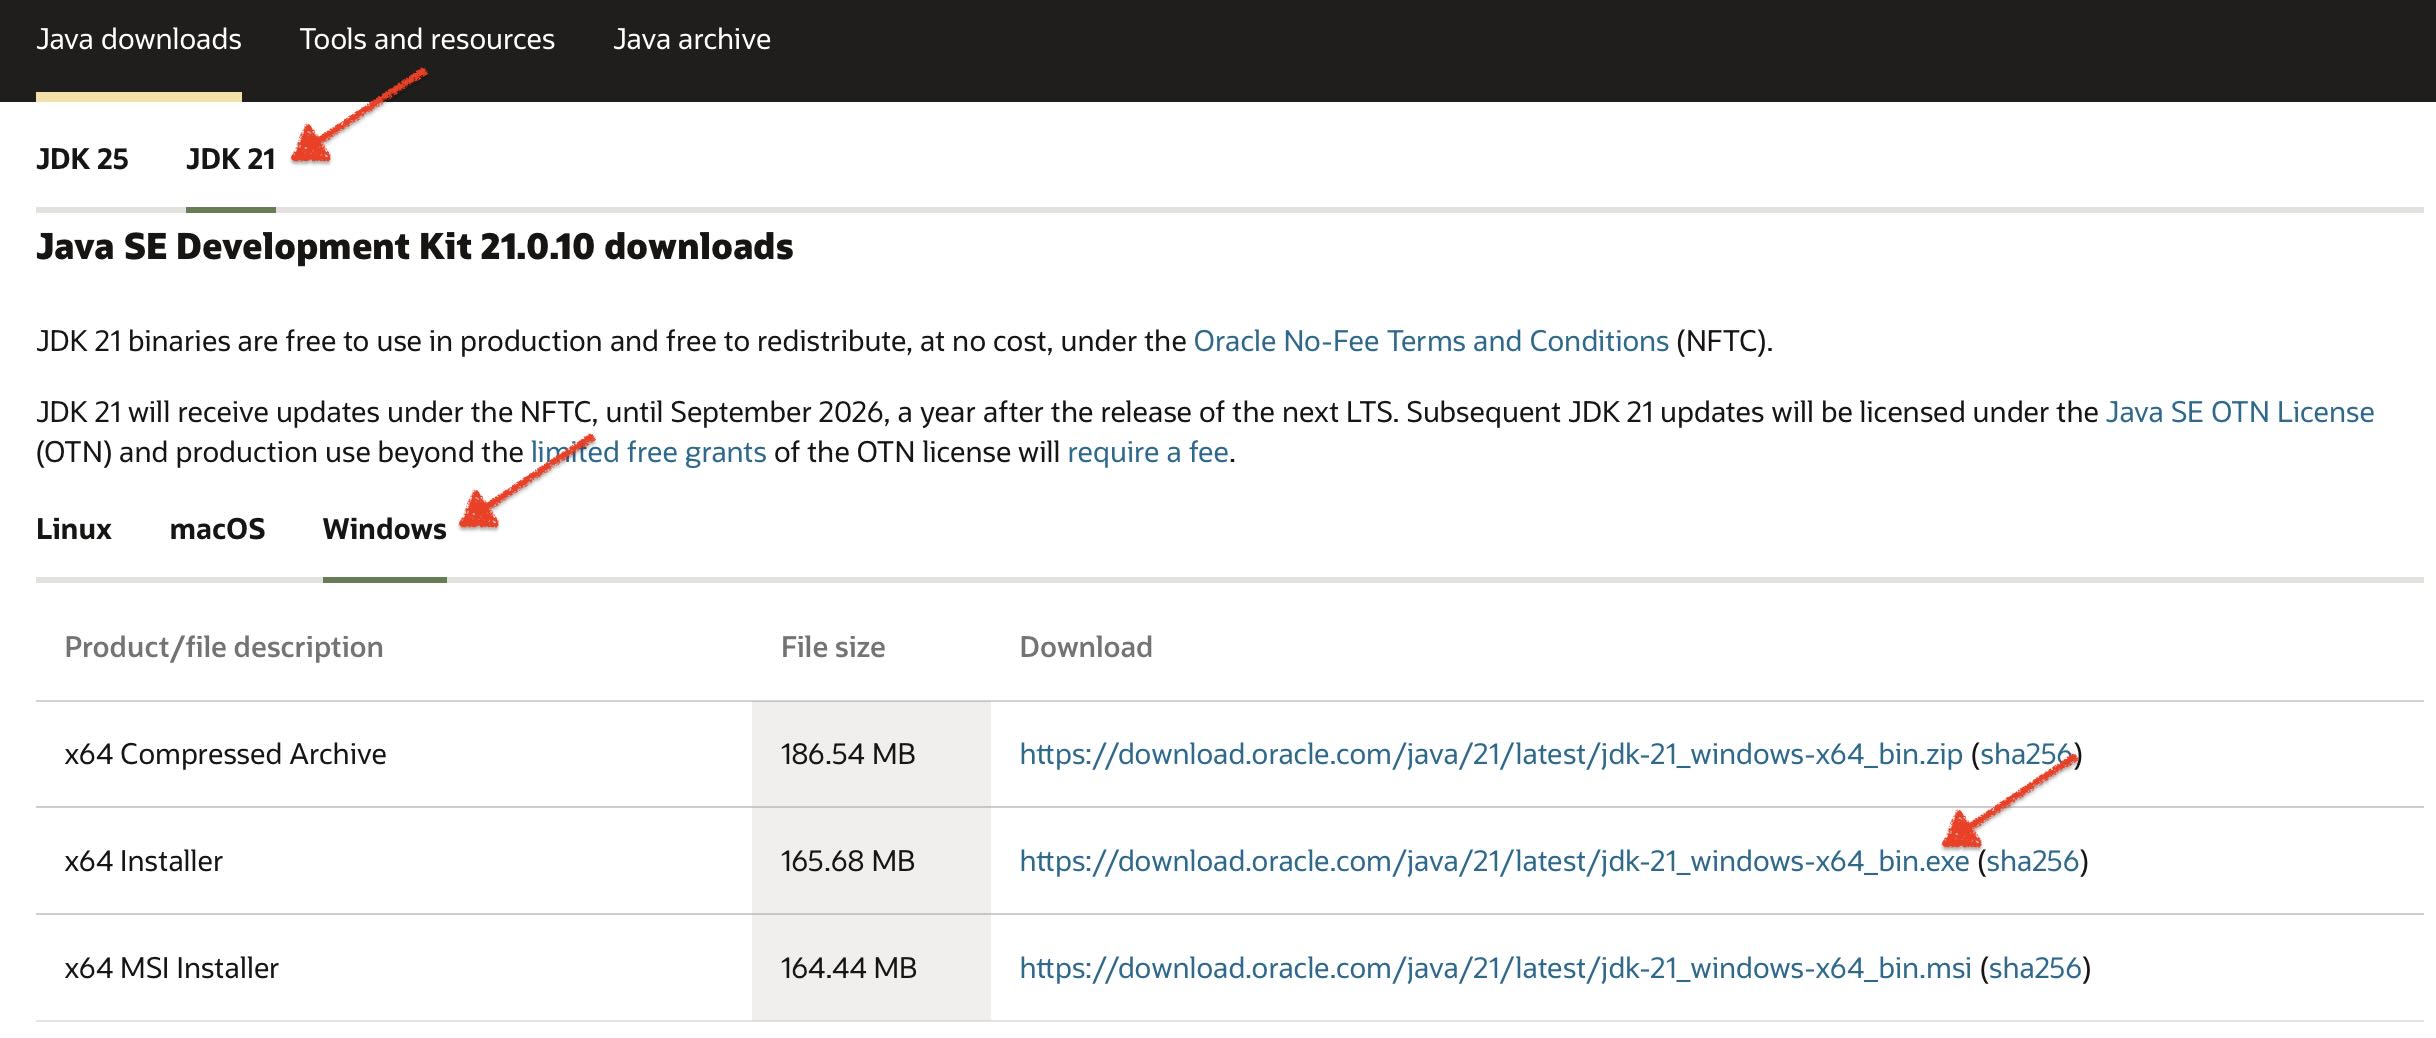
3. Click on .exe link. JDK 21 will start to download on your machine
Install Java Development Kit (JDK)
Given below are the steps that you can follow to install JDK on your Windows 10 or 11 machine –
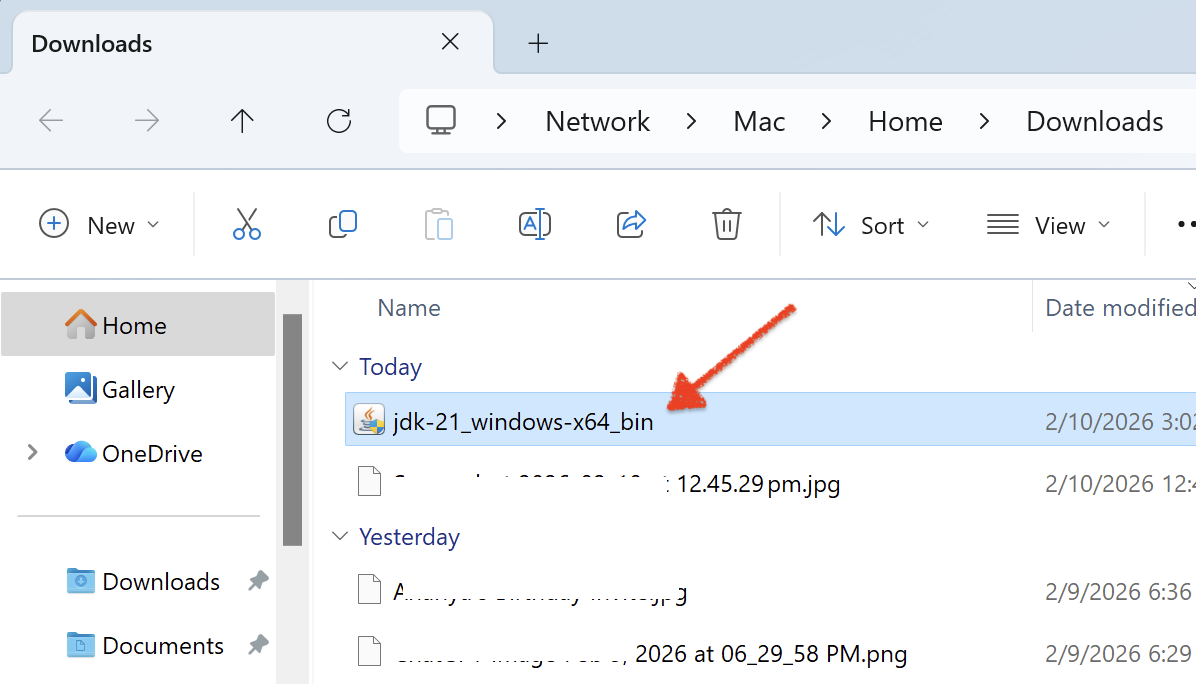
1. Navigate to the folder where you had downloaded JDK. Double click on the exe file to start the installation process
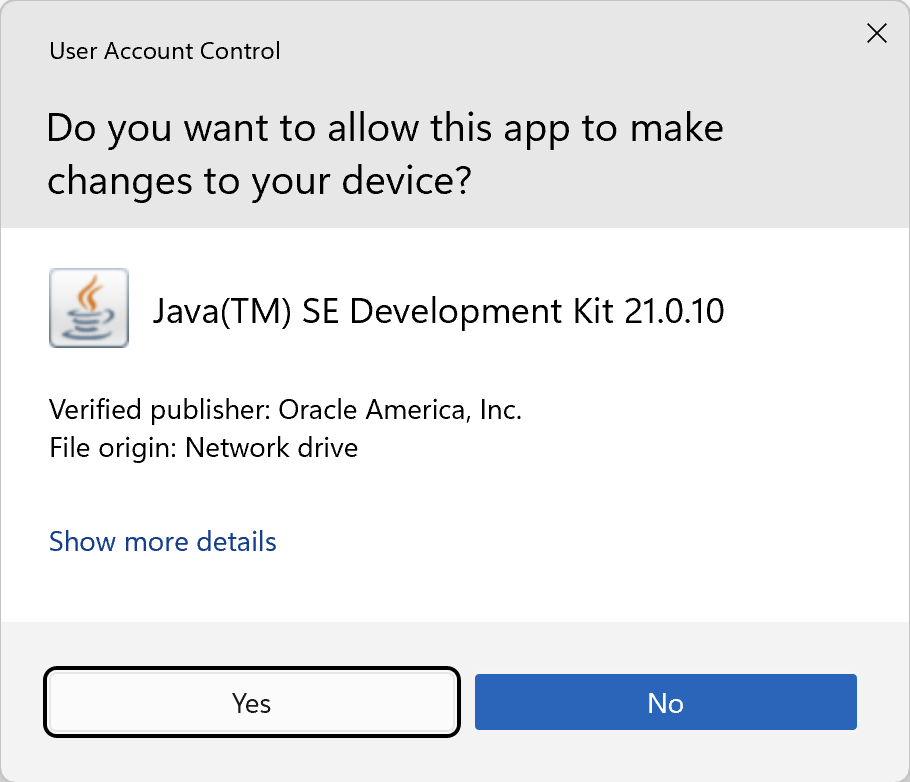
2. If you see this popup – “Do you want to allow this app to make changes to your device?”, then click on Yes button to proceed
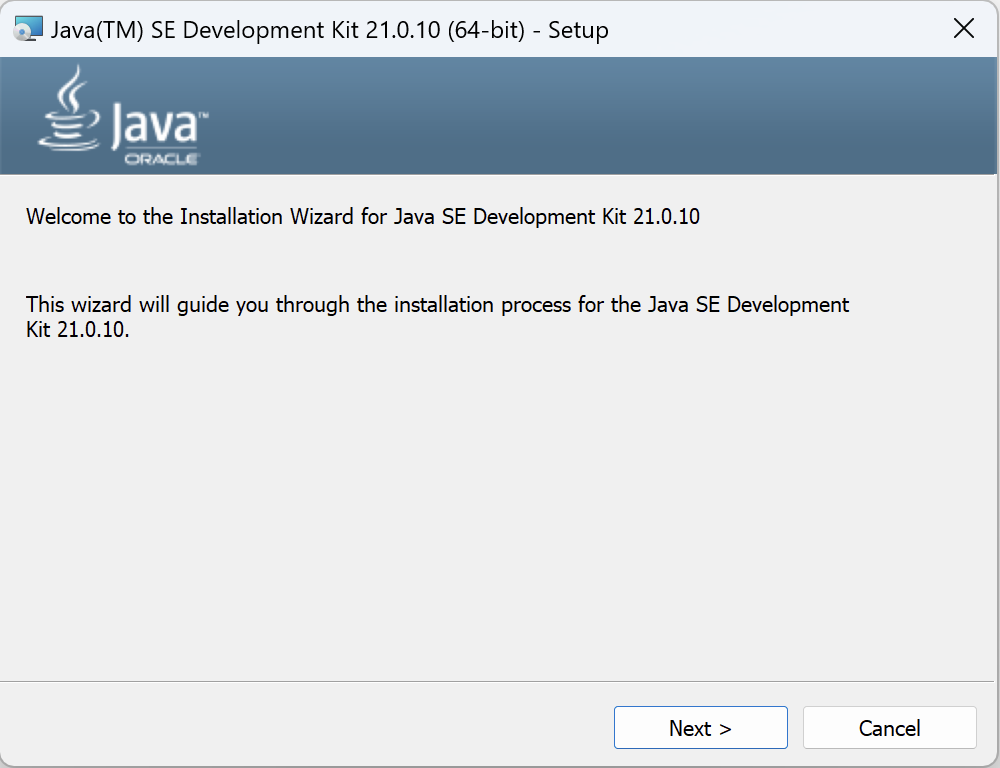
3. The installation process would now begin. Click on Next button on the Setup screen
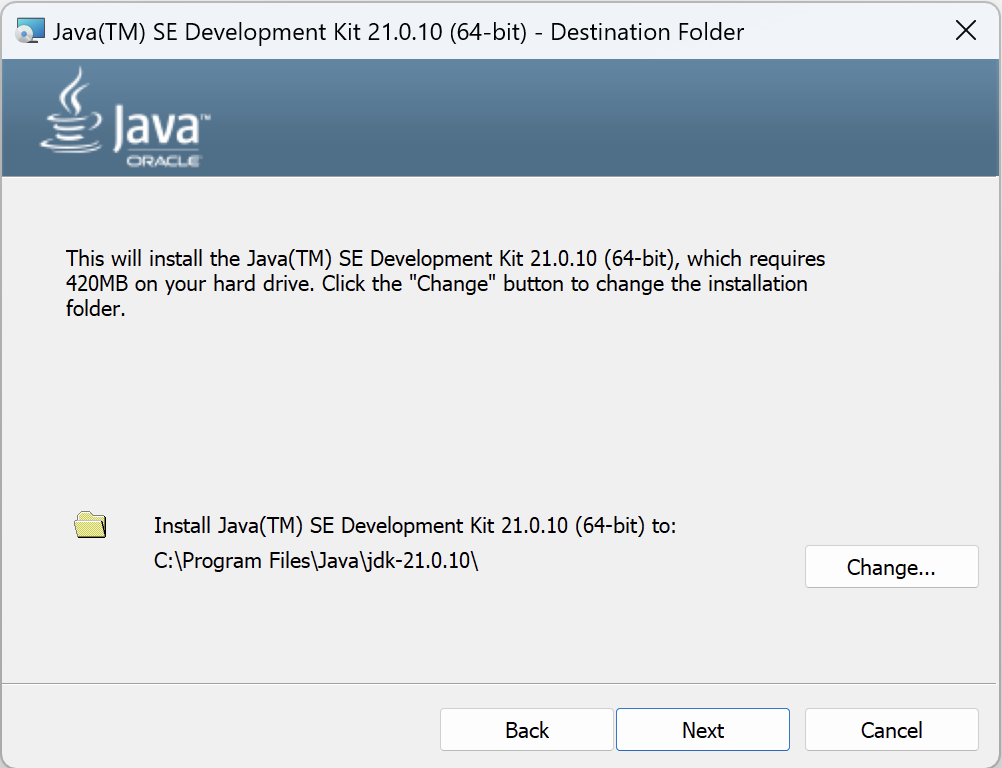
4. Wait for few seconds for Java to install some files. After that, it will ask you to specify the destination folder for JDK. Leave the default location as it is and click on Next button
5. JDK installation would now begin
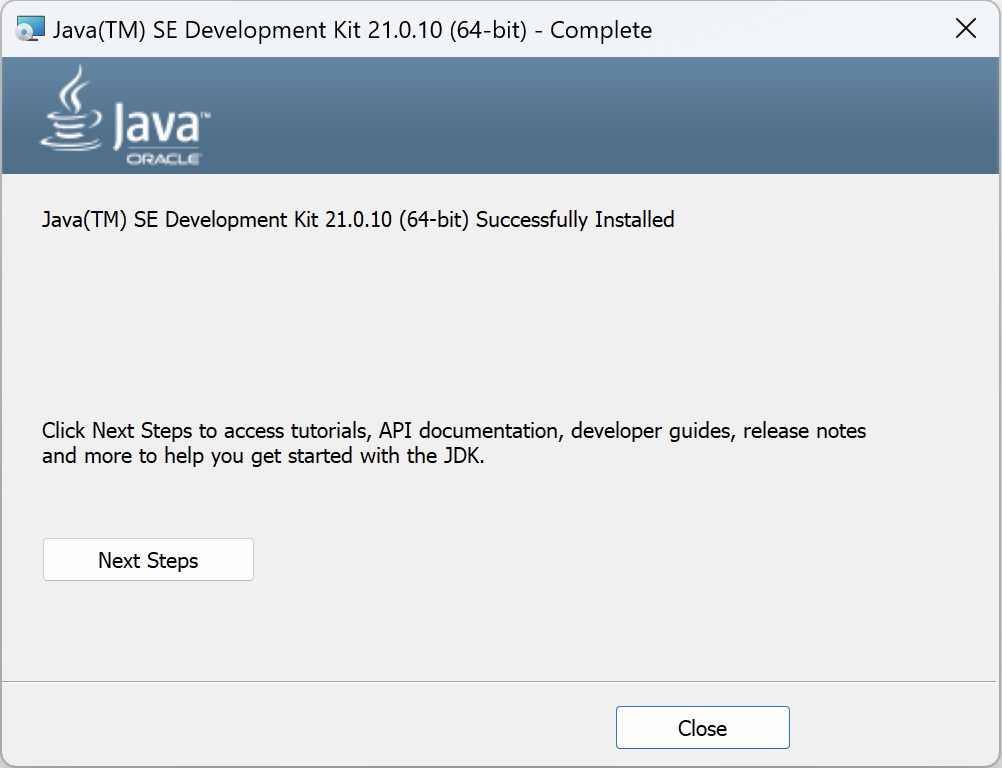
6. Once the installation is complete, you would see the window as shown in the below screenshot. Click on Close button to close the window
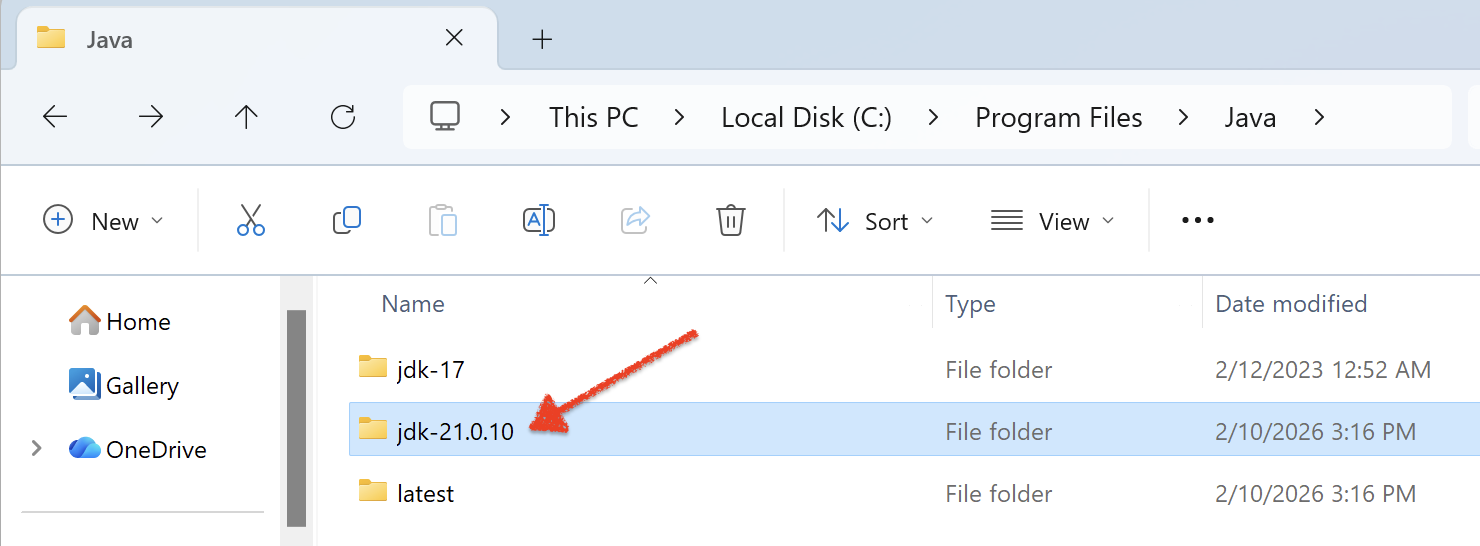
7. To verify that the installation is successful, open Java folder in Program files. You would see that new JDK folder with the latest version numbers have been created. Don’t worry if you see previous versions of JRE or JDK folders in there. Multiple versions of JDKs & JREs can co-exist.
With this, we complete the process of downloading and installing the Java Development Kit. However, installing Java alone is not enough to start working with Selenium or Appium. You must also add Java to the system PATH and configure the required environment variables, so that build tools, test frameworks, and command-line utilities can correctly locate and use Java.
In the next article, we will cover how to add Java to the PATH and set up Java environment variables on Windows, which is a mandatory step before running Selenium or Appium tests.