This article continues from the previous step, where we downloaded and installed the Java Development Kit (JDK). Installing Java alone is not enough to start working with Selenium or Appium. You must also configure Java at the system level so automation tools can locate and use it correctly.
To do this, you need to set up Java environment variables – primarily JAVA_HOME and PATH. In very simple terms, JAVA_HOME and PATH are pointers to the location where Java is installed, so you can run it from anywhere. These variables allow tools such as Selenium and Appium to execute Java-based automation tests.
In this article, we walk through the step-by-step process of setting up Java environment variables on Windows 10 / Windows 11, ensuring the correct Java version is used when running Selenium or Appium tests.
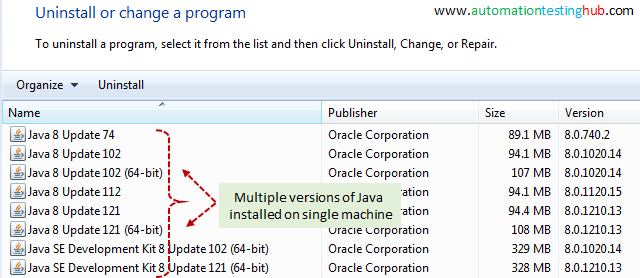
Also, in our previous article on Java Download and Installation, you would have seen that it’s very likely to have multiple versions of Java installed on your machine. In such a scenario, setting up Java environment variables becomes more important so that you can point to the exact version of Java to be used. Let us now check the detailed steps on how to setup these variables.
Java Environment Variables – Setup JAVA_HOME
As mentioned earlier, JAVA_HOME points to the folder where Java is installed on your system and allows tools like Selenium and Appium to locate it. Follow the steps below to set up the JAVA_HOME environment variable on Windows 10 and Windows 11.
1. As the first step, open the folder where Java is installed and copy the path of the latest JDK.
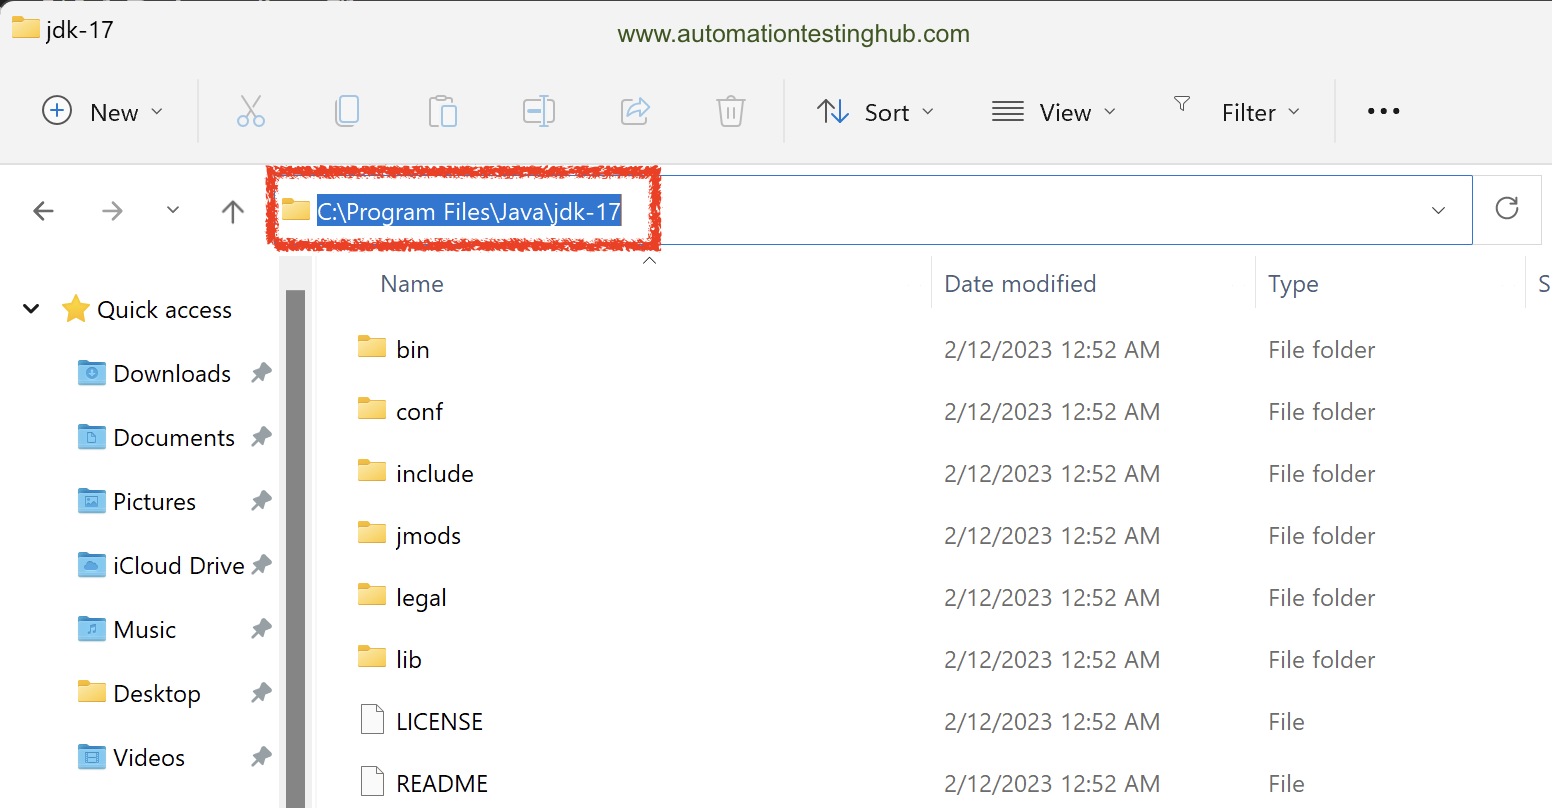
If you installed Java at the default location, navigate to C:\Program Files\Java. Now click on jdk-21 folder to open it. This is the folder location we need to copy. As per the below screenshot, we are copying this folder location – C:\Program Files\Java\jdk-21.0.10
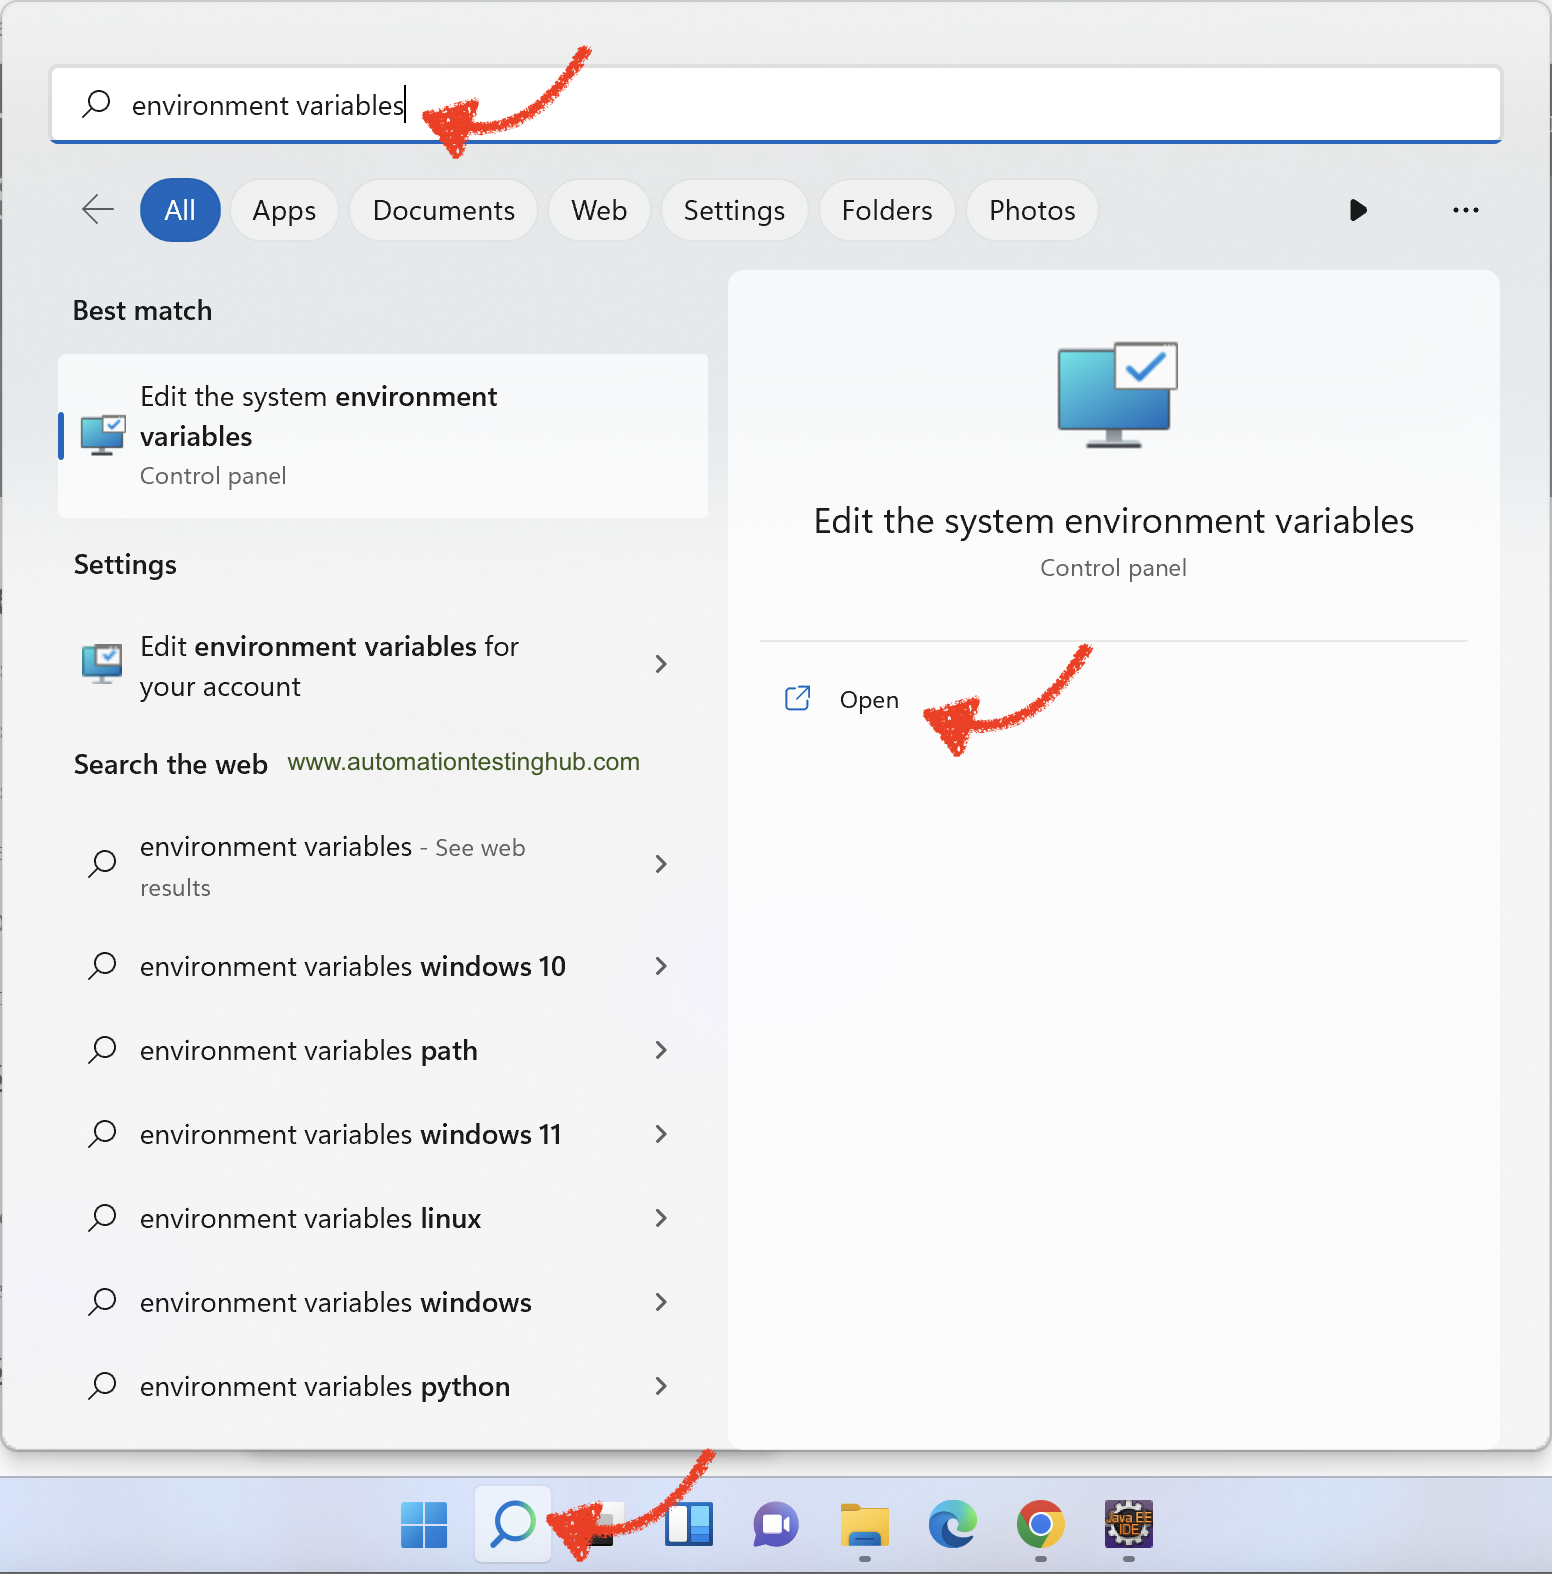
3. You have to now open environment variables window in your machine. To do this, click on Search icon or Search Bar on Windows 10 or 11, and then type environment variables. Click on Edit the system environment variables option to open it
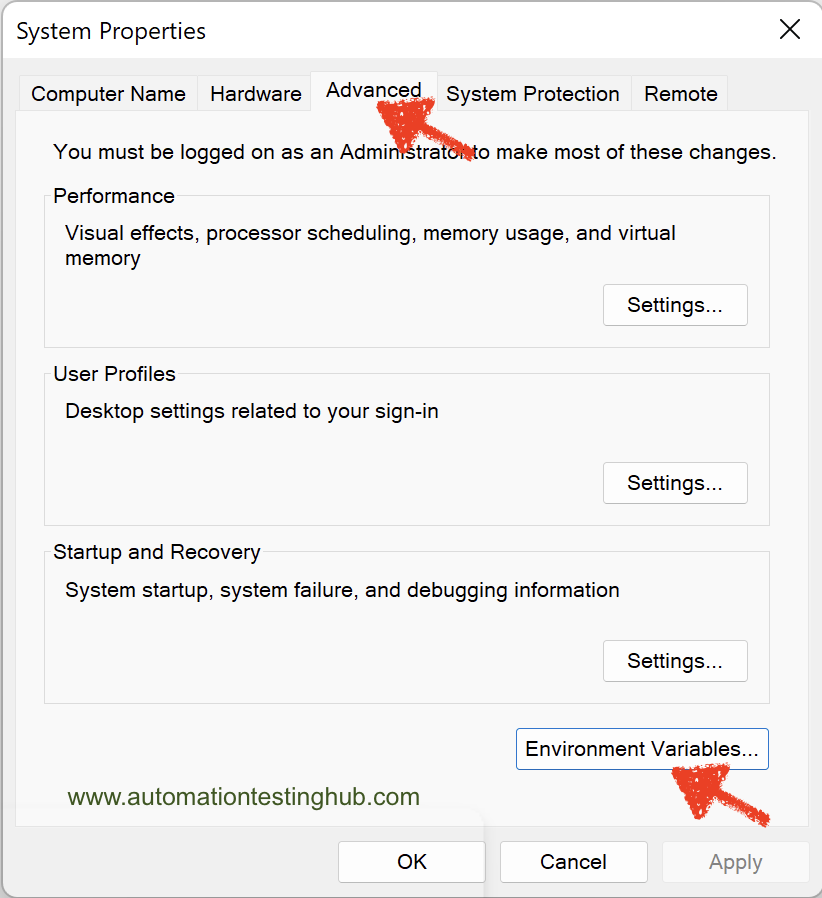
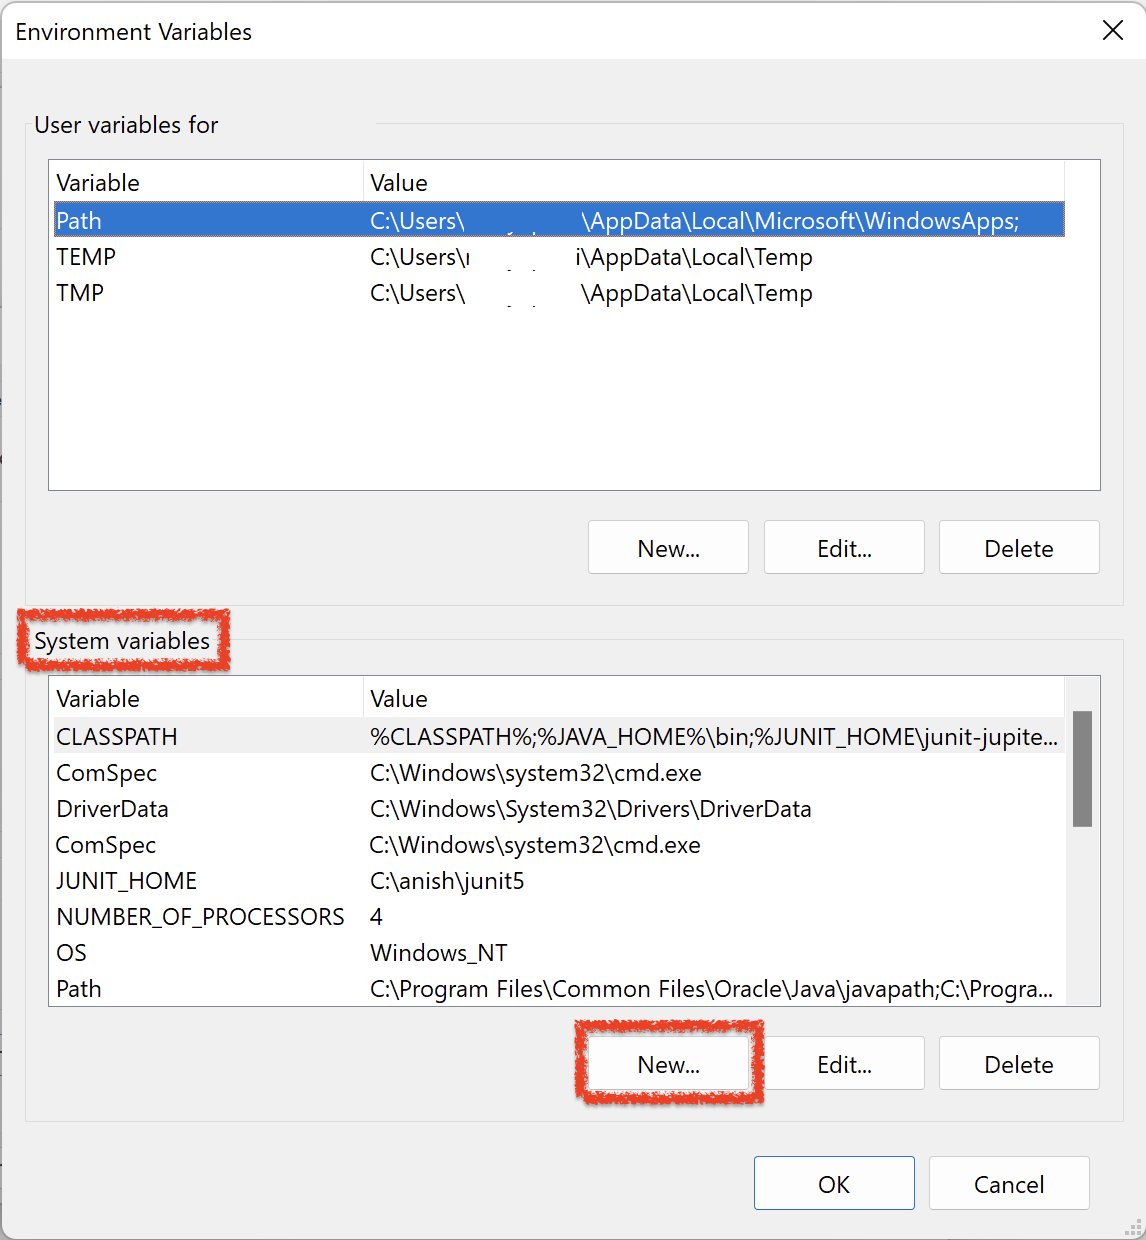
4. This should open the Environment Variables window. If System Properties window is displayed, then go to Advanced Tab, and click on Environment Variables button
5. From the Environment Variables window, click on New button from System variables section
6. Enter JAVA_HOME in Variable Name field and JDK folder location you copied in the first step (eg – C:\Program Files\Java\jdk-21.0.10) in Variable value field as shown in below image
If you had already JAVA_HOME previously for some other reason, then you can use the New button to set it again as well. This will overwrite the older value you had set previously
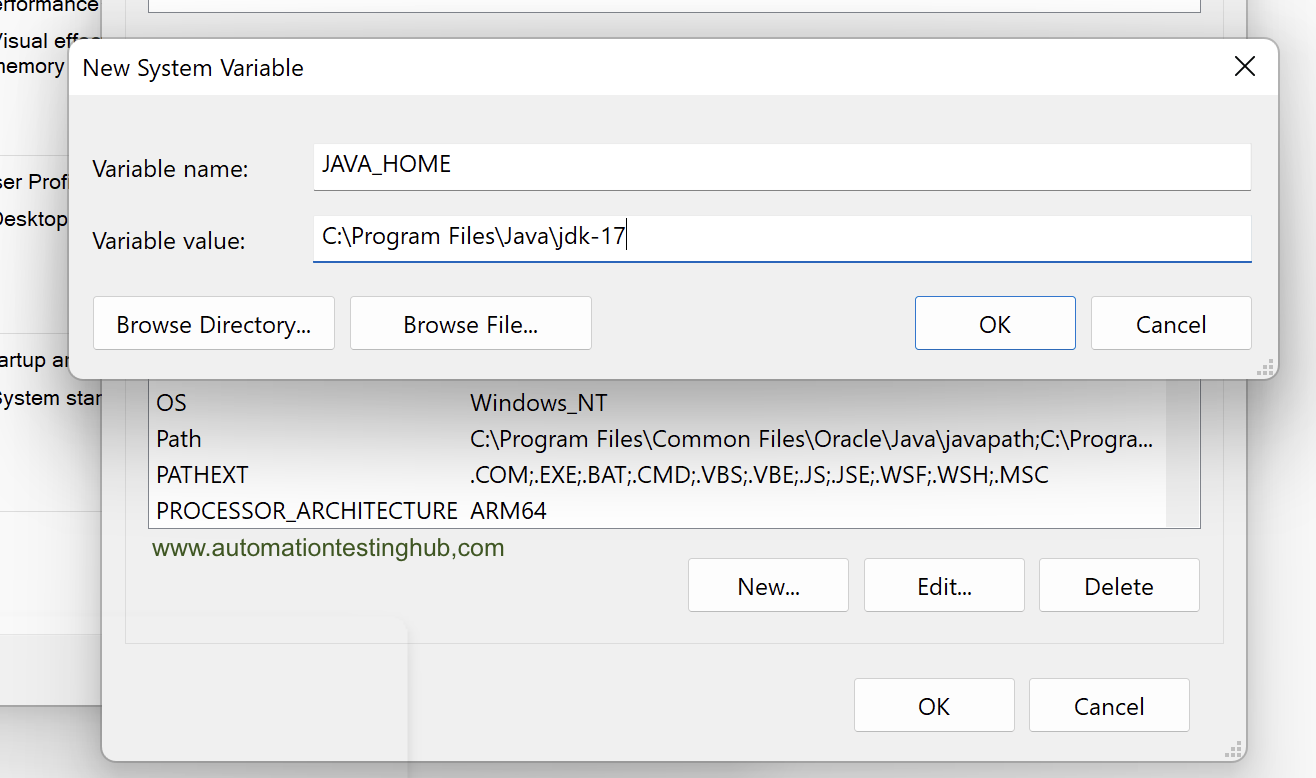
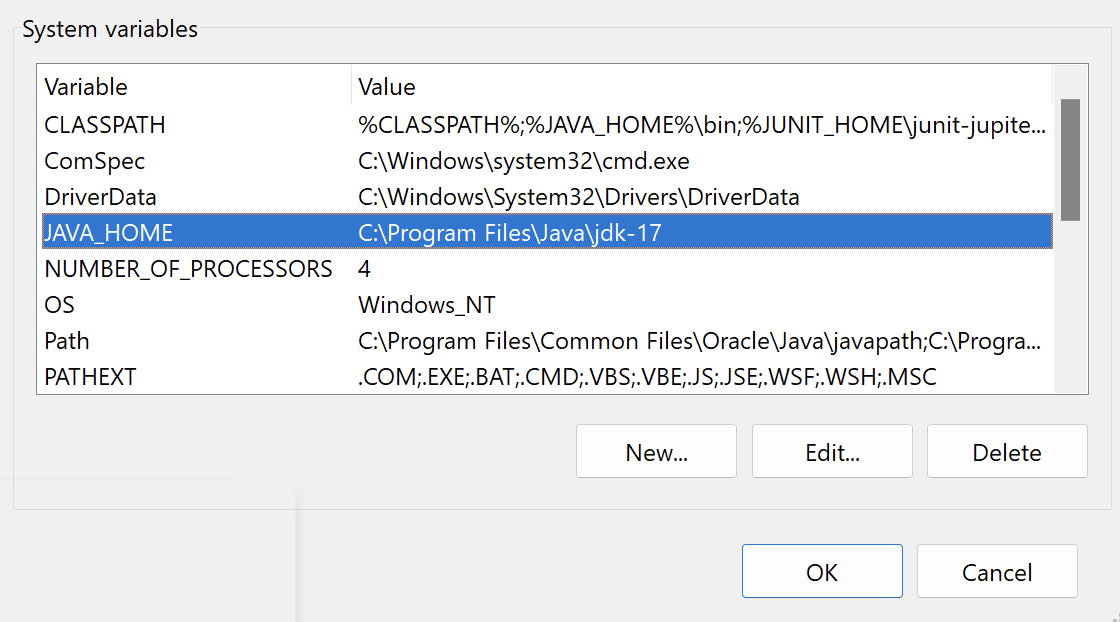
7. Click on OK button. You will see that JAVA_HOME variable has now been added in System Variables.
Setup Path variable
The PATH environment variable allows Windows to locate executable files from the command line. To run Java commands such as java and javac from anywhere, you must add the JDK bin directory to the PATH variable.
Since you already set the JDK location using the JAVA_HOME variable, you can reference it while updating PATH by adding %JAVA_HOME%\bin. This approach ensures Windows always uses the correct Java version. Let’s go through the steps to set this up –
1. Open your JDK folder (C:\Program Files\Java\jdk-21.0.10 – as per our tutorial example) and check that it has bin folder in it
2. Now open this bin folder and observe the entire folder location. For us, this folder location is – C:\Program Files\Java\jdk-21.0.10\bin
3. Since the JDK folder location is already represented by JAVA_HOME variable, so we can replace the location of JDK folder with JAVA_HOME like this – %JAVA_HOME%\bin – this is what we need to update in the Path variable
4. In the Environment variables window, check that there is a variable called Path under System variables. Please note that Path is an existing variable and we would edit it to add the bin folder location

5. Select the Path variable and click on Edit button. Edit environment variable window would be opened
6. Click on New button. A new line is highlighted in the window. Add JDK bin path %JAVA_HOME%\bin as shown in the below image

7. Click on Ok button. bin folder location is now added in the Path variable
8. Close the Environment variable window by clicking on Ok button. With this, we have now successfully setup Path variable as well
Verify that JAVA_HOME and Path variables are set correctly
After you add the JAVA_HOME and PATH variables, verify that Windows picks them up correctly.
1. Open Command Prompt. If Command Prompt was already open, close it and open a new one.
2. Run the following command: java -version This command should display the installed Java version. Verify that the version matches the JDK version you configured.
3. Also, run this command as well: echo %JAVA_HOME% This command should print the path to your JDK installation directory. Confirm that it points to the correct JDK folder.
If both commands return the expected results, you have successfully configured JAVA_HOME and PATH. Your system is now ready to run Selenium and Appium tests.

Troubleshooting:
If you see an error like “java is not recognized as an internal or external command”, make sure you added Java to the PATH variable correctly and reopened Command Prompt after making the changes.
With Java environment variables configured correctly, your system is now fully prepared to run Java-based automation tools. This setup forms the foundation for executing Selenium and Appium tests without configuration issues.