
In our previous article on Playwright Testing Tutorial, we learned how to set up Playwright and write our very first test case. That test helped us understand the basics and get something running quickly.
However, if you look closely, you’ll notice that the test we wrote is quite large and tries to cover multiple behaviours in a single flow. While this is fine for learning, this is not how you structure your tests in real-world Playwright projects.
In this article, you will see how we group tests in Playwright where – we’ll take that single long test and split it into multiple smaller, focused tests. Along the way, you’ll learn how to organise tests properly so they are easier to read, maintain and run as your test suite grows. By the end of this article, you’ll have a much more realistic Playwright test structure that closely resembles what teams use in production.
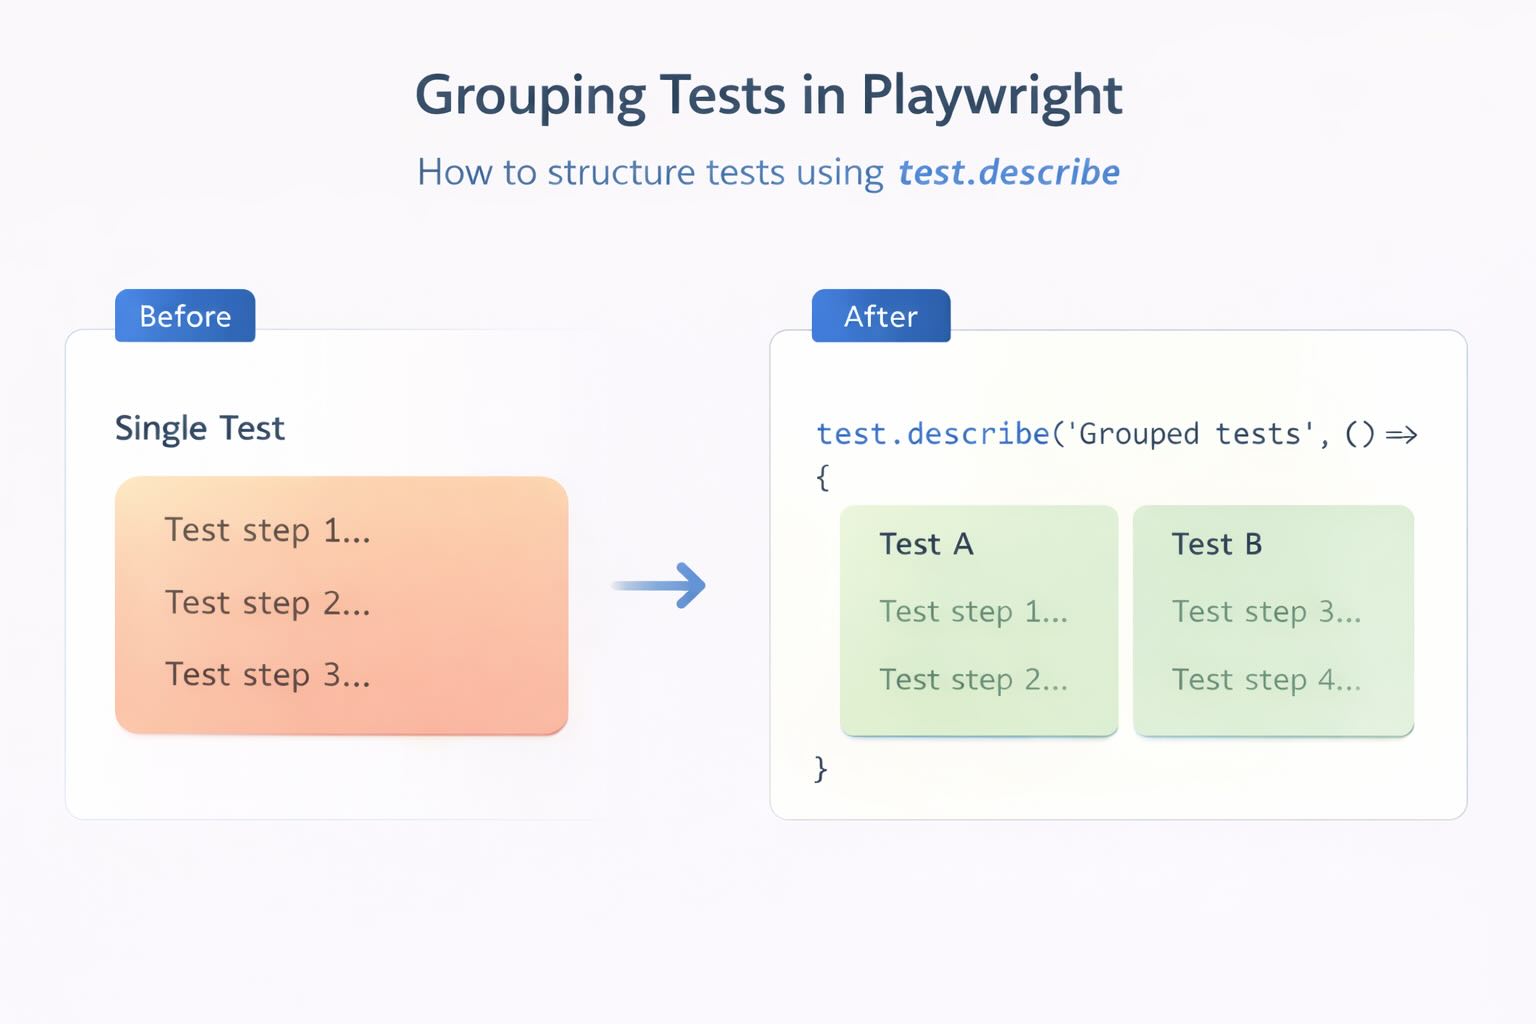
Identifying Logical Breakpoints in the Playwright Test
Before splitting a long test, it helps to step back and understand what the Playwright automation test is actually doing. The goal is not to break a test randomly. Instead, we split it in a way that reflects real user behaviour.
If you look at our original test, you’ll notice that it performs two primary actions, both of which are independent behaviours:
- Opening the Google Flights website and verifying that the landing page loads
- Searching for flights from New York to London
Another useful way to identify split points is to look for common and reusable steps.
In this example, opening the website and confirming that it loads is a step that would be required in many other tests as well — such as searching for different routes or validating filters. Since this is a reusable action, it makes sense to keep it separate instead of embedding it inside a long end-to-end flow.
Based on this, we can logically split our original test into the following smaller test cases:
- Verify that the Google Flights landing page loads successfully
- Search for flights from New York to London
Now that we know what to split and why, let’s refactor the original test into smaller, focused Playwright tests.
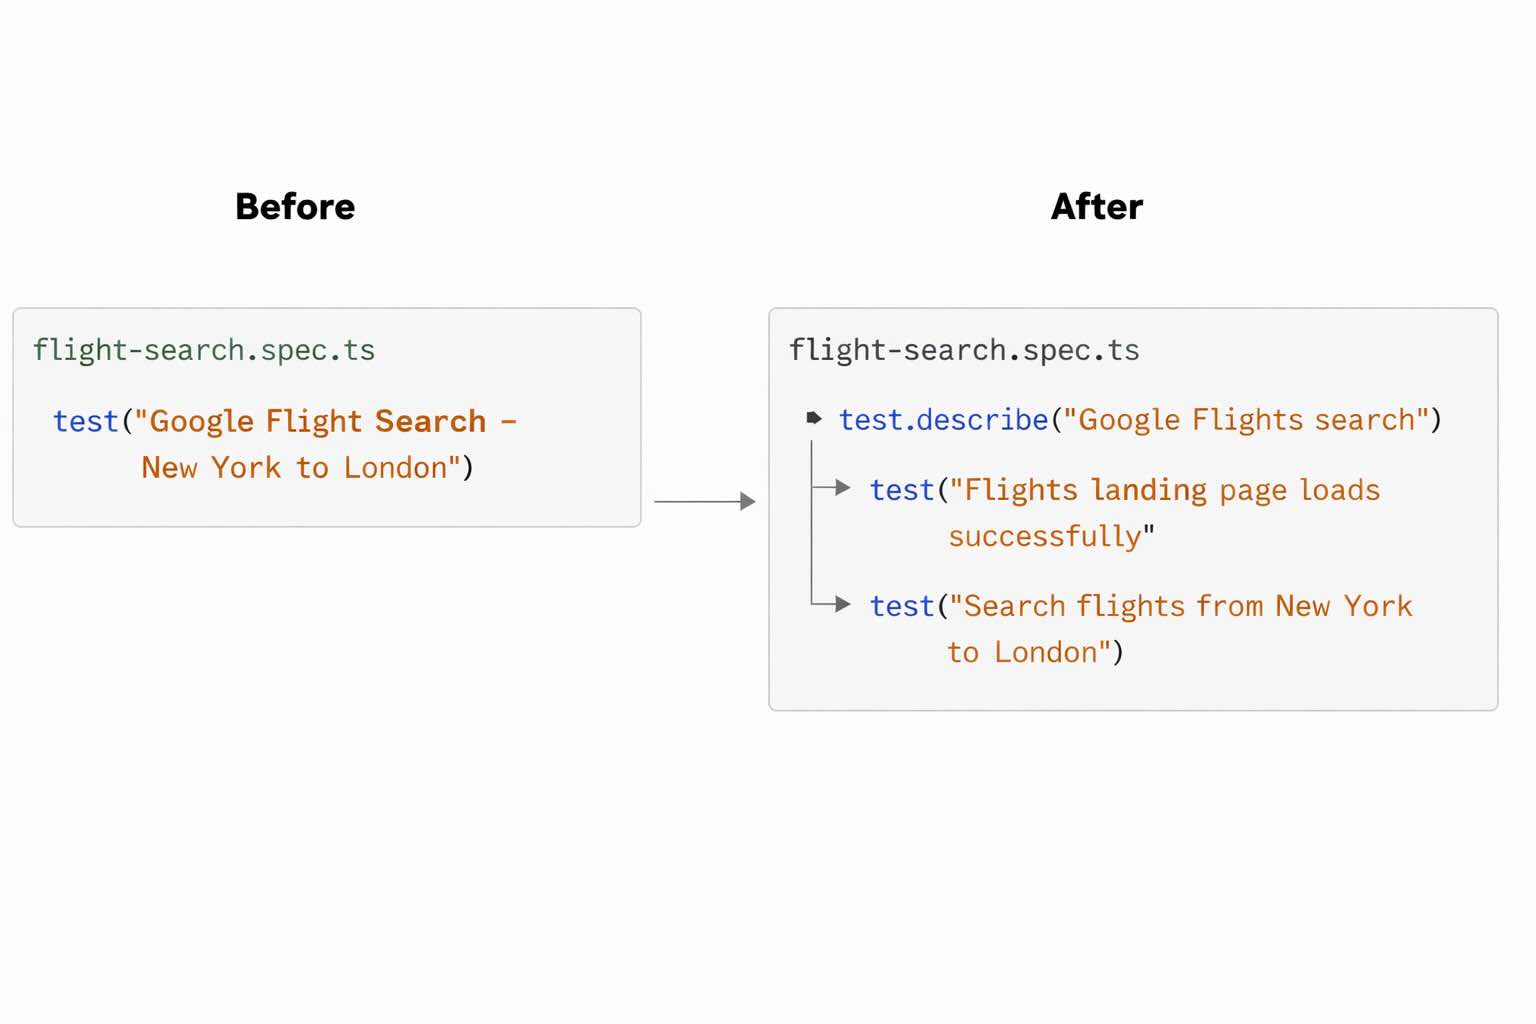
Grouping Tests Using test.describe
From the previous screenshot, you may have noticed that we used test.describe while splitting the original test into multiple smaller tests. This test.describe was not present in our first iteration, when all the code lived inside a single test block.
In Playwright, we use test.describe to group related test cases together. It helps organise tests by feature or behaviour, making the overall test structure easier to read and maintain as the test suite grows.
In our example, both the test cases – verifying the landing page and searching for flights – belong to the same feature: Google Flights search. Hence, grouping them using test.describe makes that relationship explicit and results in a more organised Playwright test suite.
Here’s how it looks in our refactored test file:
test.describe("Google Flights search", () => {
  test("Flights landing page loads successfully", async ({ page }) => {
    // test steps
  });

  test("Search flights from New York to London", async ({ page }) => {
    // test steps
  });
});
Splitting the Original Test into Multiple Playwright Tests
Now that we’ve identified the logical breakpoints, we can refactor the original test and group them into multiple smaller, focused Playwright tests. The behaviour remains the same – only the structure has changed.
import { test, expect } from "@playwright/test";

test.describe("Google Flights search", () => {

  test("Flights landing page loads successfully", async ({ page }) => {
    // Navigate to Google Flights homepage
    await page.goto("https://www.google.com/travel/flights");

    // Verify the Flights landing page is loaded
    await expect(page).toHaveTitle(
      "Find Cheap Flights Worldwide & Book Your Ticket - Google Flights"
    );
  });

  test("Google Flight Search - New York to London", async ({ page }) => {
    await page.goto("https://www.google.com/travel/flights");

    // Enter "Where from?" and select the first auto-suggested option
    await page.getByLabel("Where from?").fill("New York");
    await page.getByRole("listbox").getByRole("option").first().click();

    // Enter "Where to?" and select the first auto-suggested option
    await page.getByLabel("Where to?").fill("London");
    await page.getByRole("listbox").getByRole("option").first().click();

    // Calculate departure date as tomorrow
    const departureDate = new Date();
    departureDate.setDate(departureDate.getDate() + 1);

    // Calculate return date as 5 days after departure date
    const returnDate = new Date();
    returnDate.setDate(returnDate.getDate() + 6);

    // Format dates to DD Month YYYY format - example: 17 August 2025
    const options: Intl.DateTimeFormatOptions = {
      day: "numeric",
      month: "long",
      year: "numeric",
    };
    const departureDateFormatted =
      departureDate.toLocaleDateString("en-GB", options);
    const returnDateFormatted =
      returnDate.toLocaleDateString("en-GB", options);

    // Click on the Departure field, so that date picker modal is opened
    await page.getByRole("textbox", { name: "Departure" }).click();
    await page.waitForTimeout(1000); // Small wait to allow date picker modal animation to complete

    // Enter departure date and confirm selection
    await page.getByRole("textbox", { name: "Departure" })
      .fill(departureDateFormatted);
    await page.getByRole("textbox", { name: "Departure" }).press("Enter");

    // Enter return date and confirm selection
    await page.getByRole("textbox", { name: "Return" })
      .fill(returnDateFormatted);
    await page.getByRole("textbox", { name: "Return" }).press("Enter");

    // Close the date picker modal
    await page.getByRole("button", { name: "Done" }).click();
    await page.waitForTimeout(1000); // Wait for overlays / transitions to fully disappear

    // Trigger flight search
    await page.getByRole("button", { name: "Search" }).click();

    // Verify search results page reflects correct route
    await expect(page).toHaveTitle("New York to London | Google Flights");
  });

});
Before we move to the next section, there are a couple of important points worth calling out.
The first test — “Flights landing page loads successfully” — may look simple, but it represents a common smoke test. Its purpose is to verify that the application is reachable before more complex user flows are exercised.
You’ll also notice that we navigate to the Google Flights page in both tests. This is intentional. Each Playwright test is designed to run independently, and sharing page or browser state between tests is outside the scope of this article.
For now, duplicating the navigation step keeps the tests reliable and easy to understand. We’ll improve this later when we introduce shared setup and lifecycle management in a dedicated article.
Organising Tests Within the Same Spec File
At this point, both of our refactored tests still live inside the same spec file. This is intentional and it reflects how Playwright tests are commonly organised in real projects. A spec file usually represents a single feature, with all related test cases kept together. In our example, tests related to Google Flights search belong in flight-search.spec.ts.
As more scenarios are covered, it’s natural to add additional test cases to the same file. For example:
tests/
└── flight-search.spec.ts
    └── Google Flights search
        ├── Flights landing page loads successfully
        ├── Google Flight Search - New York to London
        ├── Search for the cheapest available flight
        └── Search for the flight with the shortest duration
The last two tests simply illustrate how the structure can grow. We are not adding their code yet and include them here purely for clarity.
Running Playwright Tests from the Command Line
Now that we’ve split the original test into multiple test cases, let’s run the tests from the command line and verify the results. From the project root, run:
npx playwright test --project=chromium
Using a single browser keeps the execution predictable and avoids browser-specific differences at this stage. Once the tests complete, you should see that both test cases are executed successfully – one validating the landing page and the other performing the flight search.
Now, open the HTML report by running this in the command line –
npx playwright show-report
In the report, both tests are listed separately. This makes it easy to see what tests ran and to identify failures if something goes wrong.
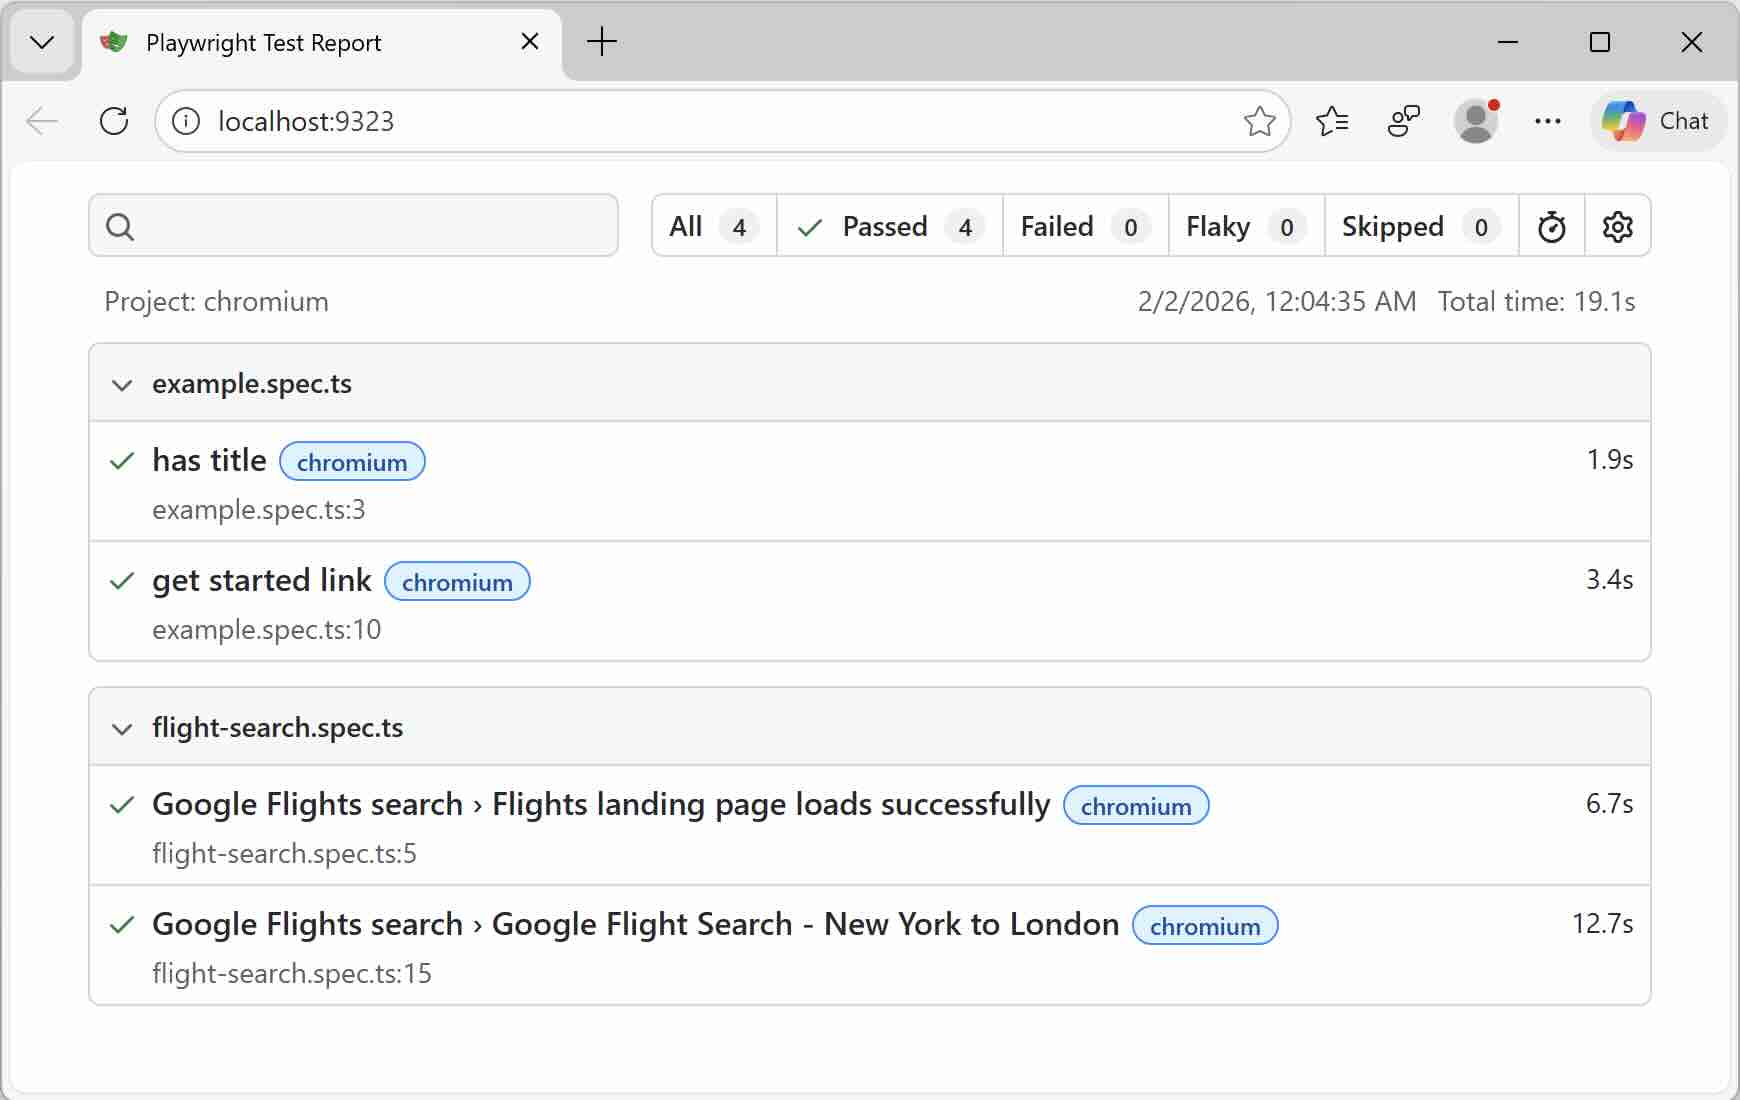
You may also notice results from example.spec.ts in the report. This file is created by Playwright during the initial setup and contains sample tests. We haven’t modified or removed it yet, which is why it still appears alongside our flight-search.spec.ts results.
What’s Next: Running and Debugging Playwright Tests from VS Code
So far, we have run our Playwright tests from the command line, a common approach for executing tests in CI pipelines.
However, when writing and debugging tests locally, most developers prefer working directly from their editor. In the next article, we’ll look at how to run and debug Playwright tests from VS Code using the Playwright extension. This makes it easier to run individual tests, inspect failures, and debug issues step by step.
This will build on the structure we’ve set up in this article and make the local development experience much smoother.