Playwright is a modern end-to-end automation testing framework built for fast, reliable, and scalable web testing. It is widely used by teams that need consistent cross-browser test execution, strong CI/CD integration, and minimal test flakiness.
In this Playwright automation testing tutorial, you will learn how to install Playwright, understand its core concepts, and write your first real-world end-to-end test using Typescript. This tutorial guide focuses on practical usage, clean test structure, and patterns that scale well as your automation suite grows.
By the end of this tutorial, you will have a working Playwright project, a clear understanding of how Playwright tests are structured, and a strong foundation to move into advanced topics such as locators, test configuration, reporting, and CI pipelines.
Who This Tutorial Is For?
This tutorial is ideal for:
- Testers new to Playwright
- Engineers moving from Selenium or Cypress
- Teams setting up Playwright for real-world automation projects
What is Playwright?
Playwright is an open-source framework for end-to-end web automation developed by Microsoft. You can use it to automate and test modern web applications across all major browser engines, such as Chromium, Firefox, and WebKit.
Since Google Chrome and Microsoft Edge are based on Chromium, and Safari uses the WebKit engine, Playwright allows you to run automated tests on Chrome, Edge, Firefox, and Safari using a single framework.
Playwright is cross-platform and works on Windows, macOS, and Linux. It also supports multiple programming languages such as JavaScript, TypeScript, Python, Java, and .NET, making it flexible for different teams and projects.
At its core, Playwright provides a modern testing API that closely mimics real user interactions with the browser. This makes it especially effective for testing dynamic, JavaScript-heavy web applications.
Why Choose Playwright for Automation Testing?
- Built-in auto-waiting
Playwright automatically waits for elements to be ready before interacting with them, which significantly reduces flaky tests and removes the need for most explicit waits.
- Native cross-browser support
The same test can be executed across Chromium, Firefox, and WebKit without additional configuration, helping catch browser-specific issues early.
- Fast and reliable execution
Playwright is designed for speed and supports parallel test execution out of the box, making test runs faster as the test suite grows.
- Rich tooling included by default
Playwright comes with a test runner, HTML reports, screenshots, video recording, and trace viewer without requiring extra third-party libraries.
- Scales well for real-world automation projects
Its structure and features make Playwright suitable for maintaining large and evolving automation test suites over time.
How Playwright works (High-Level Overview)
Playwright runs tests by controlling real browser instances through a single API. Each test runs in an isolated browser context, ensuring clean state and preventing tests from affecting each other. This design helps Playwright deliver fast, reliable execution while closely simulating real user behavior.
Prerequisites to installing Playwright
As mentioned in the previous section, Playwright supports multiple different languages. In this tutorial series, we will be using Playwright with TypeScript. Hence, you will need to setup the following tools before starting with Playwright.
1) Download and Install Node.js – We will use Node.js / NPM to download and install Playwright for JavaScript
2) Download and Install Visual Studio Code (VS Code) – We will be using VS Code as our code editor, to write the automation test scripts
Installing Playwright Step by Step
Once the prerequisites are completed, follow the steps given below to download and install Playwright (the steps and screenshots mentioned this is article are for Windows OS, but you can follow the same steps to download and install Playwright for MacOS as well). Playwright can be installed using a single command in terminal or command prompt. And comes bundled with everything needed to start testing immediately, including browser binaries as well as a test runner.
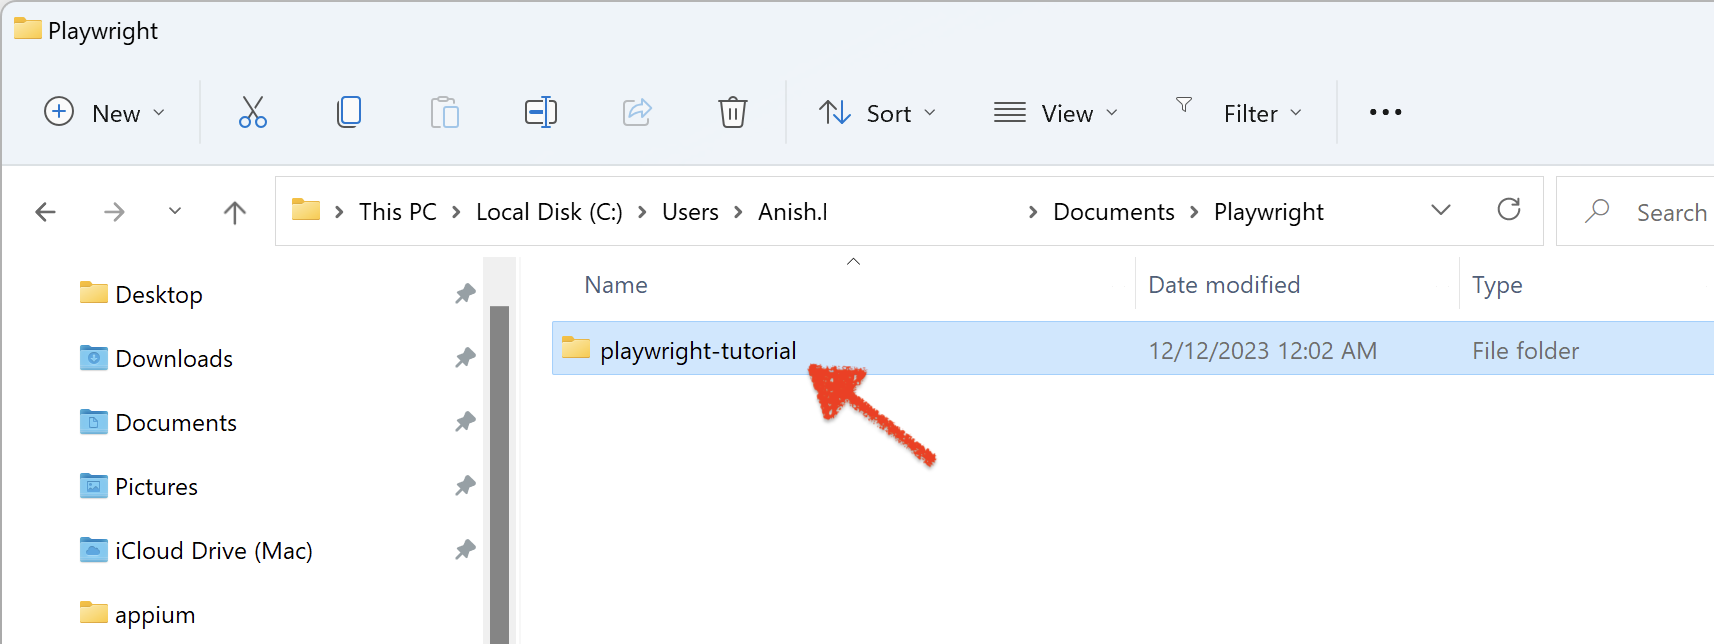
1) Create a new folder/directory on your machine for this Playwright testing project. We are creating a folder named playwright-tutorial, as shown in the below image
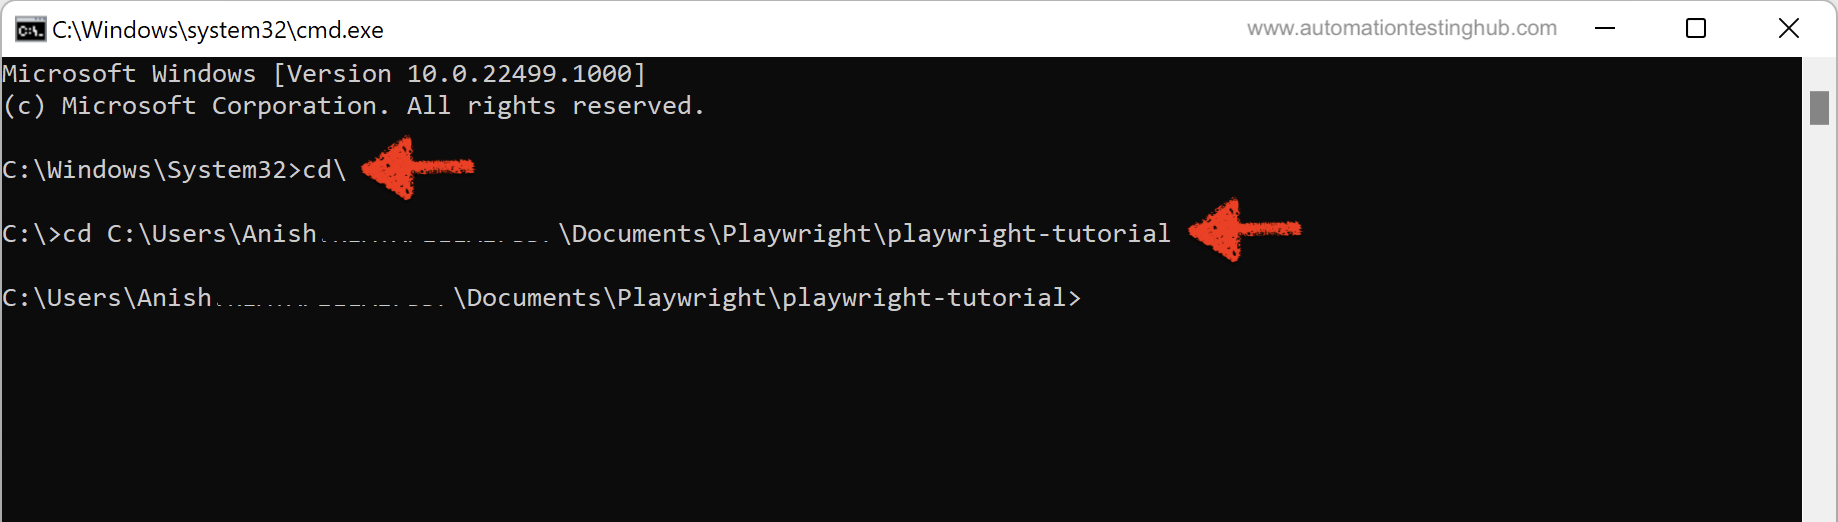
2) Open command prompt, or terminal and cd to this playwright-tutorial folder
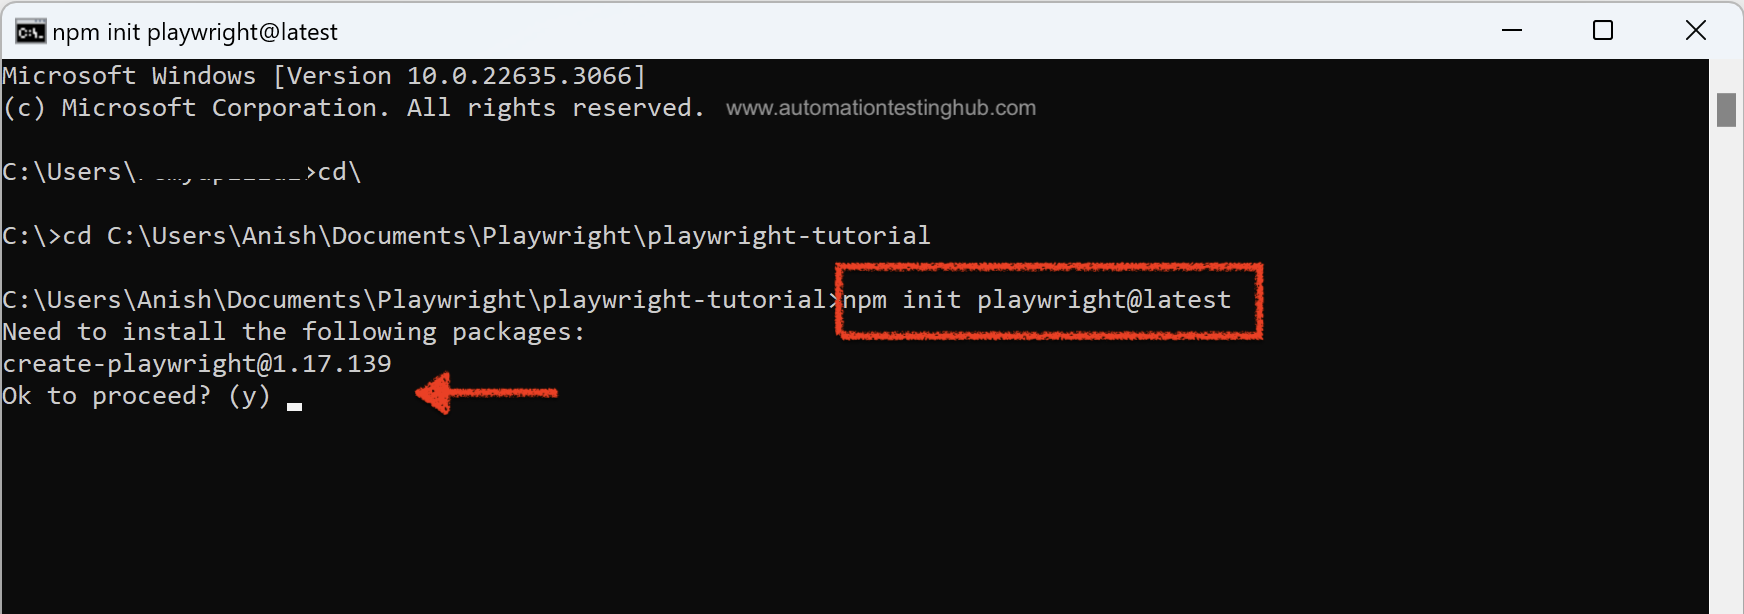
3) Now let’s install Playwright. In your terminal (or Command Prompt) window, run the following command to set it up along with the required browsers:
npm init playwright@latest
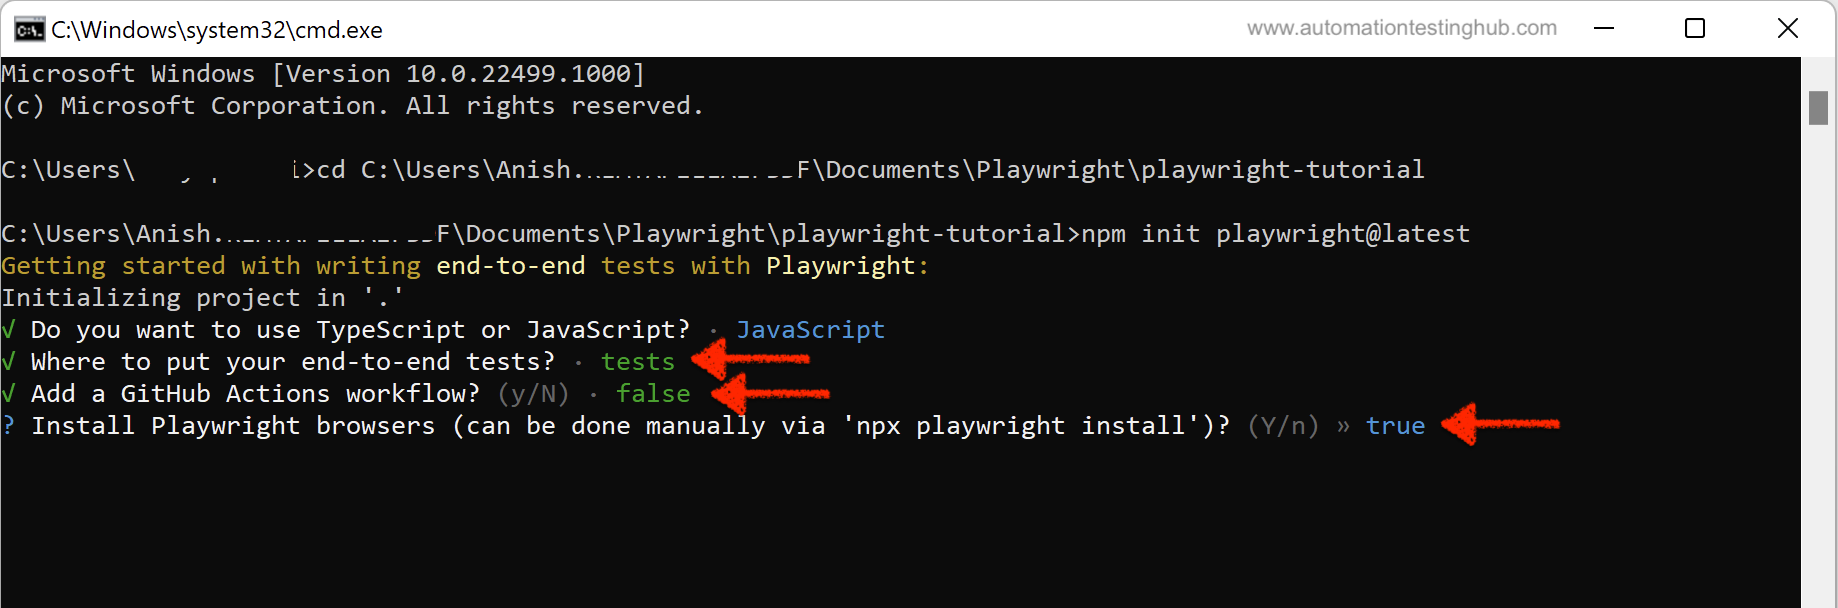
Once you run this command, the setup will prompt you to answer few questions –
3a) If the setup asks about installing playwright, then type y and hit Enter
3b) Next it would ask, Do you want to use TypeScript or JavaScript. Typescript is selected by default – leave it as it as and hit Enter (Note: You can use up and down arrow keys to toggle between TypeScript and JavaScript)

3c) The next question is about the location of end-to-end tests. Type tests and then hit Enter
3d) After this, the setup will prompt for adding a Github actions workflow. Default option is true, so just type t
3e) Next question is about Installing Playwright browsers. Here also, the default option is true, hence leave it as it is and just type t
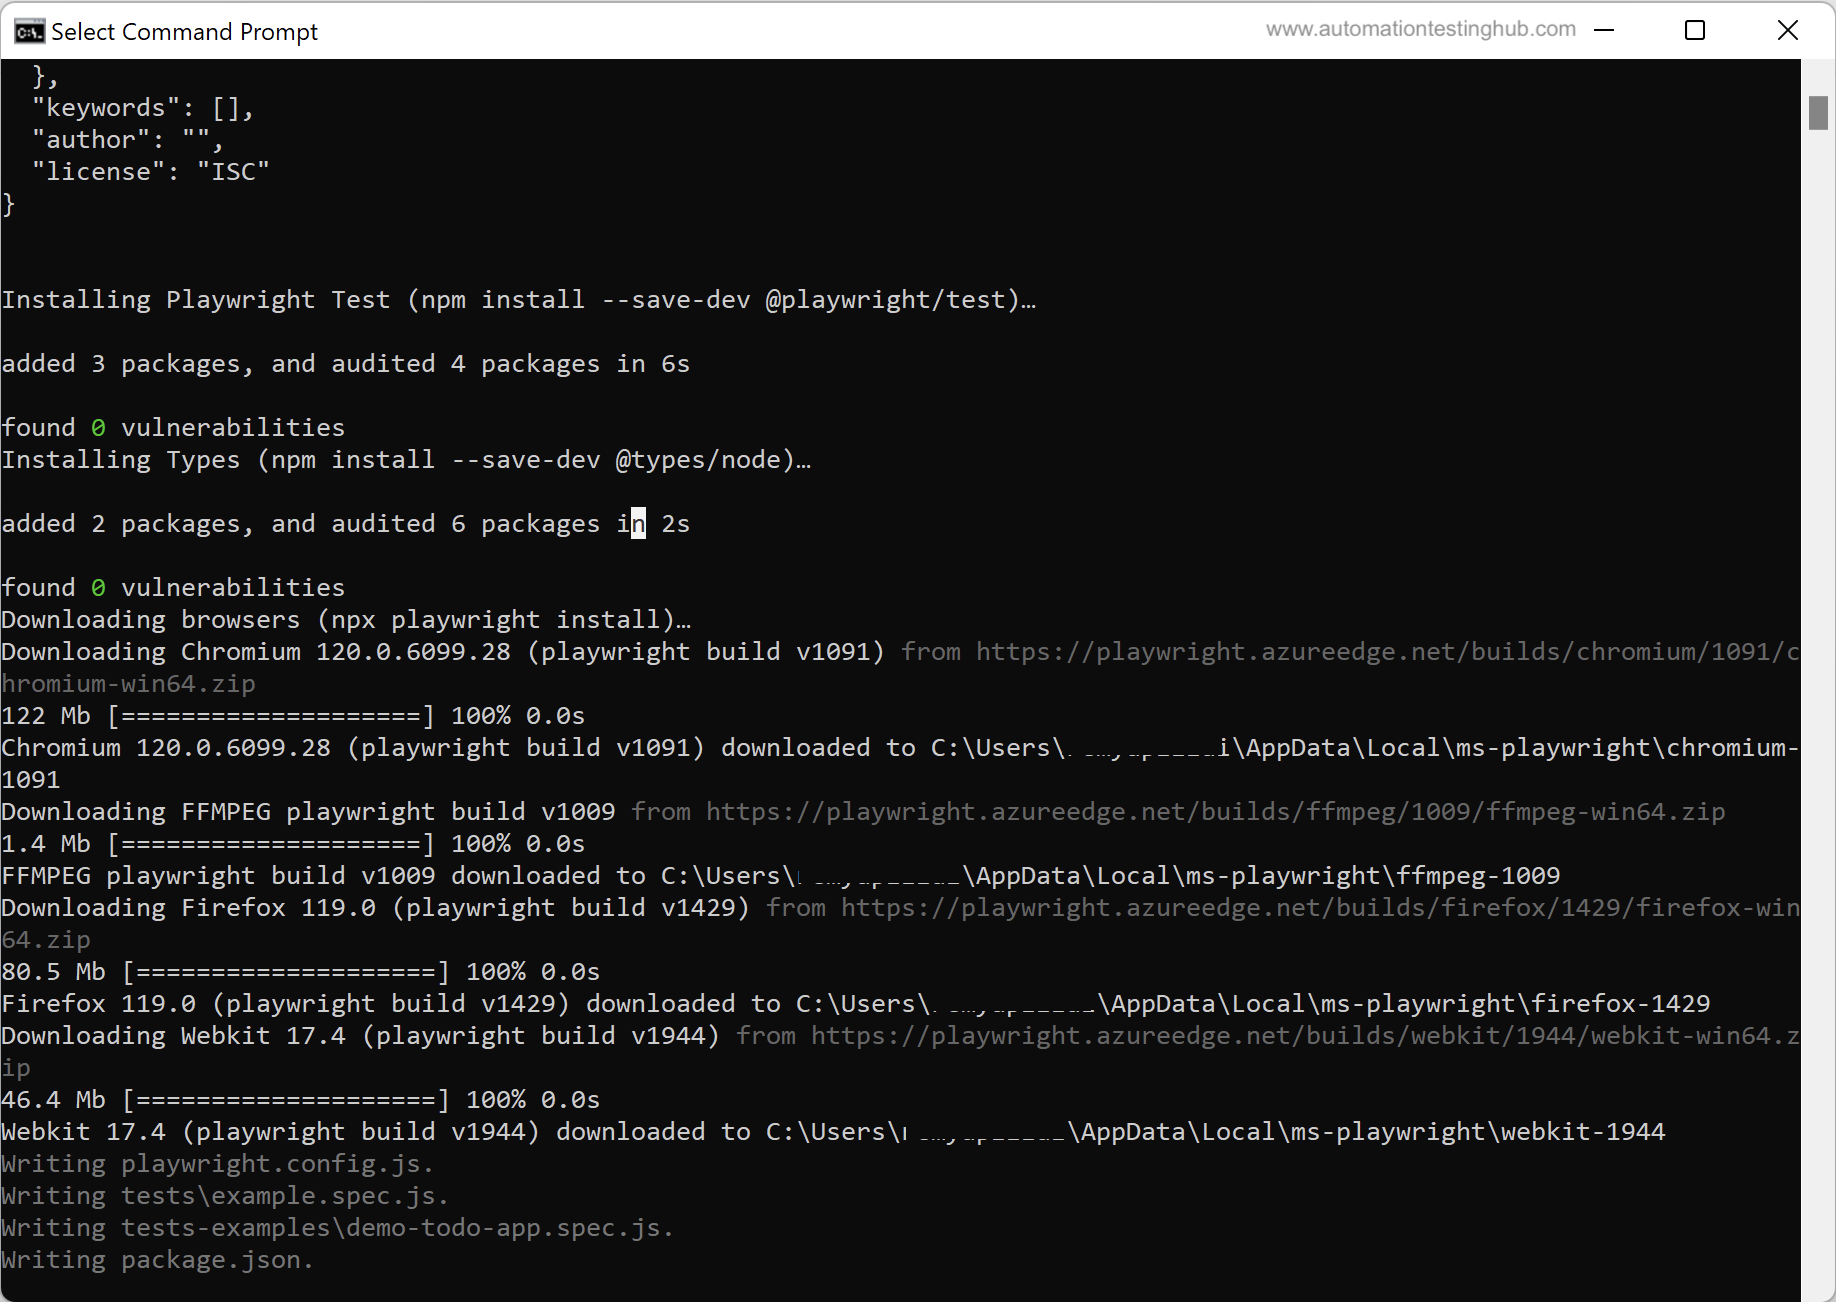
This will start the installation process. In the command prompt, you would be able to see that npm is installing Playwright and the browsers as well (Chromium, Firefox and Webkit)
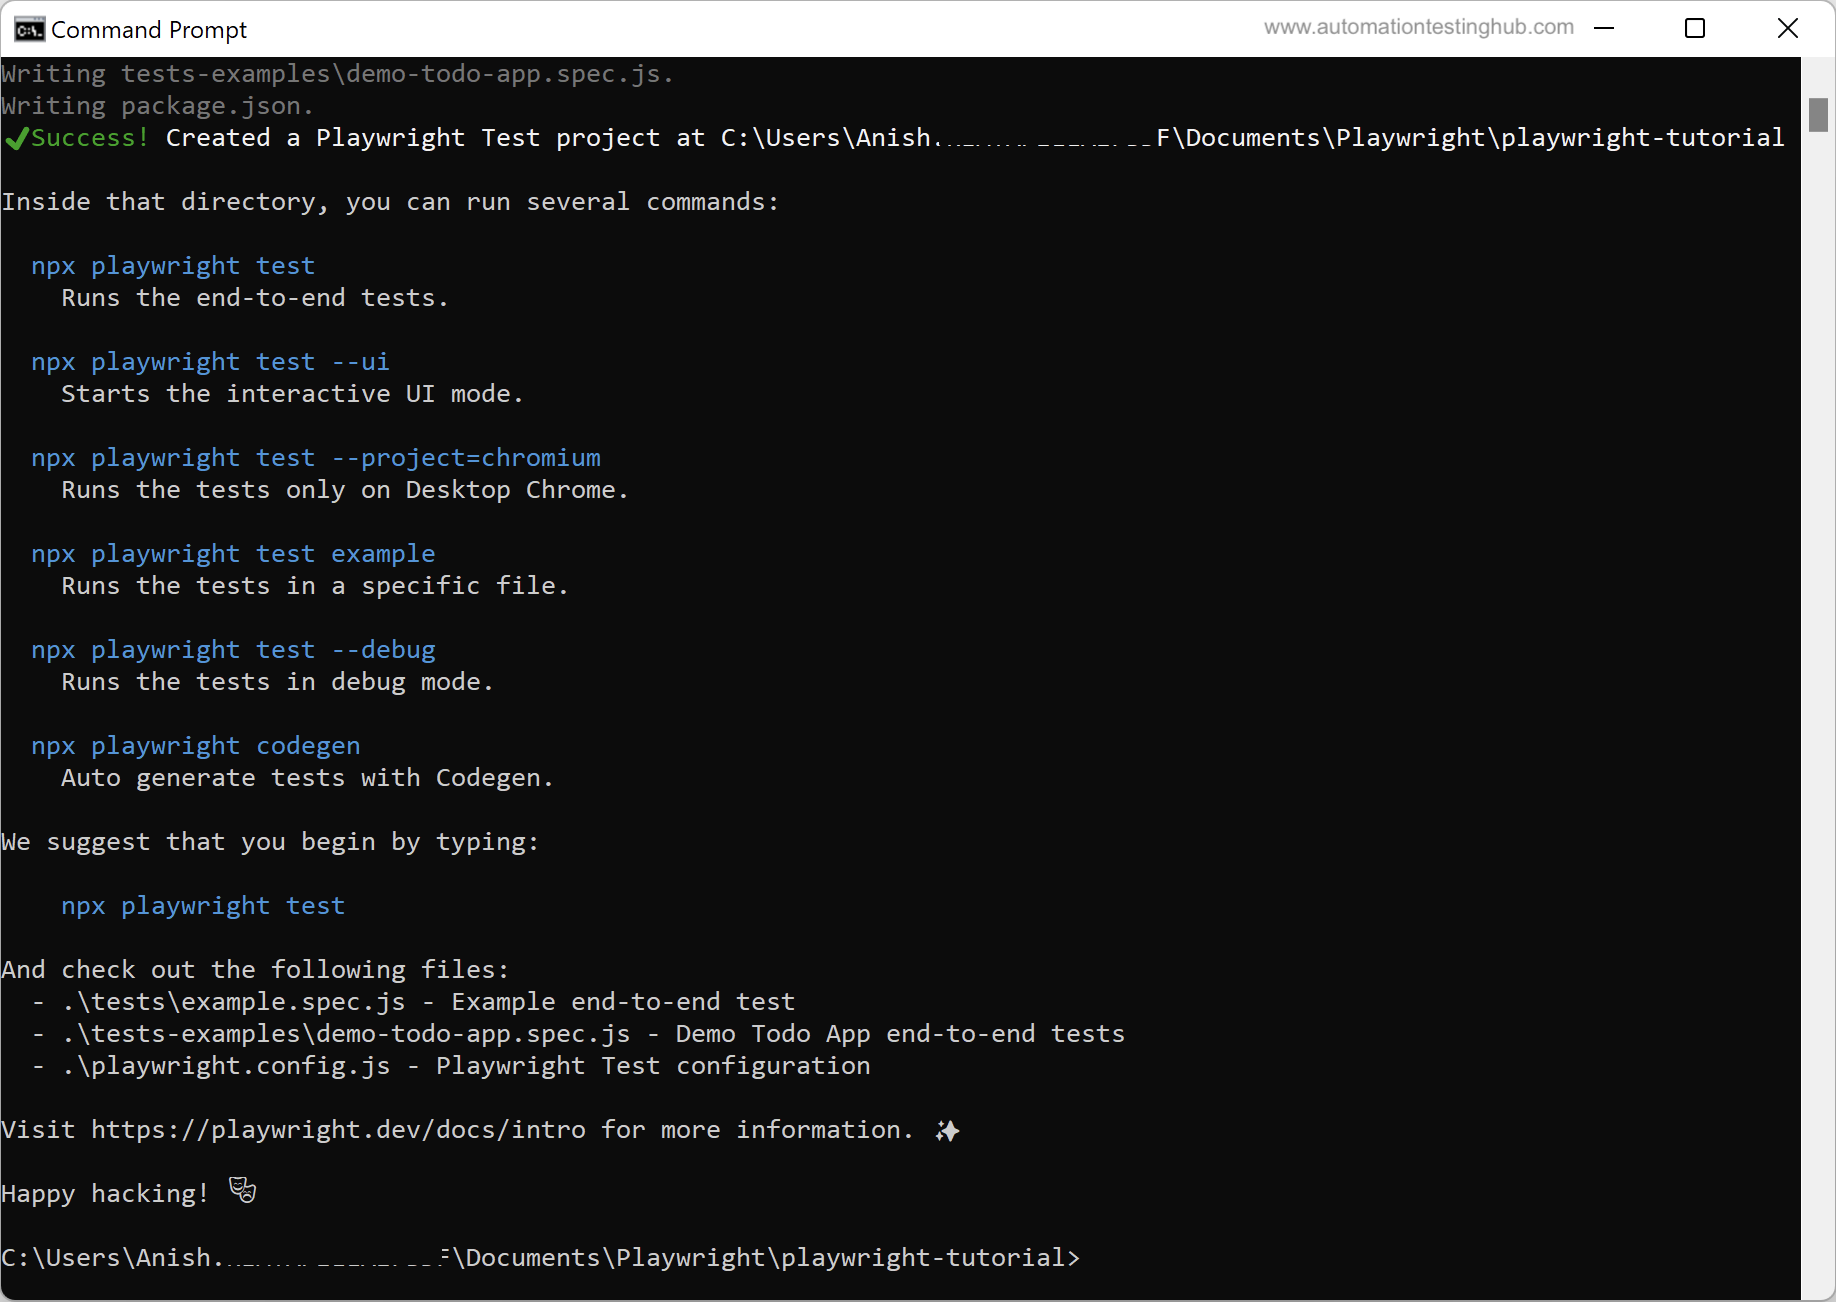
Once the installation is complete, you will see the final command prompt/terminal screen, which should look similar to the screenshot given below
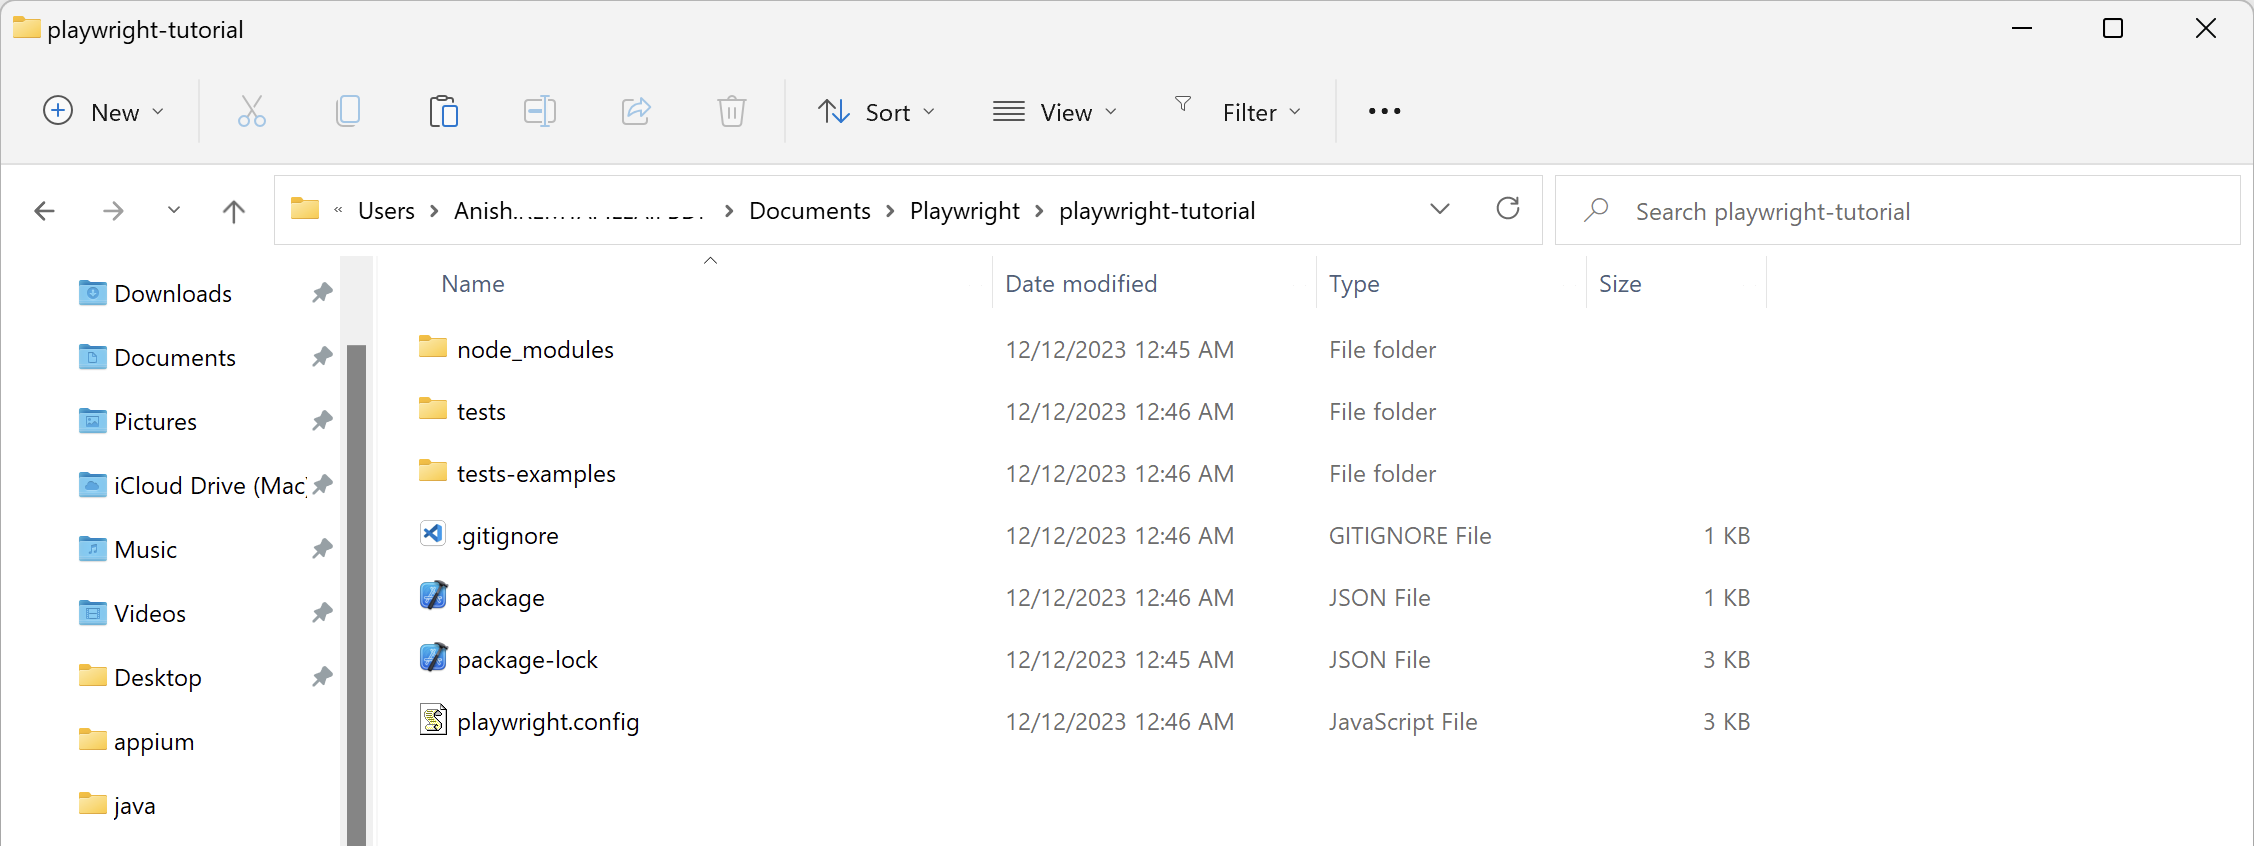
As the final step, open the playwright-tutorial folder once again. You will notice that the playwright setup/installation has been done inside this folder. This folder now contains multiple sub-folders such as node_modules, tests and some individual files like playwright.config
With Playwright now installed, let’s briefly review the project structure created during setup before moving on to writing our first test script.
Understanding the Playwright Project Structure
As you would have noticed in the last screenshot in the previous section, Playwright creates a ready-to-use project structure as part of the installation process. Below is a quick overview of the key files and folders that you will work with most often.
tests/
Contains all Playwright test files. By default, Playwright looks for test cases inside this folder when running tests.playwright.config
The main configuration file used to define browser settings, timeouts, parallel execution, reports, and other global test options.node_modules/
Stores all project dependencies installed via npm, including Playwright and browser binaries. This folder is auto-generated and should not be edited manually.package.json
Manages project metadata, dependencies, and npm scripts used to run Playwright tests.
This basic understanding is enough to get started. We will explore the project structure and configuration in more detail in later articles as we build on this foundation.
Open Playwright project in Visual Studio Code
Since you have already downloaded and installed Playwright in the previous section, it is now time to open this Playwright project in Visual Studio Code (VSCode) –
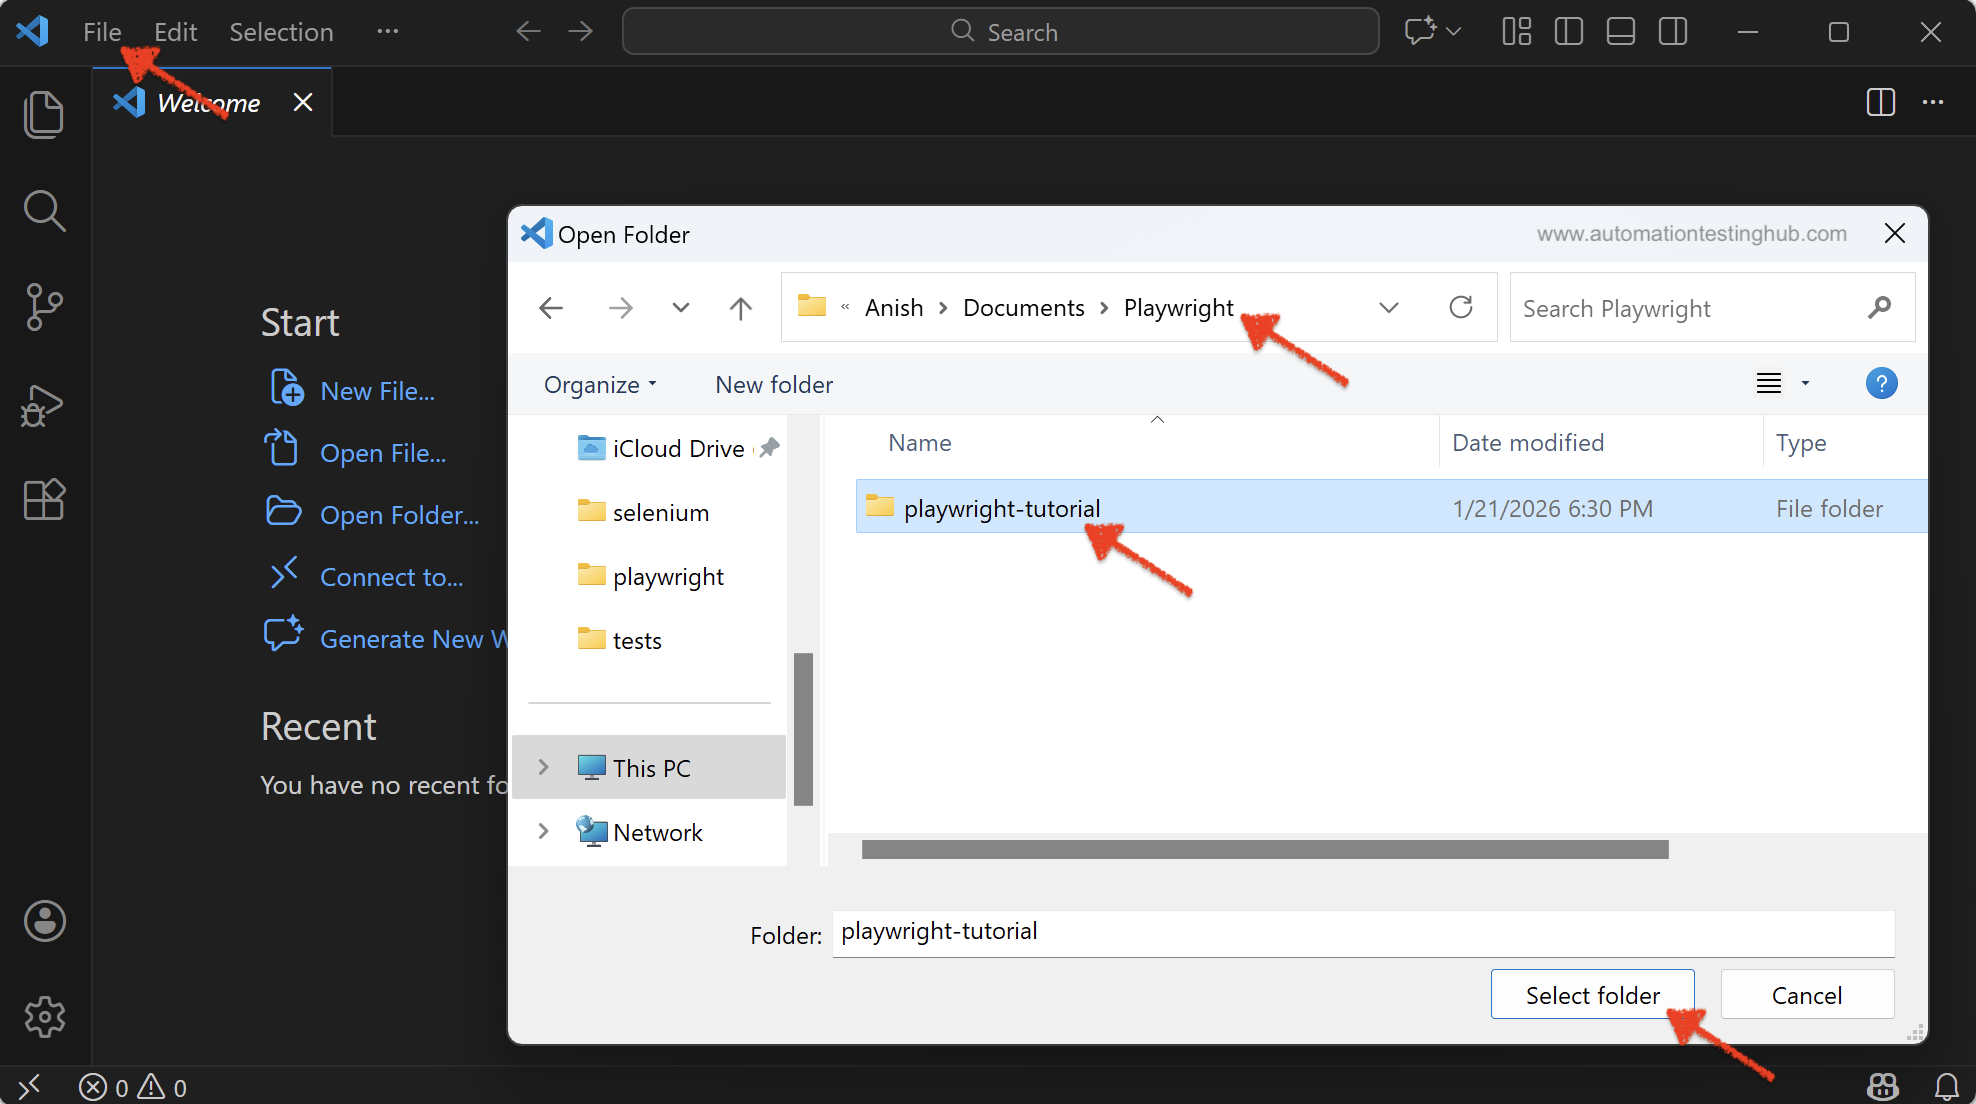
1) Open Visual Studio Code. Select File -> Open Folder option
2) Select the playwright-tutorial folder and then click on Select Folder option
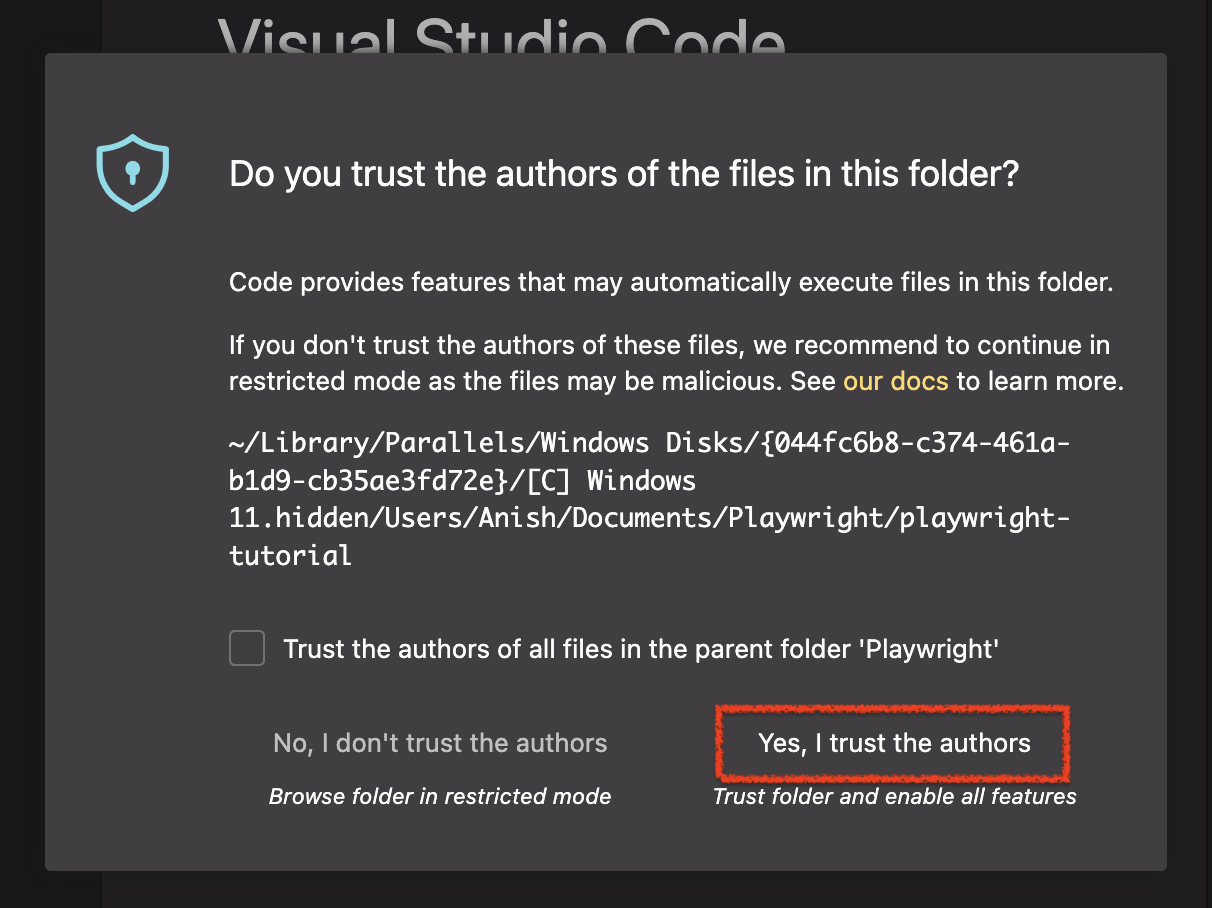
3) If you see – “Do you trust the authors of the files in this folder?” modal, then click on “Yes, I trust the authors” button
4) Playwright Tutorial project will now get displayed in Visual Studio Code.
5) Click on tests folder. You will notice that there is already an example.spec.ts file present in the folder. Click on the file to open it. You will see that there are 2 tests already added to this file – test ‘has title’ and test ‘get started link’.

This file and the two tests are added as part of the playwright installation to –
- Show basic Playwright syntax
- Demonstrate test structure
- Provide a working test out of the box
We will leave this example spec file as it is and create a new test for our learning purpose.
Write your first Playwright test script
In this section, you will write your first automation test script with Playwright. Instead of using a trivial example, we will automate a realistic user flow to demonstrate how Playwright handles navigation, form input and assertions. The test scenario that we will cover in this section is as follows –
- Open “Google Flights” website
- Search for flights between New York and London
- Enter Departure Date as tomorrow’s date
- Enter Return Date as 5 days after Departure Date
- Wait till the search results are displayed
Follow the steps given below to write the test script –
Step 1:
In VS Code, right-click on the tests folder and select New File.
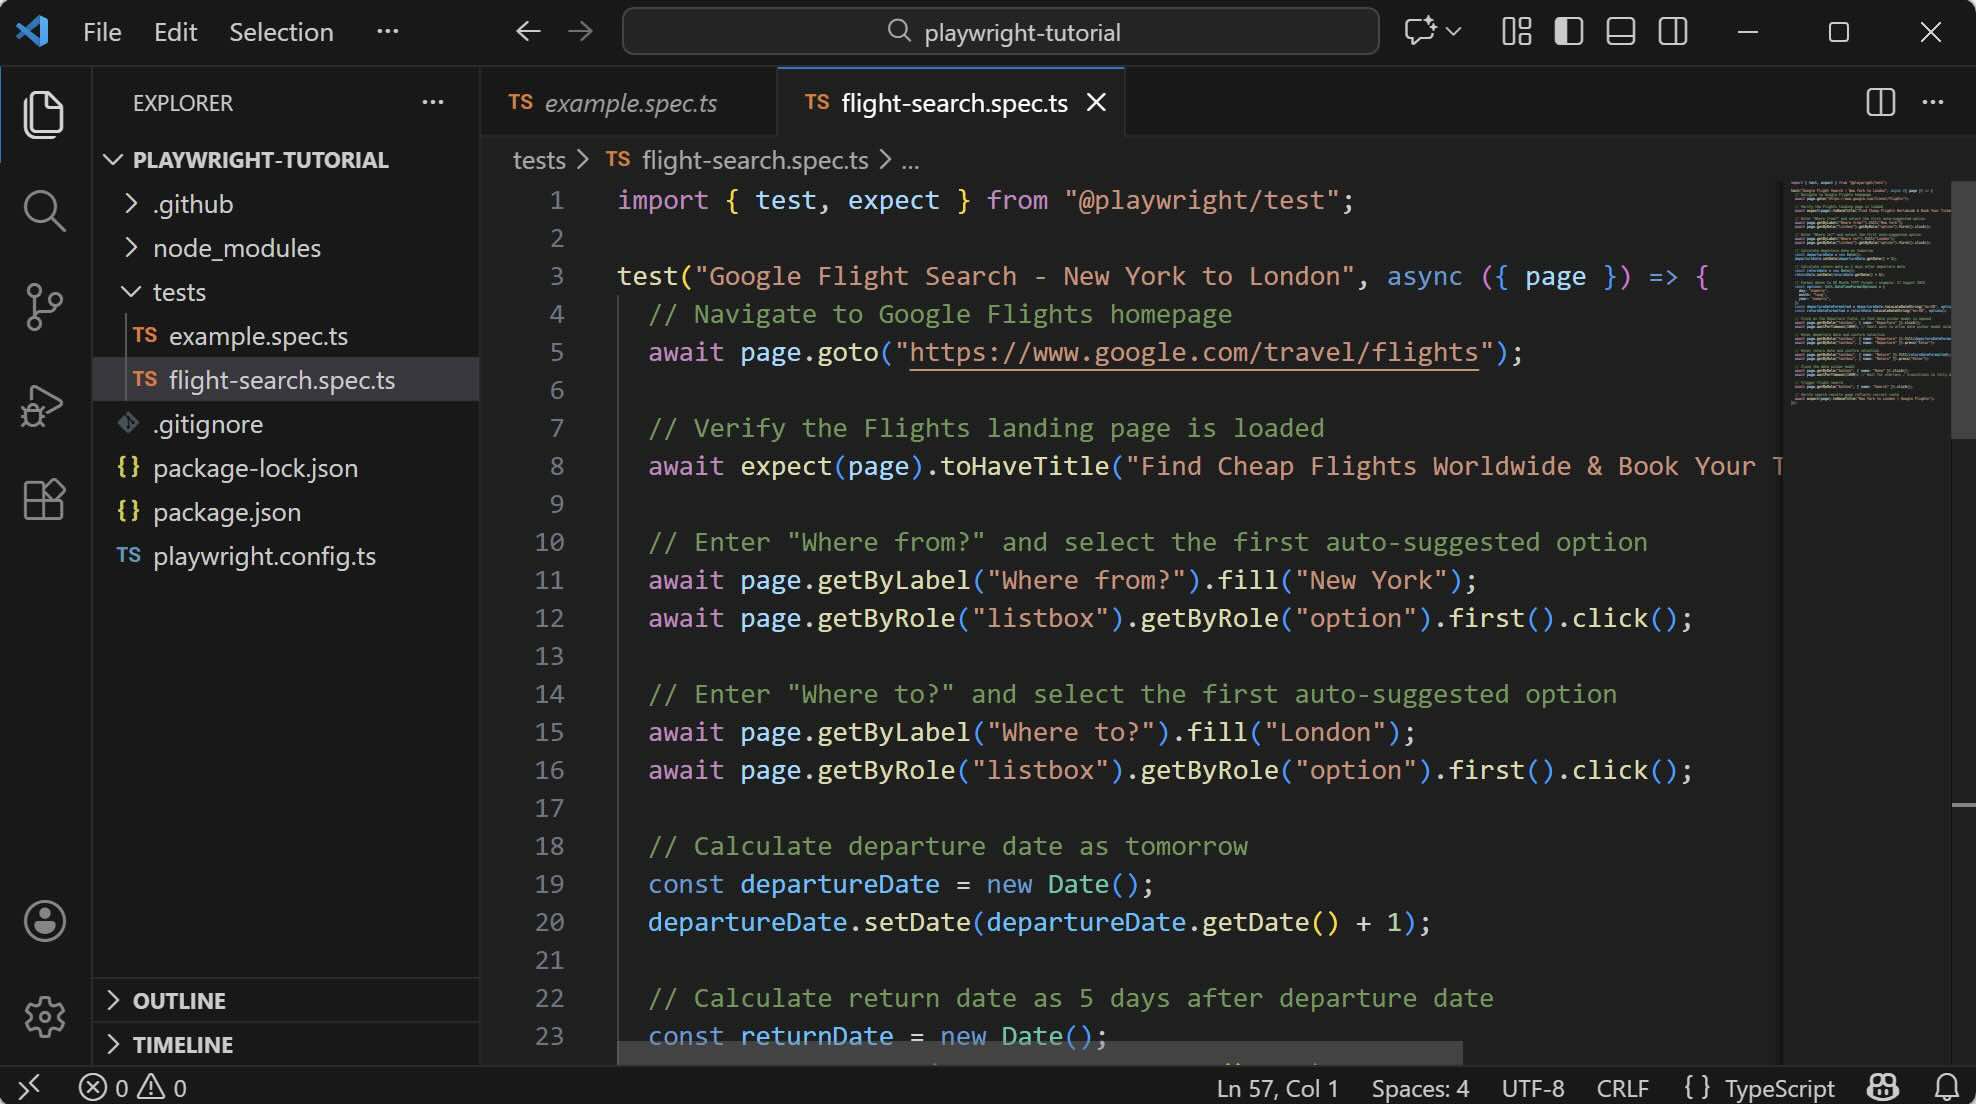
Name the file flight-search.spec.ts and press Enter.
Step 2:
For now, copy and paste the following Playwright test code into this file.
Most of the code is self-explanatory, but we’ll walk through some key parts of it later in this article.
import { test, expect } from "@playwright/test";

test("Google Flight Search - New York to London", async ({ page }) => {
  // Navigate to Google Flights homepage
  await page.goto("https://www.google.com/travel/flights");

  // Verify the Flights landing page is loaded
  await expect(page).toHaveTitle("Find Cheap Flights Worldwide & Book Your Ticket - Google Flights");

  // Enter "Where from?" and select the first auto-suggested option
  await page.getByLabel("Where from?").fill("New York");
  await page.getByRole("listbox").getByRole("option").first().click();

  // Enter "Where to?" and select the first auto-suggested option
  await page.getByLabel("Where to?").fill("London");
  await page.getByRole("listbox").getByRole("option").first().click();

  // Calculate departure date as tomorrow
  const departureDate = new Date();
  departureDate.setDate(departureDate.getDate() + 1);

  // Calculate return date as 5 days after departure date
  const returnDate = new Date();
  returnDate.setDate(returnDate.getDate() + 6);

  // Format dates to DD Month YYYY format - example: 17 August 2025
  const options: Intl.DateTimeFormatOptions = {
    day: "numeric",
    month: "long",
    year: "numeric",
  };
  const departureDateFormatted = departureDate.toLocaleDateString("en-GB", options);
  const returnDateFormatted = returnDate.toLocaleDateString("en-GB", options);

  // Click on the Departure field, so that date picker modal is opened
  await page.getByRole("textbox", { name: "Departure" }).click();
  await page.waitForTimeout(1000); // Small wait to allow date picker modal animation to complete

  // Enter departure date and confirm selection
  await page.getByRole("textbox", { name: "Departure" }).fill(departureDateFormatted);
  await page.getByRole("textbox", { name: "Departure" }).press("Enter");

  // Enter return date and confirm selection
  await page.getByRole("textbox", { name: "Return" }).fill(returnDateFormatted);
  await page.getByRole("textbox", { name: "Return" }).press("Enter");

  // Close the date picker modal
  await page.getByRole("button", { name: "Done" }).click();
  await page.waitForTimeout(1000); // Wait for overlays / transitions to fully disappear

  // Trigger flight search
  await page.getByRole("button", { name: "Search" }).click();

  // Verify search results page reflects correct route
  await expect(page).toHaveTitle("New York to London | Google Flights");
});
The code in flight-search.spec.ts file should look like this. Save these changes
Running Playwright Tests Locally (from terminal or cmd)
Let us now run this test script on Chrome browser (which was installed during Playwright installation process in the previous section). To run this test –
1) Go to command prompt or terminal
2) Type the below command and hit Enter
npx playwright test flight-search.spec.ts --project "Chromium" --headed
3) Since we have specified Chromium browser with headed option, you will notice that once the execution starts, Chromium browser will get opened, the test script would get executed and once the execution is finished, the browser will automatically close as well.
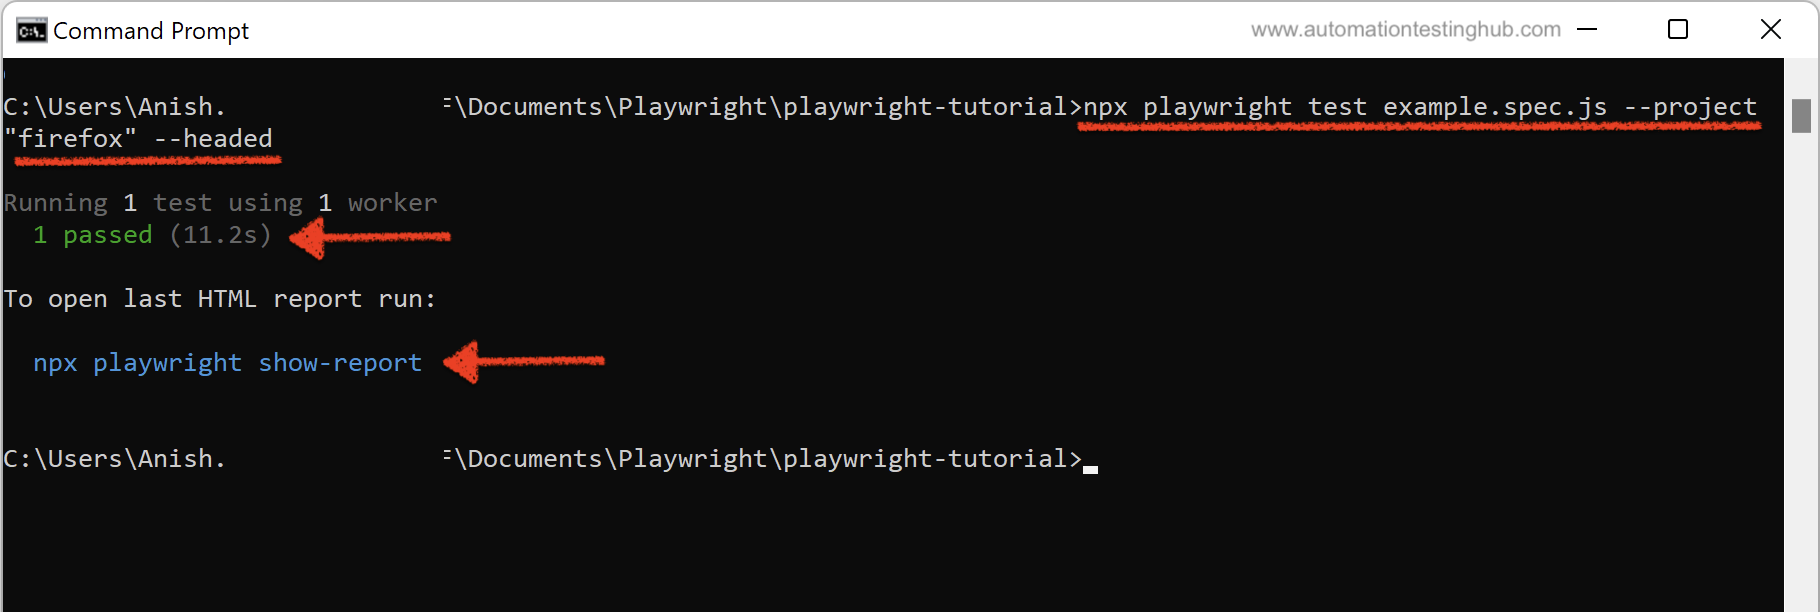
4) Command prompt / terminal will display the success result as shown in the below image
Viewing Playwright Test Reports
Playwright generates rich HTML reports by default, making it easy to debug failures and review execution steps. From the previous screenshot, you would have noticed that execution results are available in the form of HTML report as well. To view the HTML report, type the below command in cmd/terminal and hit ENTER
npx playwright show-report
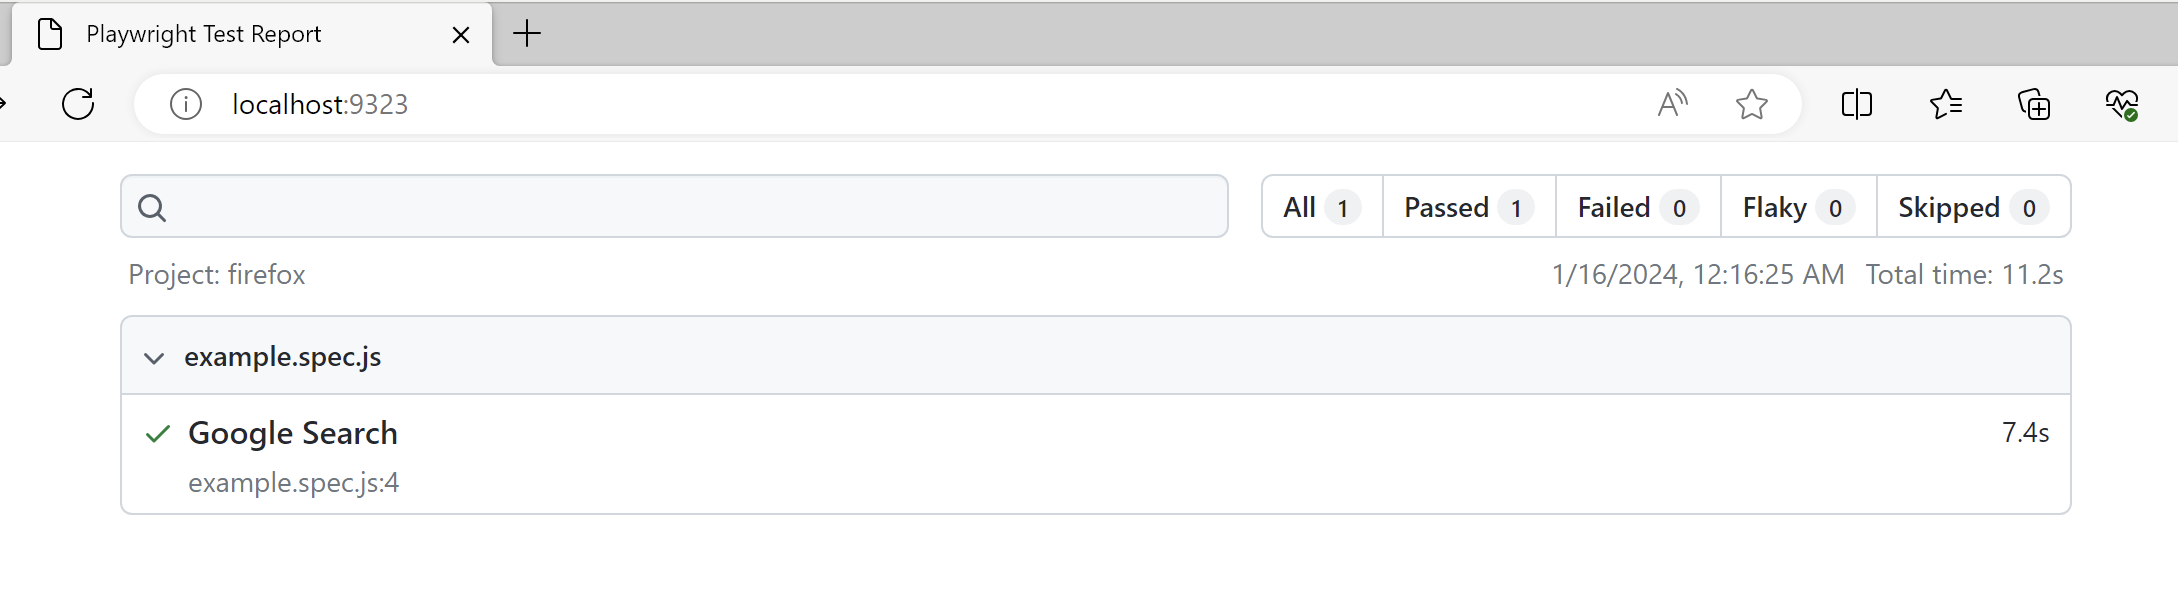
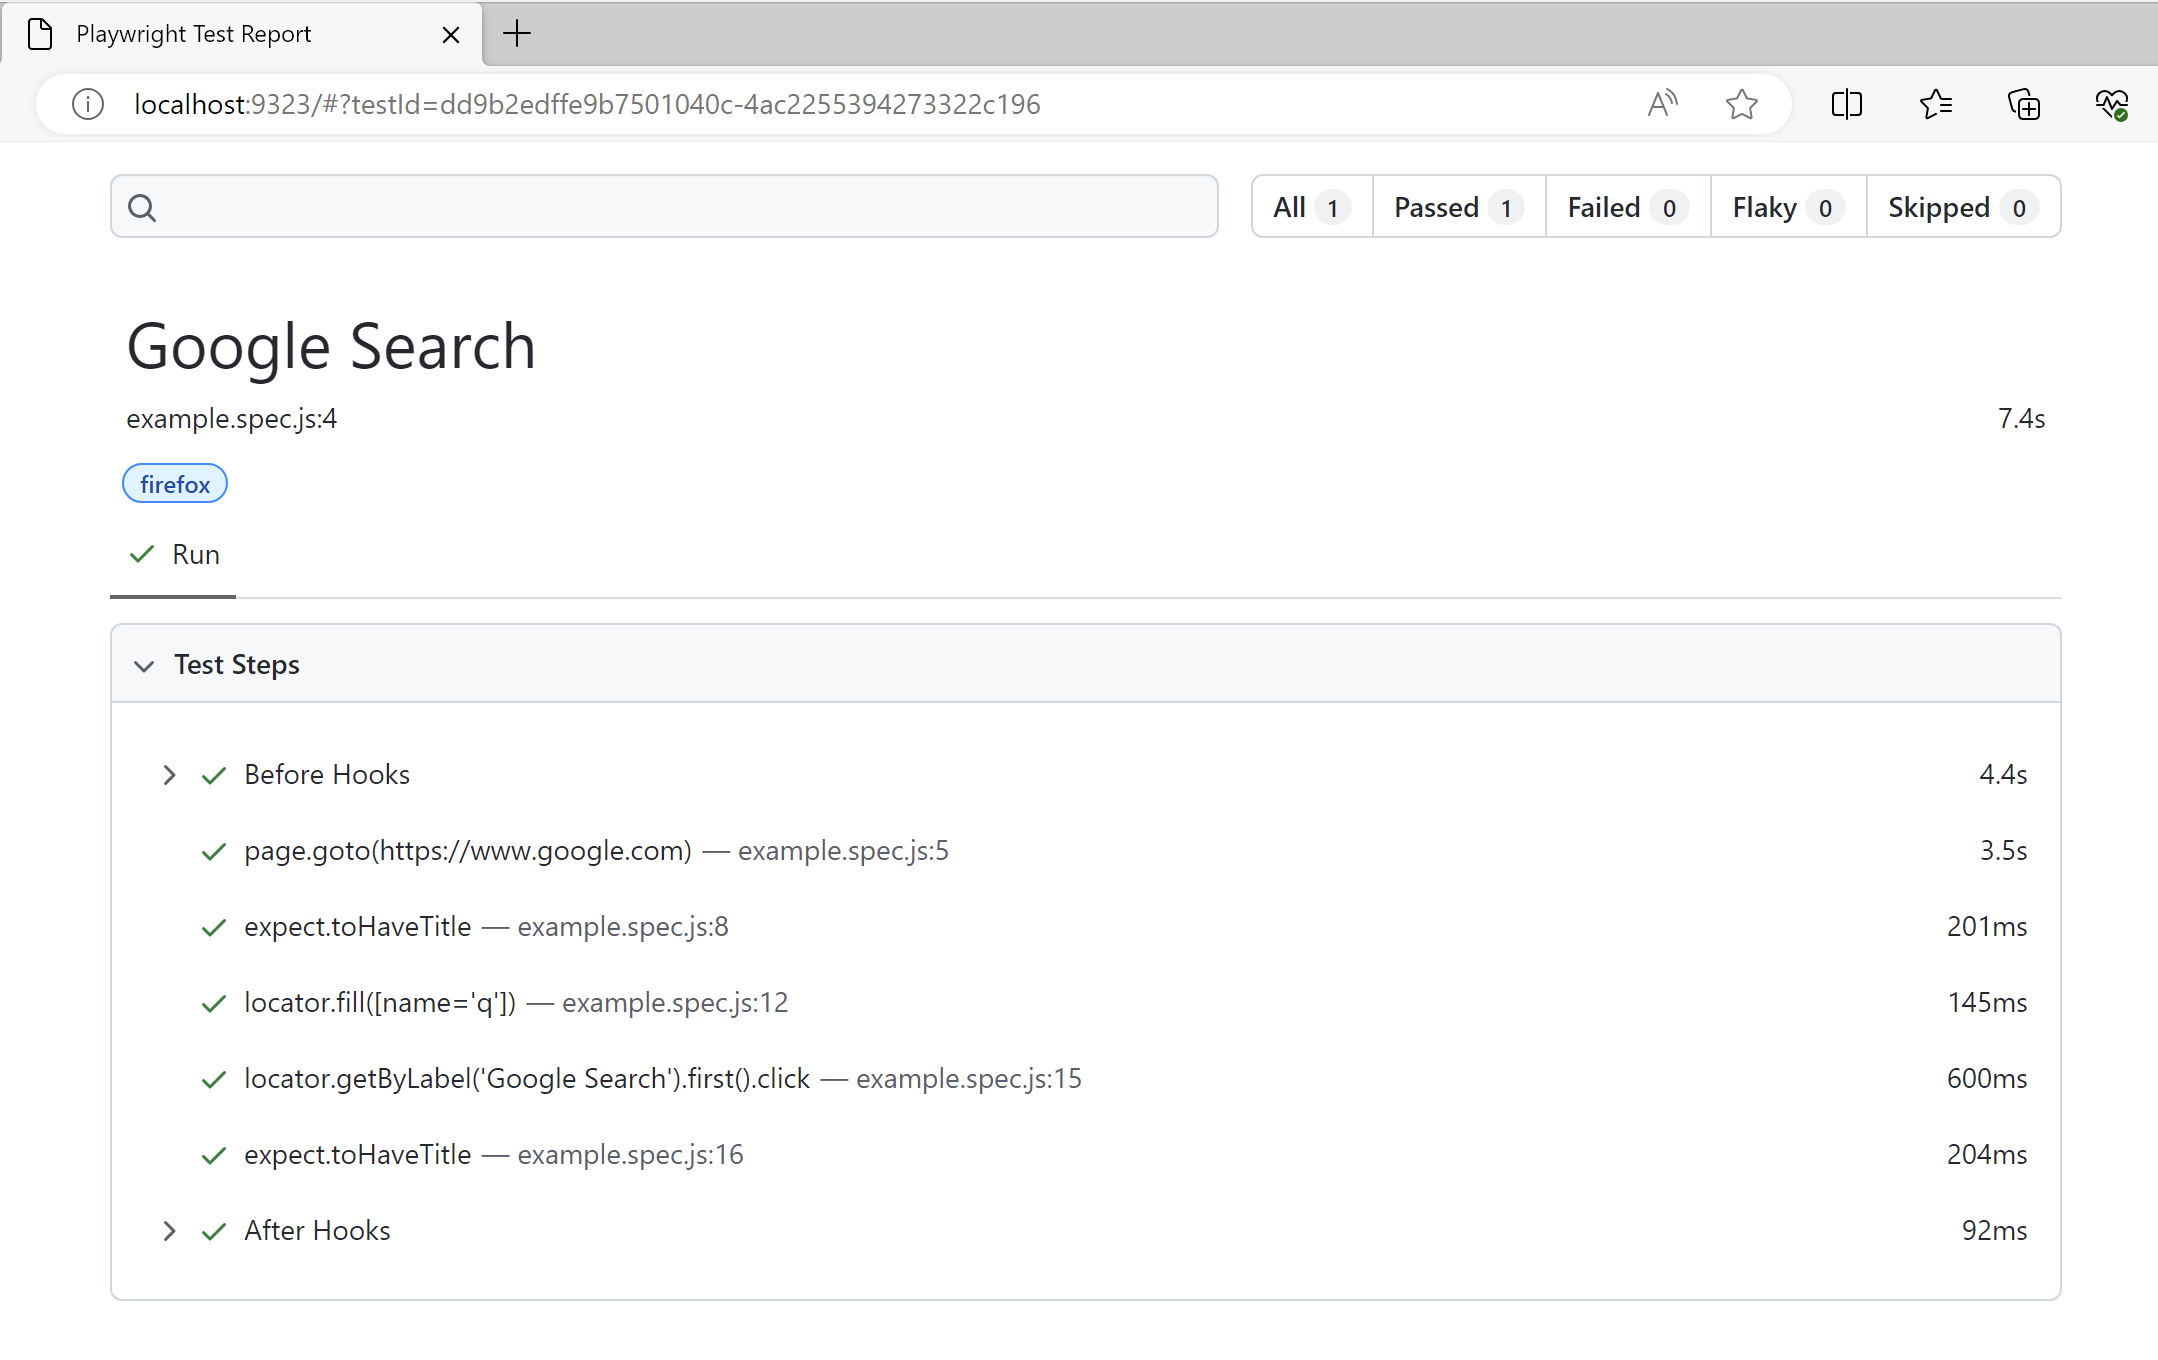
You can click on the test case (Google Flight Search – New York to London in this example), to view the detailed test steps as well
At this point, you have a working Playwright setup and a complete end-to-end test that runs in a real browser. This forms a solid foundation for exploring Playwright in more depth.
Before moving on to advanced topics, it is helpful to understand how Playwright compares with other popular automation frameworks and why many teams are choosing it for modern web testing.
Playwright vs Selenium vs Cypress (Quick Comparison)
When choosing an automation framework, we often compare Playwright with Selenium and Cypress – two other widely used tools in web automation testing. Each framework has its own strengths, and therefore, the right choice depends on factors such as browser support, reliability, execution speed, and ease of maintenance.
The table below provides a high-level comparison of Playwright, Selenium, and Cypress across some commonly considered areas
| Feature | Playwright | Selenium | Cypress |
|---|---|---|---|
| Cross-browser support | Yes | Yes | No |
| Auto-waiting | Yes | No | Yes |
| Parallel execution | Yes | Limited | Limited |
| Multi-language support | Yes | Yes | No |
Which Framework Should You Choose?
Playwright is a strong choice for teams building modern, JavaScript-heavy applications that require reliable cross-browser testing and fast feedback. Selenium remains relevant for legacy systems or highly customized setups, while Cypress works well for simpler, single-browser workflows. For most new automation projects, Playwright offers a balanced combination of speed, reliability, and built-in tooling.
Common Beginner Mistakes in Playwright
When starting out with Playwright, it’s easy to fall into a few common traps. Being aware of these early can help you write more stable and maintainable tests.
- Using hard waits instead of relying on auto-waiting
Playwright automatically waits for elements to be ready. Adding manual waits often makes tests slower and more fragile.- Note: In this tutorial, we have used couple of short hard waits intentionally to keep the first example simple and easy to follow. In real-world test suites, relying on Playwright’s built-in auto-waiting and proper assertions is the recommended approach
- Not using role-based or semantic locators
Using Playwright’s built-in locators likegetByRole()results in more reliable tests compared to brittle selectors. - Overloading a single test with too many assertions
Keeping tests focused and readable makes failures easier to understand and debug.
What You’ll Learn Next in This Playwright Tutorial Series
This article is the first part of a complete Playwright automation testing tutorial series. Now that you have Playwright installed and have written your first test, we will build on this foundation step by step.
As a next step, it’s important to learn how to structure Playwright tests properly as they grow. In the second article of this series, we look at how to group tests in Playwright using test.describe, and refactor a single long test into multiple focused and maintainable tests.
In the upcoming articles, we will cover:
- Playwright locators and assertions
- Page Object Model (POM) in Playwright
- Handling test data and authentication states
- Parallel execution and performance optimisation
- Debugging tests and understanding HTML reports
- Running Playwright tests in CI pipelines
Each article in this series will focus on practical examples and best practices that can be applied to real-world automation projects.
Frequently Asked Questions (FAQs)
Is Playwright suitable for large test suites?
Yes. Playwright is designed to scale and supports parallel execution, shared configuration, and modular test structures, making it suitable for large and growing test suites.
Can Playwright replace Selenium?
In many cases, yes. Playwright provides built-in features such as auto-waiting, native cross-browser support, and modern tooling that reduce the need for additional libraries often required with Selenium.
Is Playwright reliable for CI pipelines?
Yes. Playwright integrates well with modern CI environments and generates detailed HTML reports, traces, screenshots, and videos, making it easier to debug test failures in CI pipelines.
Which language is best for Playwright?
JavaScript and TypeScript are the most commonly used and receive the earliest feature support. However, Playwright also works well with Python, Java, and .NET depending on your team’s technology stack.
This tutorial is written based on hands-on experience building and maintaining automation test frameworks across multiple web applications.
Final Takeaways
- Playwright provides fast, reliable browser automation with minimal flakiness
- Setup is simple and production-ready out of the box
- Built-in tooling reduces dependency on third-party libraries
- Playwright scales well for long-term automation and CI-driven workflows